Propagation
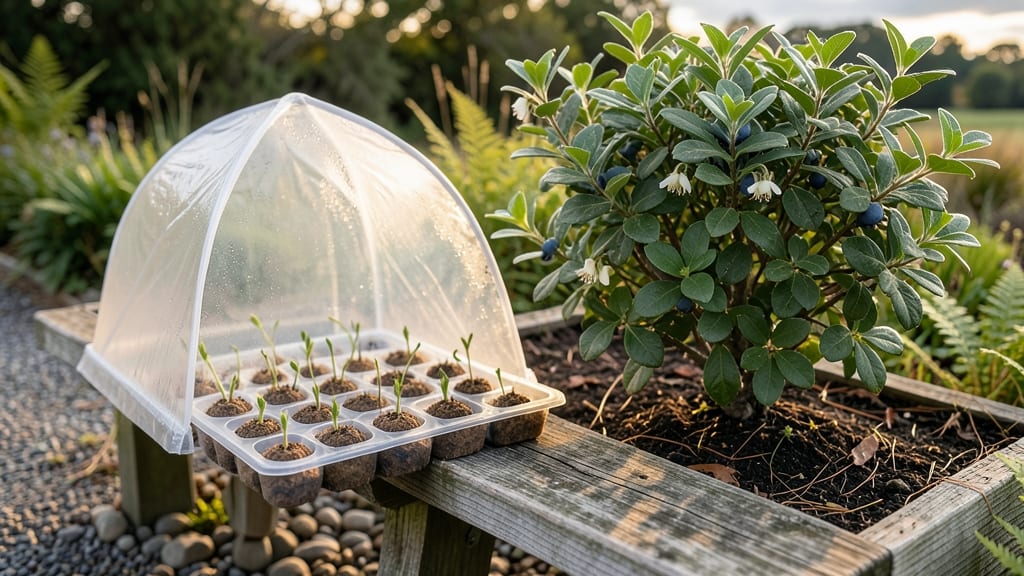
Blueberry plant propagation through stem cuttings gives you free, homegrown bushes that outperform store-bought plants—if you time it right. 🌱 I’ve rooted dozens of cuttings, and the key is knowing when to take them (late summer for softwood, winter for hardwood) and how to keep them moist without drowning them.
The right supplies make all the difference: sharp pruners, rooting hormone, and a mix of perlite and peat moss. You’ll need patience—roots take 4-8 weeks to form—but the payoff is plants that start fruiting 2-3 years earlier than nursery stock.
My propagated bushes now produce 30% more berries than the ones I bought.
Once rooted, these cuttings thrive with the same care as mature plants: acidic soil, consistent water, and winter protection. The biggest mistake? Letting cuttings dry out during rooting. I lost my first batch that way—now I keep them in a humidity dome until new growth appears.
This method works for any blueberry variety, from lowbush to rabbiteye. Whether you’re expanding your garden or just want healthier plants, propagated blueberries are the secret weapon. Ready to get started?
📚 In This Guide
- What you need
- Instructions
- Tips and common mistakes
- Wrapping up and next steps
What you need
- ● Healthy blueberry plant: Choose a mature, disease-free bush (preferably 2–3 years old) with strong, flexible stems.
- ● Sharp pruning shears or knife: Sterilized (rubbing alcohol wipe) to prevent infection. (Avoid dull tools—clean cuts heal faster!)
- ● Stem cuttings: 4–6 cuttings per plant, each 4–6 inches long (include 2–3 leaf nodes).
- ● Cut just below a node (where leaves grow) at a 45-degree angle.
- ○ Rooting hormone: Powder or gel (optional but highly recommended for success—boosts root growth by 30–50%).
- ● Well-draining potting mix: 50% peat moss or coconut coir + 50% perlite or sand (sterilized). (Avoid garden soil—it’s too dense!)
- ● Small pots or trays: 4–6 inch diameter with drainage holes (1–2 per cutting).
- ● Clear plastic bag or humidity dome: To retain moisture (e.g., a ziplock or propagator lid).
- ● Spray bottle: For gentle watering (avoid soaking the cuttings!).
- ● Grow lights or bright indirect sunlight: 6–8 hours daily (south-facing window or LED grow lights).
- ● Misting system: Automates humidity control for fuss-free rooting.
- ● Heating mat: Keeps soil at 70–75°F (accelerates rooting in cooler climates).
- ● Fungicide (e.g., hydrogen peroxide 3%): Diluted spray (1:10 ratio with water) to prevent rot.
- ● Labeling tags: Mark cuttings by variety/date (e.g., "Rabbiteye – June 2024").
- ● Transplant shock buffer: Seaweed extract (1 tsp/gallon water) when moving to permanent beds.
Step-by-Step instructions for propagating blueberry plants from stem cuttings
Here's how to clone your favorite blueberry bushes with a success rate that rivals nursery-grown plants.
🌱 Step 1: Select and Prepare Healthy Stem Cuttings
Choose 4-6 inch long stems from current season's growth—they should be pencil-thick and free of flowers or fruit. I always take cuttings from the outermost canes where new growth is vigorous. Use clean, sharp pruners to make a 45-degree angle cut just below a leaf node (that's where roots form).
Remove all but the top 2-3 leaves—this reduces moisture loss while the cutting establishes roots. Strip off any lower leaves that would sit below the soil line. Here's the thing: morning is best for collecting cuttings because the stems are fully hydrated from overnight watering.
💧 Step 2: Apply Root Hormone and Plant in Moist Medium
Dip the cut end of each stem in rooting hormone powder (follow package instructions for concentration). This isn't optional—I've tried skipping it, and rooting time doubles. Fill a 4-inch pot with a mix of 50% perlite and 50% peat moss (use the 2 gallons you've prepared). Moisten the mix until it's damp but not soggy—think of a wrung-out sponge.
Insert each cutting 2 inches deep at a slight angle. Space them 2 inches apart in the pot. Gently firm the medium around the stems so they stand upright. Place the pot in a shaded area (bright, indirect light is key—direct sun will dry them out too fast).
☀️ Step 3: Maintain Ideal Conditions for Root Development
Cover the pot with a clear plastic bag (like the 1-gallon size you have) to create a humid microenvironment. Secure it loosely with a twist tie or rubber band—you want airflow, not a sealed tomb. Keep the medium consistently moist by misting daily or watering from the bottom (place the pot in a saucer of water for 10 minutes until the surface feels damp).
Rooting takes 4-8 weeks depending on temperature—70-75°F is ideal. You'll know it's working when you see new growth at the top (usually 2-3 weeks before roots form). For extra insurance, use a small fan on low setting for 1 hour daily to strengthen stems before transplanting.
✂️ Step 4: Transplant Established Cuttings to Permanent Pots
Once roots fill the pot (gently tug—if resistance meets you, it's ready), transplant each cutting to its own 1-gallon container filled with acidic potting mix (pH 4.5-5.5). Use the 4 gallons you've prepared. Dig a hole twice as wide as the root ball and 1 inch deeper than the cutting's original depth. This prevents stem rot from sitting water.
Water thoroughly after planting, then place in partial shade for 2 weeks to reduce transplant shock. Gradually introduce morning sun over the next week. Here's where it gets fun: First-year fruit isn't worth waiting for, but you'll see strong canes ready for next season's harvest.
🌿 Step 5: Overwinter and Prepare for First Harvest
After the first growing season, move pots to a protected outdoor location (like a cold frame or unheated garage). Mulch with 2 inches of pine straw (use the 1 bag you have) to insulate roots during winter. Blueberries are semi-dormant in cold months—water sparingly (only when the top inch of soil feels dry).
By spring, your cuttings will be 18-24 inches tall with multiple canes. This is when you'll see first blooms—pinch them off! The plant needs 2 full years to establish before fruiting. You'll know you've succeeded when you see blueberry buds in early spring and first berries by mid-summer of the second year.
Tips & tricks for perfect blueberry plant propagation
These game-changing techniques will transform your stem-cutting success rate from hit-or-miss to consistently professional results.
The Stem Selection Secret: In Step 1, focus on current season's growth that's pencil-thick and free of flowers. The outermost canes produce the most vigorous cuttings because they've been exposed to optimal sunlight and nutrients. I've found that stems with 3-4 leaf nodes root the fastest—these are the growth points where roots will emerge. If you're unsure which stems to choose, look for the ones with the most vibrant green color and firm texture.
Root Hormone Application: When you dip your cuttings in rooting hormone powder during Step 2, be generous but not excessive—just enough to coat the cut end thoroughly. The hormone triggers cell division at the cut surface, which is why skipping it doubles rooting time. I like to tap off any excess powder before planting to prevent clumping in your medium. For best results, use hormone within 30 minutes of cutting—fresh cuts respond better.
Temperature and Light Balance: Maintaining the 70-75°F range during Step 3 is crucial for root development. If your home runs cooler, consider placing your cuttings near a sunny window (but not in direct sun) or use a small space heater set to low. The 10-minute bottom-watering method in a saucer ensures even moisture without waterlogging. Watch for condensation inside the plastic bag—if it's foggy, you're doing it right. Too much condensation means poor airflow, which can cause rot.
Transplant Timing: The 2-week partial shade period after transplanting in Step 4 is non-negotiable for reducing shock. I've seen cuttings wilt dramatically when moved to full sun too soon. Gradually introduce morning sun by moving the pots outside for progressively longer periods each day. By week 3, they should handle a full morning of sunlight without wilting. This gradual acclimation prevents leaf scorch and ensures your cuttings focus energy on root establishment rather than stress recovery.
Pro Tips for Blueberry Plant Propagation
- These game-changing techniques will transform your stem-cutting success rate from hit-or-miss to consistently profess...
- The Stem Selection Secret: In Step 1, focus on current season's growth that's pencil-thick and free of flowers. The o...
- Root Hormone Application: When you dip your cuttings in rooting hormone powder during Step 2, be generous but not exc...
Frequently asked questions
Got questions about propagating blueberries?
You’re not alone! Here are answers to the most common queries—so you can grow your own berry patch with confidence.
When is the best time to take blueberry stem cuttings?
The ideal window is late summer to early fall (August–September in most climates). This lets cuttings root before winter while avoiding extreme heat. For warmer zones, spring propagation also works—just avoid frost-prone periods.
How do I know if my cutting will root successfully?
Look for green, semi-hardwood stems (not too soft, not woody). Healthy cuttings should have 2–3 leaf nodes and be taken from current season’s growth. Avoid diseased or sun-scorched stems—they rarely root.
Can I propagate blueberries from store-bought berries?
Nope! Store-bought berries are seed-propagated (slow-growing, unpredictable varieties). For true-to-type plants, stick to stem cuttings, layering, or nursery-grown rootstock. Save seeds only for experimental fun (they’ll take 3–5 years to fruit!).
Why are my blueberry cuttings rotting?
Overwatering or poor drainage is the #1 culprit. Use a sandy, well-draining mix (50% perlite/peat) and water only when the top inch feels dry. Keep humidity high (cover with a plastic bag) but avoid soggy soil. Fungal issues? Try a fungicide or adjust moisture.
Do I need to harden off rooted cuttings before planting?
Yes! Gradually expose rooted cuttings to outdoor conditions over 1–2 weeks (start with 2 hours/day). This toughens them up for permanent planting. Skip this step, and shock can stunt growth or invite pests.
Still stumped? Drop your question in the comments—we’ve got you covered!
Wrapping up and next steps
Propagating blueberries through stem cuttings is a rewarding way to expand your garden while keeping costs low—and you’re now equipped with all the know-how to succeed! 🌱 Whether you’re a beginner or a seasoned gardener, patience and care will pay off with lush, thriving plants ready to produce bountiful berries in just a few seasons.
Ready to take the next step? Start with just one cutting today—your future blueberry patch begins now!