Pruning
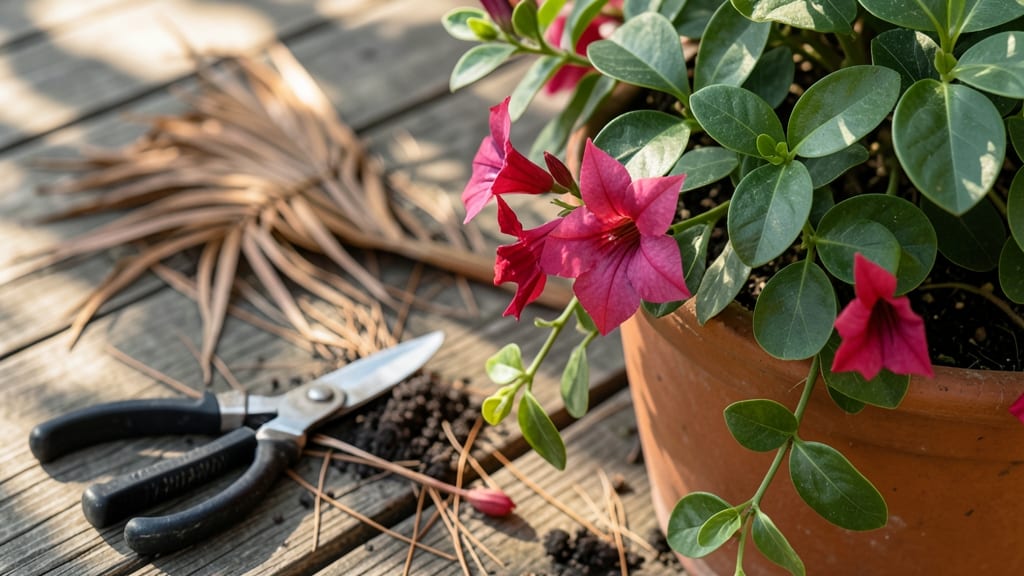
Pruning dipladenia plants isn't just about keeping them tidy—it’s the secret to year-round blooms that turn heads at your front door. 🌿 I’ve pruned mine for five summers now, and the difference between a well-shaped plant and one left to sprawl is like night and day: one’s a lush, flowering masterpiece, the other a tangled mess.
The key isn’t complicated—just timing, sharp cuts, and a little patience.
You’ll only need three tools: clean pruning shears, rubbing alcohol (to sterilize between cuts), and a pair of gloves (those thorns don’t play fair).
The real magic happens in three clean cuts: first in late winter to shape, again after blooms fade to encourage new growth, and a light trim in summer to keep it compact. Most people over-prune or cut at the wrong time—both mistakes lead to leggy stems and fewer flowers.
After pruning, your dipladenia will bounce back faster than you think. Within 2-3 weeks, you’ll see fresh, vibrant growth shooting from the base, and by midsummer, those trumpet-shaped blooms will return in full force.
The plant rewards precision: too aggressive, and you’ll stress it; too gentle, and it won’t stay bushy. Balance is everything.
This method works for both container-grown dipladenias and those planted in the ground, though potted plants need slightly more frequent trims. If you’ve ever struggled with a dipladenia that just wouldn’t bloom, this is the reset it’s been begging for. Let’s get those shears sharp and those stems trimmed!
📚 In This Guide
- What you need
- Instructions
- Tips and common mistakes
- Wrapping up and next steps
What you need
- ● Pruning shears: Sharp, bypass-style shears (2-4 inch blades) for clean cuts—sterilize with rubbing alcohol before and after use!
- ● Hand pruners: For thicker stems (¼ inch or larger), opt for bypass pruners with ergonomic grips to avoid hand fatigue.
- ● Gloves: A pair of gardening gloves (nitrile-coated for grip) to protect against thorns and sap.
- ● Disinfectant: 70% isopropyl alcohol or a horticultural spray to prevent disease spread.
- ● Sharpie or marker: Permanent marker for labeling cuttings (if propagating).
- ● Horticultural oil: For deep-cleaning tools between pruning sessions.
- ● Rooting hormone: If you’re propagating cuttings, use a gel or powder to boost success.
- ● Small bucket or tray: To collect trimmings (great for compost!).
- ● Plant food: A balanced liquid fertilizer (10-10-10) to reward your Dipladenia post-prune.
How to prune dipladenia for continuous, vibrant blooms
Three strategic cuts keep your dipladenia flowering nonstop—here’s how I do it.
✂️ Step 1: Trim Dead or Brown Stems After Winter
Start in early spring when new growth begins. Use clean, sharp pruners to snip away any stems that look dry, brittle, or browned from winter dormancy. These dead stems won’t produce blooms and can harbor pests, so removing them early gives your plant a fresh start.
Cut just above a leaf node where new growth can emerge. You’ll know you’re in the right spot when you see a small bump or bud—this is where your dipladenia will sprout fresh stems. Avoid cutting into healthy green stems, even if they look weak.
✂️ Step 2: Prune Back 1/3 of Each Stem After Flowering
Once your dipladenia finishes blooming, it’s time for the most important cut. Look for stems that have produced flowers and select the longest ones. Using your pruners, cut each of these stems back to about one-third of their length, always making the cut just above a leaf node.
This encourages bushier growth and more flower buds to form. You’ll see new side shoots emerging within 2-3 weeks. If your plant looks leggy, this is the perfect time to shape it—cutting back the longest stems first balances the plant’s shape naturally.
✂️ Step 3: Lightly Trim Tips to Encourage Fullness
Throughout the growing season, pinch back the tips of new growth to promote a fuller, bushier dipladenia. Use your fingers or small pruners to snip off the very top of each stem, just above a set of leaves. This prevents the plant from growing too tall and leggy while encouraging it to branch out.
Do this every 4-6 weeks during the active growing season. You’ll notice more compact growth and a denser cluster of flowers. Avoid over-trimming—just a light pinch is enough to stimulate new growth without stressing the plant.
⏰ Step 4: Light Maintenance Pruning Year-Round
Keep an eye on your dipladenia throughout the year and remove any spent flowers or damaged leaves as they appear. This not only keeps the plant looking tidy but also redirects energy to producing new blooms. Use clean pruners to make quick, precise cuts just above a leaf node.
In fall, as temperatures drop, reduce pruning to only remove dead or diseased growth. Your dipladenia will naturally slow down, and you don’t want to encourage new growth that won’t have time to harden off before winter. A light touch in the cooler months keeps the plant healthy without overstimulating it.
Tips & tricks for perfect dipladenia pruning
These simple strategies will ensure your dipladenia stays lush and blooming all year—no guesswork required.
Tool Prep: Always sterilize your pruners with rubbing alcohol before each use. I learned this the hard way after noticing my dipladenia's growth slowed down—turns out, old cuts can harbor bacteria that stunts new growth. Wipe them down after each cut too, especially when working with multiple stems.
Step 2 Timing Secret: The 2-3 week window after pruning back one-third of each stem is when your dipladenia decides whether it'll reward you with a second bloom cycle. Keep the soil consistently moist during this period—water deeply but let the top inch dry out between waterings. This balance helps the plant redirect energy to forming new buds rather than struggling with root stress.
Visual Cue for Step 3: When you're pinching back tips every 4-6 weeks, look for stems where the leaves are spaced about 2 inches apart. That's your signal to trim just above the third leaf from the top. This spacing creates the perfect framework for bushier growth—you'll notice within weeks that your plant fills out more densely rather than stretching upward.
Fall Pruning Wisdom: In cooler months, focus on removing only what's clearly dead or diseased. Healthy stems might look a bit sad in fall, but they're storing energy for next spring's growth. I've seen plants that got over-pruned in fall take months to recover—better to err on the side of caution and keep those green stems intact until true dormancy sets in.
Pro Tips for Dipladenia Plant Pruning
- These simple strategies will ensure your dipladenia stays lush and blooming all year—no guesswork required.
- Tool Prep: Always sterilize your pruners with rubbing alcohol before each use. I learned this the hard way after noti...
- Step 2 Timing Secret: The 2-3 week window after pruning back one-third of each stem is when your dipladenia decides w...
Frequently asked questions
Got questions about keeping your dipladenia thriving after pruning? Here are some of the most common concerns—plus expert answers to help you prune like a pro!
When is the best time to prune dipladenia for maximum blooms?
The ideal times are early spring (just before new growth) and right after flowering (late summer/early fall). Avoid heavy pruning in winter—dipladenia is semi-dormant and needs energy to recover. Light trimming to remove dead blooms can happen year-round!
Can I prune dipladenia in winter, or will it harm the plant?
Winter pruning is not recommended—dipladenia is sensitive to cold and needs its energy reserves for survival. If you must trim, wait until late winter (just before last frost) and keep cuts minimal. Focus on removing only dead or damaged stems to avoid stressing the plant.
How do I encourage bushier growth after pruning?
To promote fuller growth, prune just above a leaf node (where leaves meet the stem) at a 45-degree angle. This encourages new branches to sprout. After trimming, give your dipladenia bright, indirect light and consistent watering to support recovery.
My dipladenia leaves are yellowing after pruning—what’s wrong?
Yellow leaves can signal over-pruning or root stress. If only a few leaves yellow, it’s likely normal recovery. If widespread, check for root rot (overwatering) or nutrient deficiency. Adjust watering and fertilize lightly with a balanced plant food to revive it.
Can I propagate dipladenia from pruned cuttings?
Take 4–6 inch cuttings from healthy stems, remove lower leaves, and dip in rooting hormone. Plant in well-draining soil and keep humid (use a plastic bag or propagator). Roots should form in 2–4 weeks—perfect for expanding your dipladenia collection!
Wrapping up and next steps
Mastering the art of dipladenia plant pruning is your golden ticket to a year-round cascade of vibrant blooms! 🌸 With just three clean cuts—spring, summer, and post-flowering—you’ll keep your dipladenia thriving, lush, and full of life.
Remember, sharp tools, patience, and a little love for your plant are all you need to transform it into a stunning, low-maintenance showstopper.
Now that you’re armed with the know-how, go ahead and give your dipladenia the care it deserves! Grab those pruners, follow the steps, and watch your plant reward you with breathtaking flowers. Happy pruning—and happy gardening! 🌿✨