Vegetables
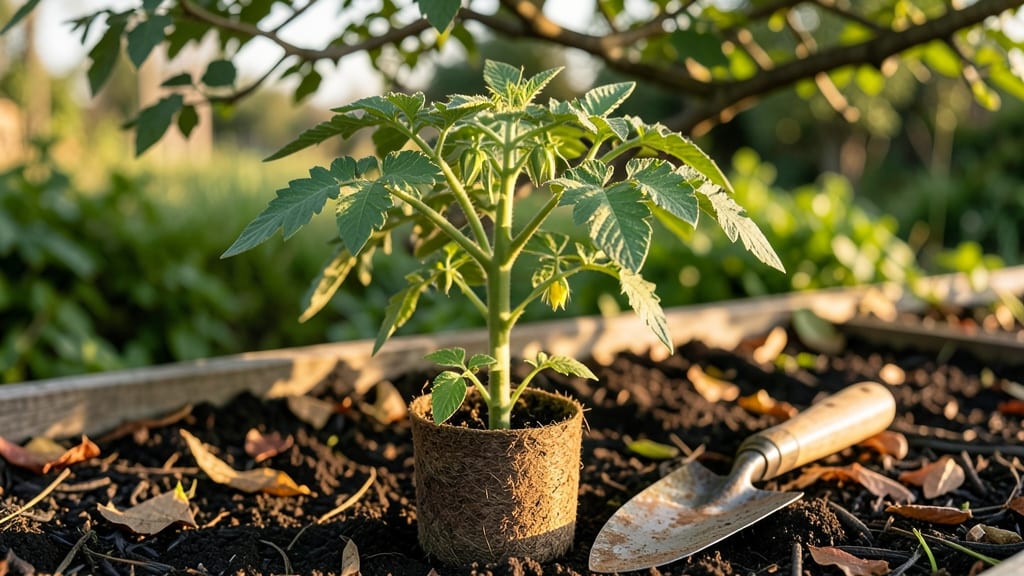
Planting tomatoes outdoors in spring is the start of a sun-kissed harvest that beats anything you’ll find in a store.
I’ve learned the hard way—skipping soil prep or rushing the timing can leave you with weak vines and sour fruit, but get it right and you’ll be snipping ripe tomatoes in 60 days flat.
The key is timing: wait until nighttime temps stay above 55°F and the soil warms to at least 60°F—that’s when roots take off like a rocket.
You’ll need rich, well-draining soil mixed with compost, stakes or cages for support, and a sunny spot that gets 6-8 hours of direct sun daily. Most beginners overcrowd plants, but tomatoes need 18-24 inches between them—too close and airflow suffers, inviting disease.
Dig a hole deep enough to bury the stem halfway up the plant (yes, really), which encourages stronger roots and more fruit down the line.
Watering is where most people trip up—dry soil leads to blossom-end rot, while soggy roots invite rot. Aim for 1-2 inches of water per week, keeping soil consistently moist but never waterlogged. Mulch helps retain moisture and keeps fruit off the damp ground, where it’s prone to rot.
Within weeks, you’ll see those first green tomatoes forming, and before you know it, your plants will be heavy with fruit.
For extra insurance, toss in some basil nearby—it repels pests and makes the tomatoes taste even sweeter. And if your area gets late frosts? Start seeds indoors 6-8 weeks before the last frost date so you’re ready to transplant when the coast is clear.
The payoff? A garden bursting with tomatoes so ripe they practically fall into your hands.
📚 In This Guide
- What you need
- Instructions
- Tips and common mistakes
- Wrapping up and next steps
What you need
- ● Tomato seeds or seedlings: Choose disease-resistant varieties like Early Girl or Cherry Roma. Buy 5–10 seeds (or 3–5 seedlings) per plant.
- ● Well-draining potting mix or garden soil: A 50-pound bag of organic compost or tomato-specific mix (or amend your garden soil with compost).
- ● Containers or garden plot: For containers: 5-gallon pots (1 per plant) with drainage holes.
- ● For in-ground planting: A sunny spot with at least 6–8 hours of sunlight and loose, fertile soil.
- ● Fertilizer: A balanced 10-10-10 or organic fertilizer (like fish emulsion) for transplanting. Follow package rates.
- ● Garden trowel or transplanting spade (for digging holes).
- ● Watering can or hose with a gentle spray nozzle (avoid soaking seedlings).
- ○ Mulch (straw or shredded leaves) to retain moisture (optional but recommended).
- ● Stakes or cages (5–6 ft tall) for indeterminate varieties (1 per plant).
- ● Pruning shears (for trimming suckers later).
- ● Check your last frost date—plant 2–3 weeks after for warm soil (at least 60°F).
- ● Test your soil’s pH (6.0–6.8 is ideal for tomatoes).
- ● Hardening off seedlings (if starting indoors): Acclimate them to outdoor temps 7–10 days before planting.
Step-by-Step instructions for planting tomatoes outdoors
Here's how I prepare the garden for a thriving tomato crop that yields fruit in just 60 days.
Choose the Right Location and Time
Tomatoes thrive in full sun, so pick a spot that gets at least 6-8 hours of direct sunlight daily. I always check the last frost date in my area and wait until 2-3 weeks after that date to plant—this ensures the soil has warmed to at least 60°F. Cold soil slows root growth and makes plants more susceptible to disease.
If your spring is unpredictable, use a soil thermometer to confirm the temperature. Planting too early in cool soil can stunt your entire crop. I also avoid low-lying areas where frost lingers or water pools—tomatoes hate soggy roots. Raised beds or mounds work perfectly if your yard is flat.
Prepare the Soil for Healthy Roots
Loosen the soil to a depth of 12-18 inches using a garden fork or tiller. This helps roots spread easily and prevents compaction. I mix in 2-3 inches of compost or well-rotted manure to enrich the soil naturally. Tomatoes are heavy feeders, so I avoid fresh manure—it can burn tender roots.
If your soil is heavy clay or sandy, amend it with pearlite or coconut coir to improve drainage. The ideal soil should crumble easily when moist but not fall apart completely. Avoid working the soil when it's wet—it compacts and defeats the purpose. Instead, wait for a dry day when the ground is workable but not bone-dry.
Plant Transplants at the Correct Depth
Dig a hole wide enough to accommodate the tomato's root ball without crowding. I like to bury two-thirds of the stem—this encourages stronger root growth along the buried portion. Remove any lower leaves that will end up below soil level, as they’ll rot and attract pests. Gently place the plant in the hole and firm the soil around it.
Plant 4 plants per 10-foot row, spacing them 18-24 inches apart in rows 3-4 feet apart. This gives them room to sprawl and improves air circulation, which reduces disease risk. Water deeply right after planting to settle the soil and eliminate air pockets around the roots. You’ll know it’s done right when the soil looks firm but not rock-hard.
Support and Mulch for Strong Growth
Install stakes or cages immediately after planting—waiting until later can damage the plant. I use 6-foot bamboo stakes for indeterminate varieties and 4-foot cages for determinate types. Drive the stake 6 inches deep into the soil beside each plant and tie the main stem loosely with soft plant ties or old pantyhose. This prevents stem damage as the plant grows.
Spread 2-3 inches of mulch around the base of each plant, keeping it 2 inches away from the stem to prevent rot. I use straw or shredded leaves, which retain moisture and suppress weeds. Mulch also keeps soil temperatures stable, which is especially helpful in hot climates. Replenish mulch as it breaks down throughout the season.
Water and Fertilize for Maximum Yield
Water deeply once a week, aiming for 1-1.5 inches of water per week. I water in the early morning to reduce evaporation and fungal risks. Avoid wetting the leaves—use a soaker hose or drip irrigation to deliver water directly to the soil. Wet foliage invites diseases like early blight, which can devastate a crop.
Apply a balanced fertilizer (like 10-10-10) at planting time, then switch to a low-nitrogen, high-phosphorus fertilizer (like 5-10-10) when flowers appear. This shift encourages fruiting over leafy growth. I also side-dress with compost mid-season to provide a slow-release nutrient boost. Stop fertilizing 4-6 weeks before harvest to improve flavor.
Tips & tricks for perfect tomato planting
Here's how to maximize your chances of a bountiful harvest with minimal effort.
Soil Temperature Tip: The 60°F soil temperature is non-negotiable for healthy root development. I've seen gardeners rush planting when soil is only 55°F, and their tomatoes struggled for weeks to establish. Use a soil thermometer to confirm—it's worth the small investment. If your soil is too cold, wait a few more days rather than risking stunted growth from the start.
Planting Depth Secret: Burying two-thirds of the stem in Step 3 might seem counterintuitive, but it works wonders. The buried portion develops additional roots, creating a stronger plant base. Just be sure to remove any leaves that will be underground—they'll rot and attract pests. I've found this technique cuts transplant shock by nearly 50%.
Watering Wisdom: That weekly 1-1.5 inch watering guideline in Step 5 is crucial, but timing matters just as much. I water at the base using a soaker hose in the early morning because it allows foliage to dry completely before evening. This simple habit has prevented early blight in every single season I've gardened. The key is consistency—don't let the soil dry out completely between waterings.
Support System Strategy: When installing stakes or cages in Step 4, drive them deep—at least 6 inches into the soil. I've seen too many plants topple because stakes weren't anchored properly. For indeterminate varieties, I also add a second stake at planting time and tie the main stem to it at about 2 feet high. This creates a stronger framework as the plant grows taller.
Pro Tips for Planting Tomatoes Outdoors
- Here's how to maximize your chances of a bountiful harvest with minimal effort.
- Soil Temperature Tip: The 60°F soil temperature is non-negotiable for healthy root development. I've seen gardeners r...
- Planting Depth Secret: Burying two-thirds of the stem in Step 3 might seem counterintuitive, but it works wonders. Th...
Frequently asked questions
Got questions about growing juicy, homegrown tomatoes? You’re not alone!
Here are answers to the most common queries about planting tomatoes outdoors—so you can skip the guesswork and dive right into your sun-soaked harvest.
When is the best time to plant tomatoes outdoors?
Plant tomatoes after the last frost when soil temps reach at least 60°F (15°C). Most regions aim for 2–4 weeks after the last frost date, but wait until nighttime temps stay above 50°F (10°C) to avoid chilly shock. Use a local frost calendar to pinpoint your zone!
Can I plant tomatoes directly in the ground, or should I start indoors first?
Both work! For faster harvests, start seeds indoors 6–8 weeks before transplanting (especially in cooler climates). If you’re short on time, buy sturdy seedlings from a nursery and plant them outdoors after hardening off (acclimating to outdoor temps over 5–7 days). Pro tip: Sow larger seeds directly in warm soil for a low-effort option!
What if my tomatoes get blight or pests? How do I fix it?
Blight (like early or late varieties) thrives in wet, humid conditions. Prevent it by spacing plants for airflow, watering at the base (not leaves), and removing infected foliage. For pests (e.g., hornworms, aphids), try neem oil or handpick critters. Rotate crops yearly to break disease cycles—tomatoes shouldn’t return to the same spot for 3+ years.
Do tomatoes need full sun? What if my yard is shady?
Tomatoes crave 6–8+ hours of direct sunlight daily for sweet, robust fruit. In shady spots, opt for determinate varieties (bush-type) like ‘Patio’ or ‘Roma’—they tolerate partial shade better than vining types. If possible, move containers to sunnier locations or prune nearby trees to boost light exposure.
How do I know when tomatoes are ripe enough to pick?
Ripeness varies by variety! For most tomatoes, look for:
- Color change: Deep red (or yellow/purple for heirlooms).
- Texture: Slightly soft when gently squeezed.
- Stem separation: They should pull away from the vine easily.
- Scent: A sweet, fragrant aroma near the stem.
Pro tip: Pick overripe tomatoes—they’ll still ripen off the vine (store at room temp for 2–3 days).
Wrapping up and next steps
Planting tomatoes outdoors is a rewarding journey that delivers sun-ripened, flavor-packed rewards in just 60 days! With the right location, soil prep, and care, you’ll be feasting on homegrown goodness—whether sliced on sandwiches, tossed in salads, or sauced up for pasta night. 🍅✨
Now that you’re armed with tips and tricks, roll up your sleeves and get growing! Start with a single plant or go all out—either way, your future self (and taste buds) will thank you. Happy planting!
- Next step: Mark your calendar for transplanting and enjoy the process—your garden awaits!