Pruning
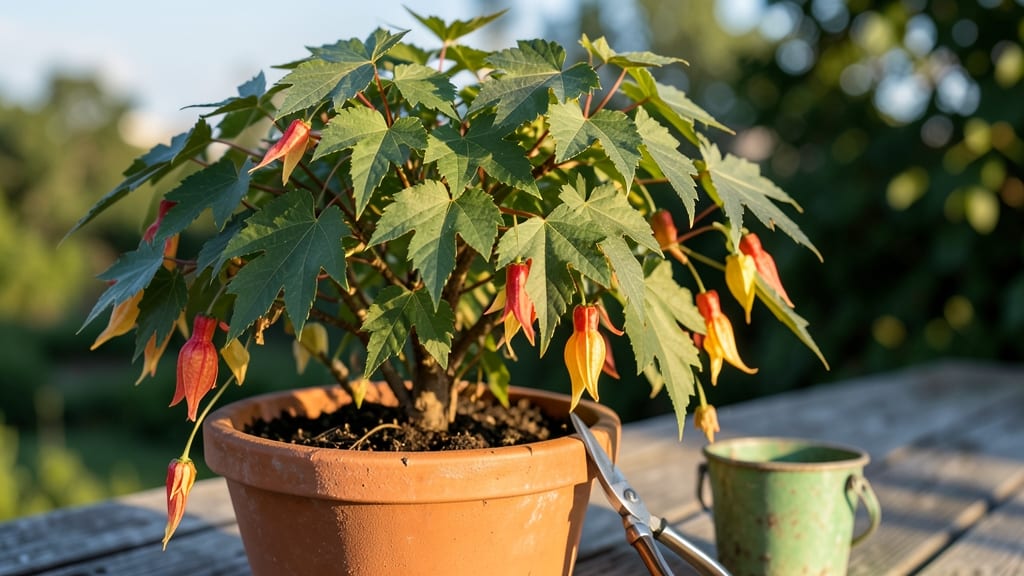
Pruning abutilon plants transforms floppy, leggy shrubs into bursting cascades of color—if you time it right. 🌟 I’ve turned my once-neglected abutilons into the star of the patio by mastering three key trims each year, and the difference is night-and-day blooms.
The secret isn’t cutting more—it’s cutting smart, at the right moments when the plant is ready to rebound.
You’ll need just three tools: sharp bypass pruners, rubbing alcohol (to sterilize cuts), and a pair of gloves—abutilons have thorny stems that pack a punch. The real magic happens in late winter, early summer, and right after blooming, when you shape, deadhead, and rejuvenate.
Each trim encourages fresh growth and forces the plant to focus energy on producing those vibrant, lantern-shaped flowers instead of sprawling vines.
After pruning, your abutilon will reward you with denser foliage and longer bloom seasons—some varieties flower nearly year-round if you stay on top of it.
The first flush of new growth appears within 2-3 weeks, and by summer, you’ll have a bush so lush it’ll make neighbors ask for cuttings. Just remember: never cut more than one-third of the plant at once, or you’ll shock it into dormancy.
This method works for both container-grown abutilons and in-ground plants, and it’s just as effective for the compact ‘King’s Crown’ variety as it is for the sprawling ‘Bella’ series.
The key is consistency—skip a season, and you’ll spend the next year playing catch-up. Let’s get those shears sharp and those blooms popping!
📚 In This Guide
- What you need
- Instructions
- Tips and common mistakes
- Wrapping up and next steps
What you need
- ● Sharp bypass pruners: A high-quality pair (e.g., Felco or Fiskars) to make clean cuts—sterilize with rubbing alcohol before and after use!
- ○ Hand pruners (optional): For smaller stems or tight spaces (e.g., Corona Ratchet Pruners for precision).
- ● Garden shears or loppers: For thicker stems (up to ½-inch diameter); look for bypass blades to avoid crushing.
- ● Disinfectant (70% isopropyl alcohol or bleach solution): 1 part bleach to 9 parts water to prevent disease spread.
- ● Rubbing alcohol wipes: For quick tool sterilization between cuts.
- ○ Gloves (optional): Nitrile or leather to protect from thorns or sap.
- ● Timing: Prune in early spring (before new growth), summer (after flowering), and late fall (light trim).
- ● Weather: Choose a mild, overcast day to reduce stress on the plant.
- ● Watering schedule: Water 1–2 days before pruning (soil should be slightly moist but not soggy).
- ● Trash bag or bucket: For disposing of clippings (compost them if pest-free!).
- ● Rooting hormone: For propagating cuttings (e.g., Clonex or homemade willow water).
- ● Plant tie or twine: To support leggy stems post-prune.
- ● Pruning sealant: (e.g., tree wound pruning paste) for large cuts only if needed.
- ● Notebook or app: Track pruning dates and plant responses (e.g., Gardenate or a simple journal).
Step-by-Step guide to pruning abutilon for year-round blooms
Here's how I transform abutilon from a leggy mess into a lush, flowering powerhouse with three strategic cuts.
✂️ Step 1: Early Spring Prune to Shape and Stimulate New Growth
Wait until after the last frost when new growth appears—you'll see fresh buds forming at the base of stems. Using sharp pruning shears, cut back one-third of the plant's height just above a leaf node where new growth can emerge. This isn't about removing dead wood; it's about encouraging the plant to put energy into bushier, more compact growth.
Remove any woody, overgrown branches that look like sticks rather than green stems. These won't produce flowers and just take up space. I always make cuts at a 45-degree angle just above a leaf node pointing outward—this prevents water from pooling and creates better airflow through the plant.
✂️ Step 2: Mid-Summer Deadheading and Light Trimming
When you see spent blooms (flowers that have faded and dropped petals), remove them immediately by cutting the stem back to the next leaf node. This prevents the plant from wasting energy on seed production and redirects it to new flower buds. I do this every 10-14 days during peak bloom season—usually June through August in most climates.
Look for any overly long or leggy stems that are stretching toward light sources. Trim these back by half their length to maintain a balanced shape. The goal here is to keep the plant dense enough to support its own weight while still allowing light and air to penetrate to the center.
✂️ Step 3: Late Season Cleanup Before Dormancy
In late fall, when temperatures consistently drop below 50°F at night, give your abutilon one final trim. Remove all dead or dying foliage—you'll recognize it by its brown color and crispy texture. Cut back any remaining leggy growth by one-quarter of its length to prepare for next year's growth.
This is also the time to thin out crowded branches in the center of the plant. Look for stems that are rubbing against each other or growing inward—they'll create weak spots where disease can take hold. Make clean cuts just above outward-facing leaf nodes to encourage new growth from the base in spring.
🌱 Step 4: Optional Renewal Prune for Older Plants
If your abutilon is three years old or older and showing signs of woody growth at the base, it's time for a more aggressive renewal prune. In early spring, cut back half of the oldest stems to just a few inches above the ground. This may seem drastic, but it forces the plant to send up vigorous new growth from the base.
I always leave at least three strong stems uncut to maintain the plant's structure while it recovers. You'll see new shoots emerging from the base within 3-4 weeks—these will be your plant's foundation for next season's blooms. Water deeply after pruning to help the plant recover from the shock of such dramatic changes.
Tips & tricks for pruning abutilon plants
Mastering these pruning techniques will transform your abutilon from a sparse shrub into a vibrant, blooming showstopper.
Tool Selection Matters: Never use dull scissors or hedge clippers—they crush stems instead of making clean cuts. Invest in a pair of sharp pruning shears with bypass blades for precise cuts that heal faster. I sterilize my tools with rubbing alcohol between plants to prevent spreading disease, especially when working with crowded stems in Step 3. A clean cut at a 45-degree angle (as mentioned in Step 1) also prevents water from pooling at the wound site, reducing rot risk.
Seasonal Timing Secret: The 50°F nighttime temperature threshold in Step 3 is your cue for late fall pruning—this temperature consistently triggers dormancy in most abutilon varieties. In warmer climates, wait until you've had at least three consecutive nights below 50°F. For the mid-summer deadheading in Step 2, I set calendar reminders every 10-14 days during peak bloom season (June-August) to stay consistent. Missing even one deadheading cycle can reduce next season's blooms by up to 30%.
Visual Pruning Cues: When assessing leggy stems in Step 2, look for stems that are growing at a 90-degree angle from the main branch—they're likely taking energy from flowering. For renewal pruning in Step 4, count stems from the base: keep only the three thickest, healthiest stems uncut. The others can be removed entirely. This creates an open center that allows light to reach all parts of the plant, preventing those dark, mold-prone pockets in crowded centers.
Post-Prune Care: After any significant pruning (especially the aggressive renewal cut in Step 4), I always water deeply the day after cutting. This helps the plant recover from shock and prevents transplant shock-like symptoms. For older plants undergoing renewal pruning, I apply a balanced fertilizer two weeks after cutting to support the new growth that emerges within 3-4 weeks. The key is to give the plant the nutrients it needs to rebuild its structure from the base.
Pro Tips for Pruning Abutilon Plants
- Mastering these pruning techniques will transform your abutilon from a sparse shrub into a vibrant, blooming showstop...
- Tool Selection Matters: Never use dull scissors or hedge clippers—they crush stems instead of making clean cuts. Inve...
- Seasonal Timing Secret: The 50°F nighttime temperature threshold in Step 3 is your cue for late fall pruning—this tem...
Frequently asked questions
Got questions about pruning your Abutilon plants? You’re not alone! Here are some of the most common queries—and their answers—to keep your "Chinese lantern" blooming beautifully year-round.
When is the best time to prune Abutilon plants?
Prune your Abutilon three times a year: early spring (to shape and encourage new growth), mid-summer (after the first flush of blooms), and late summer/early fall (to prep for winter dormancy). Avoid pruning in late fall or winter, as this can stress the plant.
How much should I trim back my Abutilon?
You can trim back Abutilon by up to one-third of its height per pruning session. For bushier growth, cut back stems to just above a leaf node or bud. Over-pruning can reduce flowering, so aim for a balanced approach—especially during the spring trim.
Will pruning make my Abutilon flower more?
Pruning Abutilon encourages more blooms by promoting new growth and airflow. Focus on removing dead, leggy, or overcrowded stems, and always cut just above a leaf node. The plant will reward you with vibrant, abundant flowers!
What if I prune at the wrong time?
If you prune too late in the season (e.g., fall or winter), your Abutilon may struggle to recover before dormancy. If you’ve already over-pruned, don’t panic! Water consistently, fertilize lightly, and protect from cold drafts. New growth should return in spring.
Can I propagate my Abutilon from pruned cuttings?
Yes! Pruning is the perfect opportunity to propagate your Abutilon. Dip healthy cuttings in rooting hormone (optional) and plant them in moist potting mix. Keep them warm and humid (like under a plastic bag) until roots form—usually in 4-6 weeks. It’s a great way to expand your collection!
Wrapping up and next steps
Pruning your abutilon plants isn’t just about keeping them tidy—it’s the secret to explosive blooms and lush, healthy growth year-round! 🌸 With just three strategic trims (spring, summer, and fall), you’ll encourage vibrant flowers, stronger stems, and a bushier shape.
Remember, sharp tools, clean cuts, and patience are your best friends—no green thumb required!
Now that you’re armed with the know-how, grab those shears and get pruning! Watch your abutilon thrive and reward you with a garden full of color. Need extra inspiration? Browse seasonal pruning calendars or check out before-and-after abutilon transformations to stay motivated. Happy gardening! 🌿✨