Orchid Care
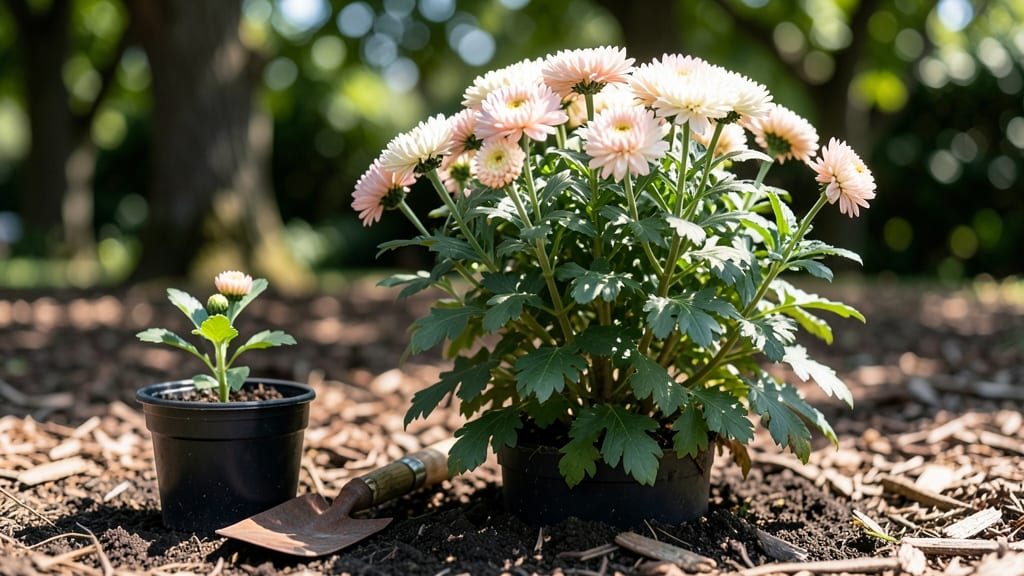
Planting chrysanthemums outdoors transforms any yard into a late-season showstopper—those bold blooms arrive just when most gardens think summer’s over. 🌟 I’ve planted them in everything from full sun to dappled shade, and the secret to their longevity isn’t just timing but a few simple prep steps that keep them thriving through frost.
The right soil, spacing, and protection from wind make all the difference between a one-year wonder and a perennial that comes back stronger every fall.
First, you’ll need well-draining soil mixed with compost—chrysanthemums hate soggy roots—and a spot with at least 6 hours of sunlight daily. In cooler climates, plant in early spring after the last frost, while warmer zones can handle fall planting for winter blooms.
Dig holes twice as wide as the root ball but no deeper, then water deeply before setting them in. The key is spacing: 18–24 inches apart for bush types, 2–3 feet for larger varieties, so they don’t crowd as they fill out.
What you’ll get is a garden that stays vibrant well into November, with flowers that last weeks in vases. Pinch back early shoots in spring to encourage bushier growth, and mulch around the base to protect roots from temperature swings.
Even in windy areas, a simple stake or clump planting breaks up drafts that can snap stems. The payoff? Chrysanthemums that reward you with color when most plants have called it quits.
For tropical regions, treat them as annuals—they won’t survive winter—but in temperate zones, they’ll naturalize over time. Just avoid overwatering once established, and you’ll have a low-maintenance star that outshines anything you’ve planted before. Ready to make your fall garden unforgettable?
📚 In This Guide
- What you need
- Instructions
- Tips and common mistakes
- Wrapping up and next steps
What you need
- ● Chrysanthemum plants: 3–6 healthy nursery-grown plants (choose varieties suited to your hardiness zone, like ‘Bonanza’ or ‘Mammoth’).
- ● Well-draining potting soil: 1–2 bags (or a mix of 60% topsoil, 30% compost, and 10% perlite/sand for DIY blends).
- ● Organic fertilizer: A balanced 10-10-10 or slow-release granular fertilizer (follow package rates for application).
- ● Mulch: 2–3 cubic feet of shredded bark or straw to retain moisture and regulate soil temperature.
- ● Garden trowel or hand shovel: For digging holes (6–8 inches deep and wide for each plant).
- ● Garden gloves: A pair to protect your hands from thorns and soil.
- ● Watering can or hose with a gentle spray nozzle: For even moisture distribution.
- ○ Pruning shears (optional): To trim dead foliage or shape plants post-planting.
- ○ Garden twine & stakes (optional): For supporting taller varieties in windy areas.
- ● Sunlight: A location with full sun (6+ hours/day) or partial shade (4–6 hours) for cooler climates.
- ● Soil pH: Slightly acidic to neutral (6.0–7.0). Test your soil or amend with lime/sulfur if needed.
- ● Spacing: 12–24 inches apart (check plant tags for variety-specific needs).
- ● Timing: Plant in early spring (4–6 weeks before last frost) or early fall (6–8 weeks before first frost).
Step-by-Step instructions for planting chrysanthemums outdoors
Here's how to plant these hardy perennials for vibrant blooms that last well into fall.
🌱 Step 1: Choose the Right Location and Prepare the Soil
Chrysanthemums thrive in full sun—at least 6 hours of direct light daily—but they tolerate partial shade in hotter climates. I always pick a spot with good air circulation to prevent fungal diseases. The soil should drain well, so if your yard holds water, amend it with 2-3 inches of compost mixed into the top 12 inches of soil.
Loosen the soil with a garden fork to a depth of 12 inches, breaking up any compacted layers. Chrysanthemums hate soggy roots, so avoid low-lying areas where water pools. If your soil is heavy clay, mix in 1 part sand for every 3 parts soil to improve drainage. You'll know you're ready when the soil crumbles easily between your fingers.
🪴 Step 2: Dig Holes and Plant at the Right Depth
Dig holes twice as wide as the root ball but only as deep as the container's root level. Chrysanthemums planted too deep suffocate, while those too shallow dry out quickly. Gently remove the plant from its container, tease the roots outward if they're circling, and place it in the hole so the top of the root ball sits just below soil level—never deeper.
Fill the hole with soil, pressing lightly around the edges to eliminate air pockets. Water deeply right after planting to settle the soil and encourage root contact. You'll see the soil sink slightly—this is normal. For 4 plants, space them 18-24 inches apart in rows 2-3 feet apart to allow airflow and future growth.
💧 Step 3: Water Thoroughly and Mulch to Retain Moisture
Water each plant with 1 gallon of water immediately after planting to help roots establish. Chrysanthemums need consistent moisture but hate soggy soil, so water 1-2 times weekly depending on rainfall, aiming for 1 inch of water per week. You'll know they're getting enough when the top 2 inches of soil feel slightly damp—not dry, not soggy.
Spread 2-3 inches of mulch (like shredded bark or straw) around each plant, keeping it 2 inches away from the stem to prevent rot. Mulch locks in moisture, suppresses weeds, and regulates soil temperature. Replenish mulch as it breaks down, especially in hot summers when evaporation speeds up.
☀️ Step 4: Fertilize and Monitor for Healthy Growth
Feed chrysanthemums with a balanced, slow-release fertilizer (like 10-10-10) 4-6 weeks after planting, then again mid-summer for a second flush of blooms. Follow package instructions for amounts—over-fertilizing leads to lush foliage but fewer flowers. You'll notice new growth within 2-3 weeks if the fertilizer is working: dark green leaves and sturdy stems.
Watch for pests like aphids or spider mites, which love tender new growth. Spray plants with neem oil at the first sign of trouble—it's organic and safe for pollinators. Deadhead spent blooms regularly to encourage more flowers and prevent seed formation, which drains the plant's energy.
⏰ Step 5: Prepare for Winter and Next Year's Blooms
In fall, cut back stems to 2-3 inches above ground level after the first hard frost. Chrysanthemums are hardy perennials, but a light layer of 2-3 inches of mulch over the roots protects them from extreme cold. In spring, remove old mulch and add fresh compost to replenish nutrients before new growth starts.
You'll see fresh shoots emerge in early spring—this is your cue to thin crowded plants and divide clumps every 2-3 years to keep them vigorous. Dividing in early spring ensures established roots before summer heat sets in. With proper care, your chrysanthemums will reward you with months of color and minimal fuss.
Tips & tricks for perfect chrysanthemum planting
Here's what I've learned after years of growing these reliable perennials—little details that make all the difference.
Sunlight Secret: Those 6 hours of direct sunlight are non-negotiable for peak blooms, but I've found chrysanthemums actually reward you with more flowers when they get 8+ hours of sun. In hotter climates, afternoon shade helps prevent wilting while still giving you that vibrant color. Trust me, the difference in bloom quantity is noticeable!
Soil Prep Game-Changer: When amending your soil with 2-3 inches of compost and 1 part sand, I recommend adding a handful of perlite to the mix for even better drainage. This prevents that dreaded soggy root situation while still keeping moisture where it belongs. Your plants will thank you with stronger stems and more abundant flowers.
Planting Depth Visual: For Step 2, here's my trick to get the depth perfect: After placing your chrysanthemum in the hole, gently press the soil around it until the top of the root ball is just barely covered—about 1/2 inch below soil level. You can even use a small stick as a marker to check depth before filling completely. Too deep and they'll suffocate; too shallow and they'll dry out.
Watering Wisdom: That 1 gallon of water right after planting isn't just for the roots—it's also helping settle the soil around those delicate roots. I like to water again 3 days later to encourage deeper root growth. And when checking soil moisture, stick your finger in about 2 inches deep—that's where the roots are actively growing. If it feels dry, it's time to water.
Pro Tips for Planting Chrysanthemums Outdoors
- Here's what I've learned after years of growing these reliable perennials—little details that make all the difference.
- Sunlight Secret: Those 6 hours of direct sunlight are non-negotiable for peak blooms, but I've found chrysanthemums a...
- Soil Prep Game-Changer: When amending your soil with 2-3 inches of compost and 1 part sand, I recommend adding a hand...
Frequently asked questions
about planting chrysanthemums outdoors—because even the best gardeners need a little guidance! Here are answers to the most common questions to help you grow these vibrant perennials with confidence.When is the best time to plant chrysanthemums outdoors?
Plant chrysanthemums in early spring (after the last frost) or early fall (4-6 weeks before the first frost). This gives roots time to establish before extreme temperatures. For fall-blooming varieties, aim for late summer planting. Avoid planting in mid-summer heat, which can stress young plants.
Can chrysanthemums survive winter outdoors?
Yes! Most chrysanthemums are hardy perennials and can survive winter in USDA Zones 5-9. In colder climates (Zones 3-4), mulch heavily with straw or leaves to protect roots. Cut back foliage in late fall but leave the crown intact. In Zone 10+, they may need winter dormancy or shade.
How do I keep my chrysanthemums from dying in cold weather?
To protect them:
- Mulch with 2-3 inches of organic mulch (straw, leaves, or shredded bark) after the ground freezes.
- Avoid wet mulch—it can rot roots. Keep soil slightly moist but not soggy.
- Group plants together for shared warmth.
- In extreme cold, cover with burlap or frost cloth if temperatures drop below 10°F.
Why aren’t my chrysanthemums blooming?
Chrysanthemums need 12-14 hours of daylight to trigger blooming. If they’re not flowering, check:
If blooms appear but fade quickly, they may need regular deadheading.
What pests or diseases should I watch for with chrysanthemums?
Common issues include:
- Pests:
- Spider mites (tiny webs on leaves—spray with water or neem oil).
- Aphids (clustered on stems—blast off with water or use insecticidal soap).
- Japanese beetles (chew leaves—handpick or use milky spore bacteria).
- Diseases:
- Powdery mildew (white dust on leaves—improve airflow, avoid overhead watering).
- Leaf spot (brown spots—remove infected leaves, water at the base).
Wrapping up and next steps
Planting chrysanthemums outdoors is a rewarding way to bring vibrant color and texture to your garden for months—even in cooler seasons! 🌼 With the right location, soil prep, and care, these hardy perennials thrive with minimal fuss.
Whether you’re a seasoned gardener or a beginner, the key is patience and consistency.
Now that you’re armed with the know-how, roll up your sleeves and get planting! Start small if you’re new, and soon, your garden will be bursting with cheerful blooms. Next, explore pruning tips or seasonal care routines to keep your chrysanthemums looking their best year after year.