Pruning
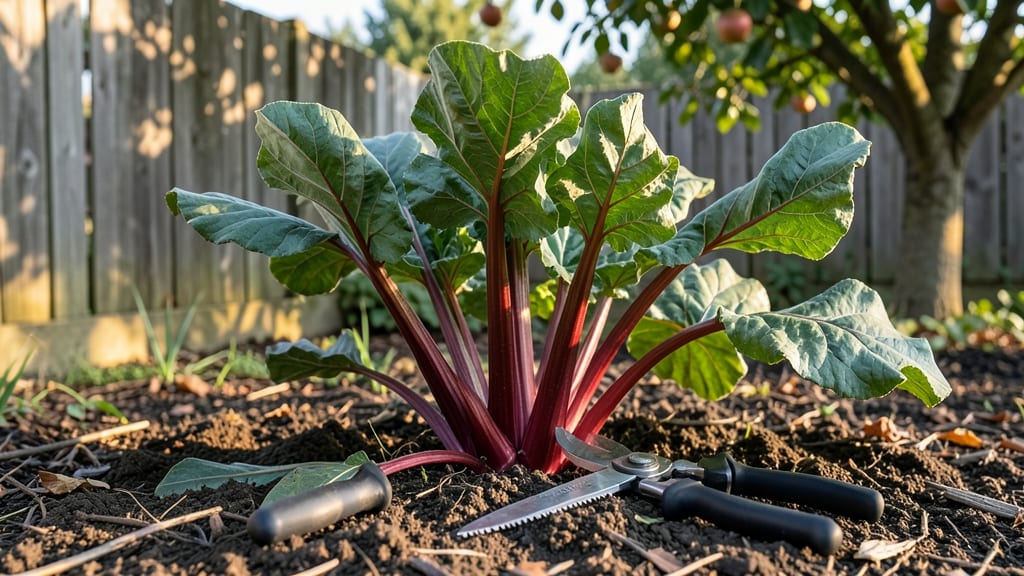
Trimming rhubarb plants transforms a struggling patch into a high-yielding powerhouse—if you do it right. I’ve watched my rhubarb go from scraggly and sparse to producing foot-long stalks by simply cutting back what looks like dead growth. The key is timing and technique, not brute force.
Start in early spring when new shoots are 6–8 inches tall, or after harvest in late summer. You’ll need sharp pruners (dull blades tear stems) and a clear day to work.
The goal isn’t to shear everything down—just remove last year’s stalks at the base and any weak growth. This opens space for fresh, vigorous shoots to take over.
Within 2–3 weeks, you’ll see thick, bright red stalks emerging from the center crown. These are sweeter, more tender, and far more productive than the old growth. The plant rewards careful trimming with years of abundant harvests, while neglect leads to overcrowding and smaller, tougher stalks.
Works for both first-time growers and seasoned gardeners—just avoid cutting into the crown (the thick, fleshy base). That’s where next year’s growth starts. For extra insurance, mulch around the base after trimming to protect the crown through winter.
📚 In This Guide
- What you need
- Instructions
- Tips and common mistakes
- Wrapping up and next steps
What you need
- ● Pruning shears or sharp bypass pruners – Choose sterilized, sharp tools (4-6 inches in blade length) to avoid damaging the plant or spreading disease.
- ● Garden gloves – A pair of durable, cut-resistant gloves (size medium or large) to protect your hands from thorns and sap.
- ● Disinfectant (70% isopropyl alcohol or bleach solution) – A small spray bottle or cloth to sterilize tools between cuts and prevent bacterial/fungal infections.
- ● Compost bin or garden waste bag – A 10-20 gallon container to collect trimmed stalks and debris.
- ● Watering can or hose with a gentle nozzle – For post-trimming hydration (1-2 gallons of water per plant).
- ● Garden twine or plant markers – To label and organize newly trimmed sections if you’re experimenting with regrowth timing.
- ● Mulch (straw or wood chips) – A 2-3 inch layer to retain moisture and suppress weeds around the base.
- ● Hand lens or magnifying glass – For inspecting stalks up close if you suspect pests or diseases.
- ● Knee pad or stool – For comfort if your rhubarb patch is sprawling or hard to reach.
Instructions for trimming rhubarb plants
Reviving your rhubarb plants starts with precise trimming—this method ensures vigorous regrowth and abundant harvests.
Identify and Remove Last Year's Stalks
Wait until late winter or early spring, just as new growth begins to emerge from the crown. The old stalks from last year’s harvest will be brown and woody—these are your targets. Use sharp pruners or a clean knife to cut them off at the base, just above the soil line. This prevents disease from lingering in dead tissue and redirects the plant’s energy toward fresh growth.
Don’t rush this step. If you leave any stalks standing, they’ll compete with new shoots for nutrients. I always remove every last one, even if it means digging a little deeper to expose hidden remnants. The goal is a clean slate for the season ahead.
Thin Overcrowded Crowns for Airflow
After clearing old stalks, inspect the crown—the thick, fleshy base where new shoots emerge. If the crown is congested with too many shoots growing too close together, thin them out. Leave only the 3-4 strongest, healthiest shoots per plant, cutting the rest at the base with clean pruners. Overcrowding invites fungal diseases and weakens individual stalks.
Here’s the thing—rhubarb plants naturally produce more shoots than they can sustain. By thinning now, you’re ensuring each remaining shoot gets enough sunlight, air circulation, and nutrients. You’ll see thicker, more robust stalks later in the season as a result.
Prune Leafy Growth Strategically
Once new stalks reach 12-18 inches tall, focus on the leaves. Remove any leaves that are yellowing, diseased, or damaged—these can harbor pests or infections. For healthy leaves, leave them until they’ve fully unfurled to protect the developing stalks from excessive sun exposure. Rhubarb stalks need shade from their own leaves during early growth to prevent sun scald.
I never remove more than one-third of the leaves at once. The remaining foliage provides the energy needed for stalk development. If you strip too many leaves, the plant will struggle to produce harvestable stalks later. Think of the leaves as the factory—keep it running efficiently.
Apply Mulch and Monitor for New Growth
After trimming, spread a 2-3 inch layer of organic mulch around the base of the plant, keeping it 6 inches away from the crown to prevent rot. This retains moisture, suppresses weeds, and regulates soil temperature. Check the crown weekly for new shoots—you’ll see them emerge as pinkish buds in early spring.
If growth stalls after a few weeks, the soil may need a boost. A light application of balanced fertilizer (10-10-10) around the perimeter of the mulch circle can encourage stronger regrowth. Avoid fertilizing directly on the crown, as this can burn tender new shoots.
Tips & tricks for perfect rhubarb plant revival
A few strategic adjustments during trimming can transform your rhubarb plants from struggling survivors to thriving producers. These insights come from years of watching what works—and what doesn't—in my own garden.
Timing is Everything: The late winter to early spring window is critical because this is when rhubarb plants begin their metabolic reboot. If you trim too early, you risk damaging dormant buds. If you wait too late, you'll miss the optimal growth window. Look for those first pinkish buds emerging from the crown—that's your cue. I've learned this the hard way after accidentally pruning too early and stunting growth for the entire season.
The Crown Inspection Technique: When examining the crown in Step 2, focus on shoot thickness and color rather than just quantity. The 3-4 healthiest shoots should have vibrant green tips and be noticeably thicker than the others. I use a simple test: gently squeeze the shoots—healthy ones will feel firm and resilient. This visual and tactile check helps identify the strongest candidates for keeping, which directly impacts your harvest yield later.
Leaf Pruning Precision: The one-third rule for leaf removal in Step 3 is non-negotiable, but there's a technique to it. Start with the oldest leaves first—they're largest and most likely to be yellowing. These leaves have already served their purpose of photosynthesizing for the plant. By removing them strategically, you're essentially pruning the plant from the bottom up, which encourages new growth from the center where your harvestable stalks will emerge.
Mulch Application Strategy: The 2-3 inch mulch layer in Step 4 serves multiple purposes beyond just moisture retention. I've found that spreading it in a slight cone shape—thicker at the outer edges and tapering toward the crown—creates better water drainage while still insulating the roots. This simple adjustment prevents the crown from sitting in soggy conditions, which can lead to rot. Also, keep that mulch 6 inches away from the crown to maintain proper airflow around the base.
Pro Tips for Trimming Rhubarb Plants
- A few strategic adjustments during trimming can transform your rhubarb plants from struggling survivors to thriving p...
- Timing is Everything: The late winter to early spring window is critical because this is when rhubarb plants begin th...
- The Crown Inspection Technique: When examining the crown in Step 2, focus on shoot thickness and color rather than ju...
Frequently asked questions
Got questions about trimming rhubarb? You’re not alone!
Here are answers to the most common concerns—from timing to troubleshooting—so you can keep your rhubarb thriving with confidence.
When is the best time to trim rhubarb plants?
Trim rhubarb after harvest, typically in late spring or early summer. Avoid cutting back in fall or winter, as the plant needs energy to regrow. Focus on removing dead or yellow leaves and thinning overcrowded stalks to encourage stronger regrowth. Pro tip: Never cut more than one-third of the stalks at once!
How do I know if I’m trimming too much?
If you see bare stems, no new leaves, or wilted foliage after trimming, you’ve likely gone overboard. Rhubarb is hardy but needs at least 3–4 healthy leaves per stalk to photosynthesize. Signs of over-trimming: Stunted growth, blackened leaves, or no new stalks by mid-summer.
Can I trim rhubarb in the fall or winter?
No—never trim rhubarb in fall or winter! The plant is dormant and needs its leaves to protect the crown from frost. Instead, mulch heavily with straw or leaves to insulate it. Wait until early spring (when new shoots appear) to clean up debris and assess damage.
What if my rhubarb looks sad after trimming?
Don’t panic! If your plant looks stressed, water deeply (1–2 inches per week) and avoid fertilizing for 4–6 weeks. Boost recovery:
- Remove all diseased or moldy leaves.
- Apply a balanced fertilizer (10-10-10) in spring.
- Ensure 6+ hours of sunlight daily.
Are there alternatives to trimming if my rhubarb is overgrown?
Yes! If trimming feels risky, try dividing the plant instead. Dig up the crown in early spring or fall, split it into sections (each with 3–5 stalks), and replant. This rejuvenates growth and prevents overcrowding. Bonus: Share sections with friends—rhubarb spreads easily!
Wrapping up and next steps
Trimming your rhubarb plants is a simple yet powerful way to unlock their full potential—producing juicier stalks, stronger growth, and a longer harvest season. By mastering the 3-step revival method, you’re not just pruning; you’re investing in a thriving garden.
Now that you’re armed with the right tools and techniques, roll up your sleeves and give your rhubarb the care it deserves!
Ready to see the difference? Start with one plant this week—your future harvest (and your taste buds!) will thank you. 🌱✨