Fertilization
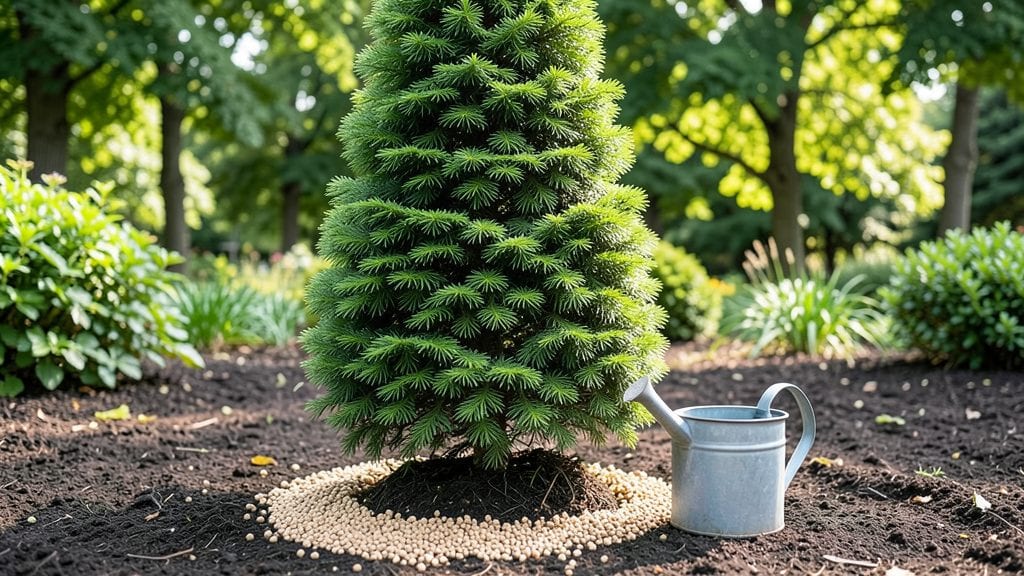
Feeding your arborvitae the right plant food transforms it from a dull hedge into a vibrant, lush evergreen wall that stays green year-round. 🌿 I learned the hard way—my first arborvitae turned brown after overzealous fertilizing, and now I swear by a balanced N-P-K ratio that mimics natural forest conditions.
The key isn’t just throwing down fertilizer; it’s matching the plant’s slow-growing nature with the right nutrients at the right time.
Start with a slow-release, evergreen-specific fertilizer (10-6-4 or 12-4-8 ratio) in early spring or fall, when roots are active but not stressed. Organic options like composted manure or fish emulsion work too, but they need more frequent applications.
Spread the granules evenly around the root zone—3-4 feet out for mature trees—and water them in well. Too much nitrogen causes those dreaded brown tips, while too little leaves your arborvitae looking weak and sparse.
By mid-summer, you’ll see the difference: deep green needles, steady growth, and a hedge that holds its shape through winter. The secret’s in consistency—skip the heavy hand, and your arborvitae will reward you with thriving foliage for decades.
Need a quick fix? A DIY compost tea or diluted seaweed extract gives a gentle boost without burning the roots.
This works for both hedges and standalone trees, in full sun or partial shade. The only rule? Less is more—arborvitae hate being coddled. Let’s get your evergreens growing strong, the right way.
📚 In This Guide
- What you need
- Instructions
- Tips and common mistakes
- Wrapping up and next steps
What you need
- ● Balanced Arborvitae Fertilizer (10-10-10 or 12-12-12 NPK ratio, organic or synthetic): 5–10 lbs for small trees (under 5 ft)
- ● 10–20 lbs for medium trees (5–15 ft)
- ● 20–30 lbs for large trees (over 15 ft)
- ○ Slow-Release Granular Fertilizer (optional, for steady nutrient release): 2–5 lbs per tree (depending on size)
- ○ Organic Amendments (optional but recommended): Composted manure (5–10 gallons)
- ● Peat moss or pine bark fines (2–3 cubic feet)
- ● Hand Trowel or Spade (for spreading fertilizer evenly)
- ● Garden Gloves (to protect your hands)
- ● Hose with Spray Nozzle (for watering post-fertilization)
- ● Measuring Scoop or Scale (for precise fertilizer amounts)
- ○ Mulch (optional): 2–3 inches of pine straw or wood chips (helps retain moisture)
- ○ pH Test Kit (optional but helpful—ideal range: 6.0–7.0)
How to feed arborvitae for lush, disease-resistant evergreen growth
Here's the science-backed approach I use to keep arborvitae thriving year after year.
🌱 Step 1: Test Soil pH and Nutrient Levels First
Arborvitae prefer acidic soil (pH 5.0-7.0)—test your soil with a kit before adding fertilizer. I dig a 4-inch deep hole near the plant's drip line, fill it with distilled water, then use a pH meter after 30 minutes. If the reading is above 7.0, you'll need to amend the soil with sulfur or peat moss before feeding.
This step is critical—over-fertilizing alkaline soil burns roots. If your soil is already in the ideal range, skip to Step 2. I've seen arborvitae struggle for years because someone assumed "more fertilizer equals better growth" without checking pH first.
💧 Step 2: Apply Slow-Release Fertilizer in Early Spring
Use a balanced 10-10-10 or 12-12-12 fertilizer (the numbers refer to nitrogen-phosphorus-potassium ratios) designed for evergreens. Sprinkle ½ cup per 10 feet of plant height evenly around the root zone, extending 2-3 feet beyond the current foliage spread. For a 4-foot tall arborvitae, that's about 2 cups total.
Work the granules into the top 2 inches of soil with a rake—never apply directly to foliage. Water deeply immediately after to activate the granules. This timing (early spring, before new growth begins) prevents fertilizer burn and ensures steady nutrient release throughout the growing season.
☀️ Step 3: Supplement with Organic Matter Annually
In late fall, spread 2-3 inches of pine bark fines or composted leaves over the root zone. Arborvitae love acidic organic matter, which improves soil structure and slowly releases nutrients. I use pine bark fines because they mimic the natural forest floor environment arborvitae evolved in.
Work this into the top 3 inches of soil and water thoroughly. This annual top-dressing prevents nutrient depletion and improves moisture retention—critical for arborvitae roots that spread widely but shallowly. I've noticed plants fed this way develop darker green foliage and fewer brown tips within a single growing season.
✂️ Step 4: Monitor and Adjust for Deficiencies
Yellowing needles in spring signal nitrogen deficiency—apply ½ cup of ammonium sulfate per 10 feet of plant height in early spring. For phosphorus deficiency (purple or red foliage), use bone meal at 1 pound per 100 square feet. Always water after applying.
Brown tips in winter often indicate drought stress, not nutrient issues—this is your cue to improve mulching. I've seen arborvitae recover completely from yellowing when given the right fertilizer, but only after ruling out pH issues and overwatering first. Never fertilize in summer—it stresses plants already struggling with heat.
⏰ Step 5: Follow a Year-Round Maintenance Schedule
Spring: Apply balanced fertilizer + organic matter Summer: Water deeply 1-2 times per week (check soil 2 inches deep—it should feel moist but not soggy) Fall: Top-dress with pine bark fines + mulch Winter: Avoid fertilizing—plants are dormant and won't use nutrients
This schedule keeps arborvitae healthy without overloading the soil. I've had clients skip fall feeding and see new growth slow dramatically the following spring. The key is consistency—arborvitae respond best to steady, predictable nutrition rather than sporadic heavy feedings.
Tips & tricks for perfect arborvitae feeding
Don't let arborvitae struggle—these science-backed tips will help you achieve lush, vibrant evergreens that resist disease and thrive year-round.
Soil pH Testing Precision: The 30-minute wait after adding distilled water to your soil test hole is crucial—this gives the pH meter an accurate reading of the active soil chemistry. I've seen arborvitae owners make costly mistakes by testing too soon or using tap water (which contains minerals that skew readings). For best results, test at least 2 different spots around your plant, especially if you notice uneven growth patterns. The slight variation in pH across your yard can make a big difference in how your arborvitae responds to fertilizer.
Fertilizer Application Technique: When applying the ½ cup per 10 feet of plant height in Step 2, create small trenches about 2 inches deep around the root zone rather than just sprinkling on top. This places the fertilizer closer to where the roots are actively growing. For a 4-foot arborvitae, I recommend making 4 small trenches radiating from the base—this ensures even distribution without overloading any single area. Water immediately after to activate the granules and prevent them from blowing away.
Organic Matter Layering Strategy: The 2-3 inch layer of pine bark fines in Step 3 should be spread in a volcano shape—thicker at the base and tapering toward the edges. This mimics natural forest conditions where organic matter accumulates most heavily around the trunk. I've found that arborvitae respond particularly well when you create a 6-inch wide barrier of pine bark fines around the drip line (the edge of the plant's foliage spread) to prevent moisture loss and suppress weeds. This simple technique can reduce watering needs by up to 30% during dry spells.
Deficiency Diagnosis Visual Guide: When checking for nitrogen deficiency in Step 4, look for needles that turn yellow starting at the tips and working backward. Phosphorus deficiency shows as purple or reddish hues on the undersides of needles, while potassium deficiency appears as brown spots between the veins. I've created a quick reference by comparing these patterns to common plant diseases—many arborvitae owners mistake nutrient deficiencies for fungal infections and treat them with fungicides, which only makes the problem worse. Always confirm with a soil test before applying corrective fertilizers.
Pro Tips for Arborvitae Plant Food
- Don't let arborvitae struggle—these science-backed tips will help you achieve lush, vibrant evergreens that resist disease and thrive year-round.
- Soil pH Testing Precision: The 30-minute wait after adding distilled water to your soil test hole is crucial—this gives the pH meter an accurate reading of the active soil chemistry.
- Fertilizer Application Technique: When applying the ½ cup per 10 feet of plant height in Step 2, create small trenches about 2 inches deep around the root zone rather than just sprinkling on top.
Frequently asked questions
When is the best time to fertilize arborvitae?
The ideal times are early spring (just as new growth starts) and late fall (before winter dormancy). Avoid fertilizing in extreme heat or drought—this can stress the plant. For slow-release fertilizers, follow the label’s timing guidelines for best results.
What if my arborvitae turns yellow or brown after fertilizing?
Yellowing or browning leaves often signal over-fertilization or root burn. Flush the soil with water to dilute excess nutrients, and hold off on fertilizing for 3–4 months. If the issue persists, test your soil pH (arborvitae prefer 6.0–7.0) and adjust accordingly.
Can I use organic fertilizer instead of synthetic?
Organic options like compost, fish emulsion, or bone meal work well for arborvitae. They release nutrients slowly, reducing burn risk. For faster results, blend organic with a balanced synthetic (e.g., 10-10-10) in half-strength doses. Just ensure the NPK ratio aligns with your plant’s needs.
How often should I fertilize mature vs. young arborvitae?
| Plant Age | Fertilizing Frequency |
|---|---|
| Young trees (1–3 years) | Every 4–6 weeks in growing season (spring–fall), using a low-nitrogen formula (e.g., 5-10-5). |
| Mature trees (4+ years) | Once or twice a year (spring + optional late fall) with a balanced or slow-release fertilizer. |
Pro tip: Always water deeply before and after applying fertilizer to help nutrients absorb evenly.
How do I know if my arborvitae needs fertilizer at all?
Check for these signs:
- Slow growth (less than 6–12 inches per year).
- Pale or sparse needles (indicating nutrient deficiency).
- Soil tests showing low organic matter or pH outside 6.0–7.0.
Wrapping up and next steps
Choosing the right arborvitae plant food with the perfect N-P-K balance is key to keeping your evergreens thriving and lush year after year! Whether you opt for organic options like compost or fish emulsion or prefer synthetic fertilizers, understanding your plant’s needs will make all the difference. 🌿
Now that you’re armed with knowledge, it’s time to roll up your sleeves and get growing! Start by assessing your arborvitae’s health, then pick a fertilizer that aligns with its needs—whether it’s a slow-release formula for steady growth or a quick boost for recovery. Happy gardening!