Planting
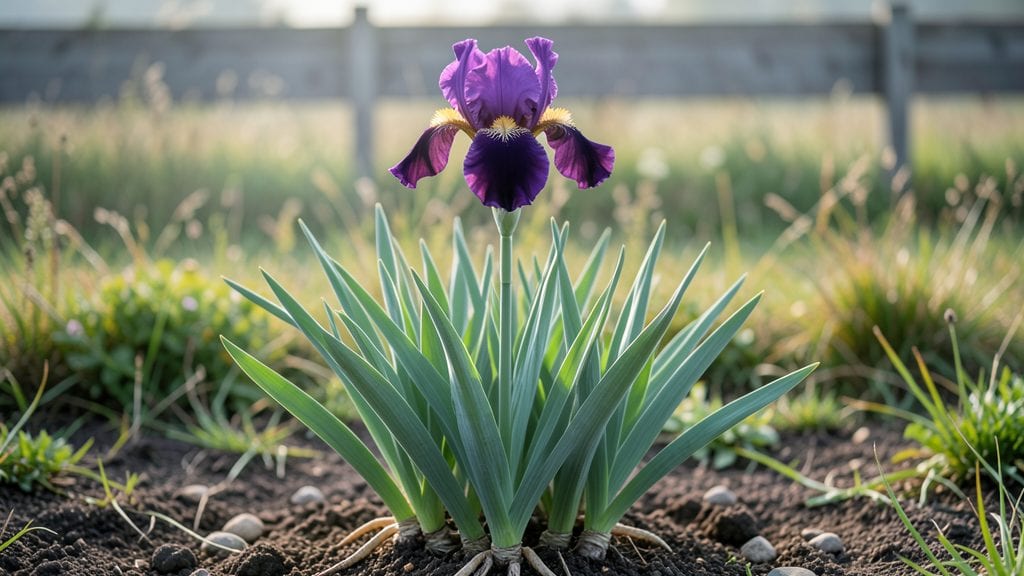
Iris plant maintenance isn't as tricky as it sounds—three strategic trims a year will keep your clumps thriving for decades. ✨ The key is timing: cut back the old foliage in early spring, trim spent blooms mid-summer, and clean up any dead growth after flowering stops.
This isn't just about looks; it's about giving your irises the energy to produce those bold, velvety blooms year after year.
Most people mess this up by cutting too early or too late, which weakens the plant. I learned that the hard way when my irises produced half the blooms one season. The right timing means your plants store nutrients in their thick rhizomes, so they explode with color next spring.
You'll also notice fewer pests and diseases when you keep the foliage tidy and the center of the clump open.
By following these three simple cuts, you'll end up with clumps that multiply naturally, producing more blooms each year. The foliage stays upright and healthy, the flowers get bigger, and you spend less time fighting back weeds that love to hide in overgrown iris beds.
This method works for both bearded and Siberian irises, whether you're growing them in full sun or partial shade.
Once you get the rhythm, it takes less than 30 minutes a season to maintain a mature clump. The payoff? Irises that look fresh and vibrant from late spring through summer, with minimal effort. Here's exactly how to do it without overcomplicating things.
📚 In This Guide
- What you need
- Instructions
- Tips and common mistakes
- Wrapping up and next steps
What you need
- ● Pruning shears or sharp bypass pruners – 1 pair (sterilized to prevent disease; look for bypass blades for clean cuts).
- ● Garden gloves – 1 pair (nitrile or leather for durability; gardening-grade recommended).
- ● Compost or well-aged manure – 1-2 gallons (for fertilizing; organic options like cow or chicken manure work best).
- ● Mulch (straw, pine needles, or shredded bark) – 1-2 inches (helps retain moisture and suppress weeds).
- ● Watering can or hose with a gentle spray nozzle – For deep but infrequent watering (irises hate soggy roots!).
- ● Disinfectant (rubbing alcohol or bleach solution) – To sterilize tools between cuts (1 part bleach to 9 parts water).
- ● Plant support stakes – If your irises are tall or floppy (e.g., bearded irises).
- ● Slow-release granular fertilizer – 10-10-10 or 5-10-10 NPK ratio (apply sparingly in early spring).
- ● Soil tester kit – To check pH (irises prefer slightly acidic to neutral soil, pH 6.0-7.0).
- ● Knee pad or small stool – For comfortable trimming (especially for larger gardens!).
Instructions for iris plant maintenance: year-round beauty with 3 simple trims
Here's my go-to routine for keeping irises thriving with minimal fuss—just three key trims a year.
✂️ Step 1: Spring Cleanup After Blooming
Once your irises finish blooming in late spring, cut back the flower stalks down to 1-2 inches above the ground. This keeps the plant focused on building strong roots and foliage for next year's blooms. I like to do this right after the petals drop, but before the leaves start yellowing.
Use clean, sharp pruners to avoid damaging the leaves. The leaves store energy for next season, so don't trim them back yet. You'll know you've done it right when the plant looks tidy but still has its full set of sword-like leaves standing tall.
🌱 Step 2: Summer Leaf Maintenance
In midsummer, when the leaves start to yellow and flop, it's time for your second trim. Cut back any dead or yellowing leaves at the base, but leave about 6-8 inches of healthy green foliage. This is crucial because the leaves feed the rhizomes underground.
I usually do this in July, just before the heat of summer really kicks in. Remove only the damaged parts—never trim healthy leaves. You'll see the plant looking refreshed, with new growth emerging from the center of the clump.
✂️ Step 3: Fall Preparation for Winter
In early fall, after the leaves have fully died back, give your irises their final trim of the year. Cut back all the dead foliage to about 1 inch above the ground. This helps prevent disease and pests from overwintering in the plant debris.
This is also the time to check for any rhizomes that might be crowding or need dividing. If you see any, you can gently lift and separate them in fall. The key is to do this before the ground freezes—usually by late October in most climates.
⏰ Step 4: Winter Check-In
During winter, irises are dormant, so no trimming is needed. However, if you notice any dead or broken foliage from winter storms, trim it back as needed. The goal is to keep the plant looking tidy without disturbing the rhizomes.
This is also the time to plan for next year's blooms. If your irises haven't bloomed well, consider dividing the clumps in early spring. You'll know they're ready for dividing when you see flowers fading and new shoots appearing around the base of the plant.
Tips & tricks for perfect iris plant maintenance
A few simple tricks will keep your irises looking stunning with minimal effort—these are the secrets I've learned after years of growing them.
Tool Tip: Invest in a good pair of bypass pruners for your iris maintenance. These clean-cut tools prevent tearing the leaves or flower stalks, which can introduce disease. I like to keep a dedicated pair just for my irises—it makes the job so much cleaner and more precise. The sharp blades also mean less effort when cutting through those tough iris stalks.
Seasonal Timing: The timing of each trim is everything. In Step 1, after blooming, don't wait too long—trim those spent flower stalks within a week of the petals dropping. For Step 2 in summer, watch for those first yellowing leaves as your cue. And in Step 3, wait until all leaves have completely died back before your final trim. This seasonal rhythm keeps your irises healthy and blooming beautifully each year.
Dividing Strategy: When you notice your iris clumps getting crowded during fall maintenance, it's time to divide. Look for established clumps with at least three fans of leaves—these are ready to be separated. I like to divide every 3-4 years to maintain vigor. Just be gentle with those rhizomes—they're more delicate than they look! Plant the divisions right away in well-draining soil for best results.
Visual Cues: For Step 2, when you're deciding which leaves to trim, look for leaves that are more than 50% brown or yellow. Healthy leaves should be a vibrant green with no browning at the tips. In Step 3, you'll know you've trimmed enough when you can see the neat, clean base of the plant with just 1 inch of stubble remaining. These visual cues make maintenance effortless once you know what to look for.
Pro Tips for Iris Plant Maintenance
- A few simple tricks will keep your irises looking stunning with minimal effort—these are the secrets I've learned after years of growing them.
- Tool Tip: Invest in a good pair of bypass pruners for your iris maintenance.
- Seasonal Timing: The timing of each trim is everything.
Frequently asked questions
Got questions about keeping your iris plants thriving? Here are answers to the most common concerns—whether you're a beginner or a seasoned gardener!
When is the best time to trim iris plants?
Trim your iris plants after they’ve finished blooming in late spring or early summer. This ensures the plant has stored enough energy in its rhizomes (thick roots) for next year’s growth. Avoid cutting back in fall or winter, as this can weaken the plant before dormancy.
How often should I water iris plants?
Water iris plants deeply but infrequently—about once a week during the growing season (spring to fall), unless your soil is particularly dry. Overwatering can lead to rot, so ensure the rhizomes are exposed to air and water drains quickly. Reduce watering in winter when the plant is dormant.
Can I divide my iris plants, and how do I do it?
Yes! Divide iris plants every 3–4 years in early fall or late winter to prevent overcrowding. Dig up the rhizomes, separate the sections with a sharp knife, ensuring each has at least one fan of leaves. Replant the divisions with the tops exposed and water lightly. Pro tip: Discard old, woody rhizomes to encourage healthier regrowth!
What should I do if my iris leaves turn yellow or brown?
Yellow or brown leaves can signal overwatering, pests (like iris borers), or fungal issues. First, check for signs of borers (tiny holes or sawdust-like frass). Adjust watering habits and ensure good airflow. If fungal disease is suspected, apply a fungicide and remove affected foliage. Preventative tip: Mulch lightly but avoid piling it around the rhizomes.
Are there low-maintenance alternatives to iris plants?
If iris care feels overwhelming, consider these low-maintenance perennials with similar beauty: daylilies, peonies, or Russian sage. Daylilies thrive in similar conditions but are more forgiving with water and soil. Peonies also bloom reliably with minimal trimming, while Russian sage offers drought tolerance and striking purple blooms.
Wrapping up and next steps
Mastering iris plant maintenance is all about timing, precision, and a little love—just like tending to any garden gem! 🌸 With the right trims, your irises will reward you with vibrant blooms year after year, proving that simple care yields stunning results.
Whether you’re a seasoned gardener or just starting out, these three easy steps will keep your irises thriving.
Now that you’re armed with the know-how, roll up your sleeves and give your irises the attention they deserve. Grab your pruners, pick a sunny day, and enjoy the process—your garden (and future blooms) will thank you! Ready to see those irises shine? 🌿