How To
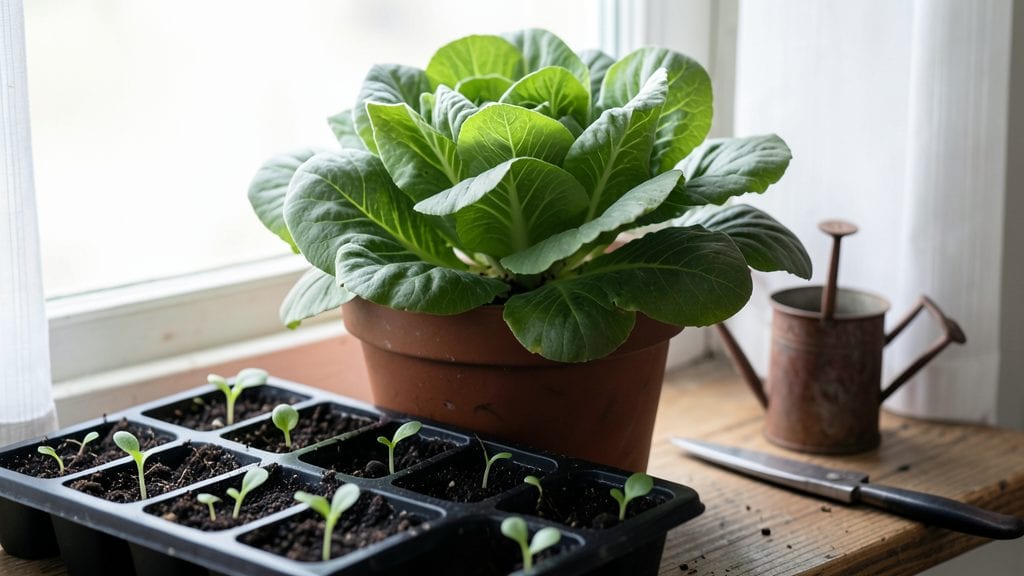
A DIY planting station turned my cramped kitchen into a thriving herb and greens hub—no yard required. I built mine last spring when my windowsill garden outgrew its containers, and now I harvest fresh basil, cilantro, and microgreens year-round without stepping outside.
The best part? It fits on a balcony, patio, or even a sunny countertop, giving you instant access to fresh produce no matter your space.
This project starts with a sturdy base—think pallet wood, repurposed shelves, or even stacked cinder blocks—and adds containers that work with your plants' needs. Herbs like thyme and oregano thrive in shallow pots, while leafy greens need deeper trays.
I used a mix of old wooden crates, plastic grow trays, and hanging pockets to maximize vertical space, and the whole setup cost under $50. The key is keeping it mobile so you can move plants to follow the sun or protect them from afternoon heat.
By midsummer, my station was packed with lush green foliage and fragrant herbs that smell amazing when you brush past them. The real magic happens when you start harvesting: snipping fresh basil for pesto, plucking baby kale for salads, or using chives in homemade dishes.
It's not just about saving space—it's about making fresh ingredients effortlessly accessible, even in the smallest of living areas.
Works for city apartments, suburban backyards, or even a sunny windowsill. The beauty of this setup is how adaptable it is—add trellises for climbing herbs, swap out containers for seasonal plants, or expand it into a full vertical garden as your confidence grows. Let's get you growing!
📚 In This Guide
- What you need
- Instructions
- Tips and common mistakes
- Wrapping up and next steps
What you need
- ● Container or Base: Wooden crate, pallet, or shelf (12"–18" deep, adjustable width)
- ● OR Large plastic storage bin with drainage holes (10+ gallons)
- ● OR Repurposed rolling cart or kitchen island (with legs for airflow)
- ● Growing Medium: High-quality potting soil (sterilized, 10–20 lbs, organic blend preferred)
- ● Perlite or vermiculite (1–2 lbs for drainage and aeration)
- ● Compost (2–3 lbs for nutrient boost)
- ● Drainage: Potting tray or saucer (1–2, depending on container size)
- ● Small gravel or pebbles (1–2 lbs for drainage layer)
- ● Plants: Herbs: Basil, parsley, cilantro, mint, or chives (3–6 starter plants)
- ● Greens: Lettuce, spinach, or kale (2–4 seedlings)
- ● Basic Tools: Trowel or small shovel (for planting)
- ● Measuring cups or spoons (for soil amendments)
- ● Spray bottle (for misting seedlings)
- ● Lighting: LED grow lights (full-spectrum, 12–18" above plants)
- ● Mobility: Casters or wheels (for rolling carts)
- ● Organization: Small labels or chalkboard tags (for plant IDs)
- ● Stackable pots or modular trays (for vertical growth)
- ● Automation: Self-watering reservoir kit (for hands-off care)
- ● Decor: Paint or stain (to match your space)
Step-by-Step instructions for building a DIY planting station
This space-saving hub lets you grow herbs and greens year-round without taking over your kitchen.
Select and Prepare the Base Structure
Choose a sturdy base like a wooden pallet, repurposed shelf, or even a large shallow crate. I prefer a 2-foot by 3-foot wooden pallet because it’s lightweight, affordable, and provides plenty of room for 4 small containers. Sand any rough edges to prevent splinters, then clean the surface thoroughly with a damp cloth to remove dust or debris.
If using a pallet, reinforce the corners with 2x4 lumber if needed—herbs and greens don’t need heavy-duty support, but you want the structure to stay level. Place the base on a flat surface where it gets at least 6 hours of sunlight daily. A south-facing window, balcony, or covered patio works perfectly. Avoid spots where rain or strong winds could disrupt your plants.
Attach or Arrange Containers for Optimal Drainage
Use the 4 gallon-sized containers you’ve chosen—plastic, fabric, or ceramic all work, but make sure each has multiple drainage holes at the bottom. If your containers lack holes, drill ¼-inch holes along the bottom edge using a power drill. Place a small piece of window screen or mesh over each hole to keep soil from escaping while allowing water to drain freely.
Arrange the containers in a way that maximizes airflow between them. I like to space them 3-4 inches apart in a staggered pattern—this prevents fungal diseases and makes it easier to reach each plant without disturbing neighbors. If using a pallet, secure the containers with landscape fabric strips tied loosely around the base to keep them from shifting during watering.
Fill and Amend the Soil for Healthy Growth
Fill each container with 2 gallons of potting mix per the provided list, leaving about 1 inch of space at the top for watering. Press the soil down lightly with your fingers to remove air pockets, but don’t compact it too tightly—roots need room to spread. Mix in ½ cup of compost into the top 2 inches of soil in each container to give your herbs and greens a nutrient boost right from the start.
Water the soil gently until it’s evenly moist but not soggy. You’ll know it’s right when water runs out the drainage holes without pooling at the bottom. Let the containers sit for 10-15 minutes to absorb the moisture, then add your plants. If you’re sowing seeds, follow the packet instructions for depth—most herbs and greens like to be planted ¼ inch below the soil surface. Keep the soil consistently moist until germination occurs.
Plant and Arrange for Sunlight and Airflow
Place your herb and greens plants or seedlings into the containers, spacing them according to their mature size. For example, basil and parsley can share a 12-inch diameter container, while leafy greens like spinach or lettuce thrive in 8-inch pots with 3-4 plants per container. Gently firm the soil around the base of each plant to secure it without packing too tightly.
Rotate the containers a quarter turn every few days so all sides of the plants get even sunlight. This simple step prevents leggy growth and ensures your herbs and greens stay compact and flavorful. Position the planting station where it gets morning sun and afternoon shade if you’re in a hot climate—this protects delicate greens from wilting while still providing enough light for robust growth.
Maintain with Consistent Care and Adjust as Needed
Water your planting station every 2-3 days, checking the top inch of soil to see if it’s dry. Herbs like thyme and rosemary tolerate drier conditions, while greens such as lettuce and kale need consistently moist soil. Use a spray bottle for delicate greens to avoid disturbing the soil, and water at the base of the plants to keep leaves dry—this prevents fungal diseases like powdery mildew.
Fertilize lightly every 4-6 weeks with a balanced liquid fertilizer diluted to half strength. Too much fertilizer can burn young plants, so always follow the package instructions. Harvest leaves as needed—pinch off the outer leaves of greens and the top sets of herbs to encourage bushier growth. With this setup, you’ll have fresh herbs and greens ready in as little as 3-4 weeks, depending on the variety.
Tips & tricks for perfect DIY planting stations
A few simple tricks will help you create a thriving herb and greens garden that lasts all year long.
Base Stability Matters: In Step 1, when selecting your base structure, I can't stress enough how important stability is. If you're using a wooden pallet, place it on a flat, level surface before adding containers. I've seen pallets wobble after just a few waterings—reinforce the corners with 2x4 lumber if needed. This prevents your containers from tipping over, especially when you're harvesting or watering. Trust me, you don't want to lose your basil plant because the whole station tipped during a windy day.
Drainage is Non-Negotiable: During Step 2, when preparing your containers, double-check those drainage holes. I learned this the hard way after my first attempt with containers that had only one small hole. The soil stayed too wet, and my parsley developed root rot within a week. Drill those ¼-inch holes along the bottom edge if needed, and always cover them with window screen. This keeps your soil aerated while preventing soil loss during watering.
Soil Preparation Secret: In Step 3, when mixing your potting soil, take an extra minute to fluff it up gently with your fingers after adding the 2 gallons. This creates tiny air pockets that help roots establish better. I also recommend adding a handful of perlite to each container—it improves drainage without affecting moisture retention. The soil should feel like a damp sponge, not a wet rag.
Sunlight Rotation Strategy: In Step 4, when arranging your planting station, set a reminder to rotate your containers every few days. I use my phone's alarm labeled "Plant Rotation" to remind me. This ensures all sides of your plants get equal sunlight exposure, preventing that leggy growth that makes herbs look sad. Plus, it's a great excuse to check on your plants daily—you'll notice new growth and potential pests more easily.
Pro Tips for Diy Planting Station
- A few simple tricks will help you create a thriving herb and greens garden that lasts all year long.
- Base Stability Matters: In Step 1, when selecting your base structure, I can't stress enough how important stability is.
- Drainage is Non-Negotiable: During Step 2, when preparing your containers, double-check those drainage holes.
Frequently asked questions
Got questions about building your own DIY planting station? You’re not alone! Here are some of the most common concerns—and their easy solutions—to help you grow confidently.
What’s the best location for my planting station?
Place your station where it gets 4–6 hours of sunlight daily (south-facing windows or balconies work best). If natural light is limited, supplement with a grow light (LED or fluorescent) for 12–16 hours/day. Avoid drafty spots or extreme heat—herbs and greens thrive in 60–75°F (15–24°C).
How long does it take to build a DIY planting station?
Most projects take 1–3 hours, depending on complexity. A simple window-box or vertical planter can be done in under an hour with pre-cut materials. If you’re customizing (like adding irrigation), budget 3–4 hours. Pro tip: Pre-measure everything to save time!
Can I make a planting station on a tight budget?
Skip expensive pots—use recycled containers (clean yogurt cups, tin cans, or plastic bottles) or pallets for vertical gardens. Swap store-bought soil for a mix of coconut coir + compost. Even a $10–$20 DIY station can yield fresh herbs and greens in weeks!
What if my plants wilt or turn yellow?
Yellow leaves often mean overwatering or nutrient deficiency. Check soil moisture (stick your finger 1 inch deep—water if dry). For wilting, ensure proper drainage (poke holes in containers!) and trim damaged leaves. Feed with diluted fish emulsion every 2–3 weeks for a boost.
How do I clean and reuse my planting station?
At season’s end, sterilize containers with a 1:10 bleach-water mix (rinse well!). Scrub trays and tools with soapy water. Store in a dry place until next season. Pro tip: Label plants with popsicle sticks to track varieties and avoid confusion!
Wrapping up and next steps
Creating your own DIY planting station is a rewarding way to cultivate fresh herbs and greens—no matter how small your space! With just a few materials and a little creativity, you’ve got a functional, space-saving garden hub that’s ready to thrive. 🌱
Now that you’re inspired, why not start planting today? Grab your supplies, follow the steps, and watch your green oasis grow—one leaf at a time! 🌿 Whether you’re a beginner or a seasoned gardener, every seed you sow is a step toward a healthier, greener lifestyle.