
Planting
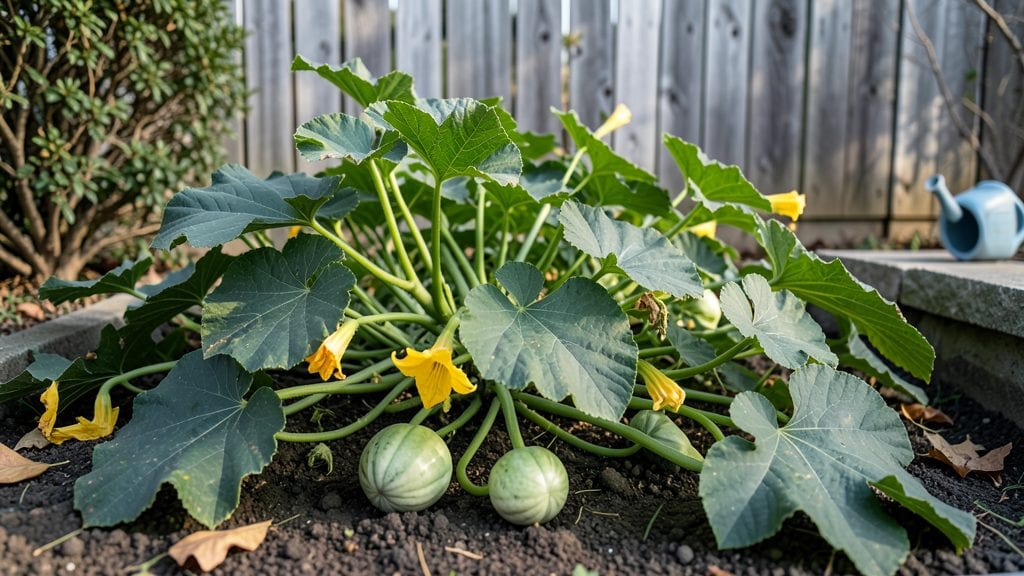
Growing Korean squash plants delivers fragrant, edible vines and sweet, pumpkin-like fruit in just 90 days—far faster than traditional winter squash. I’ve grown this underrated variety for three seasons, and its vigorous vines and dual harvests (fruit and tender shoots) make it a standout for both gardeners and cooks.
The key lies in its warm-season love and unique trellising needs, which I’ll break down step by step to ensure your plants thrive from seed to harvest.
The first thing you’ll notice about Korean squash is how aggressive yet manageable its growth is. Unlike sprawling pumpkins, its vines climb naturally, making them perfect for vertical gardens or small spaces with 3–5 feet of vertical support.
Start seeds indoors 4–6 weeks before last frost, then transplant after soil warms to 60°F or above. The real secret? Consistent moisture—drought stress leads to bitter fruit, but proper mulching keeps roots cool and soil even.
I’ve found that drip irrigation eliminates the guesswork, especially in hot summers.
By mid-summer, you’ll be harvesting young shoots like spinach and watching small gourds form along the vines. The fruit ripens unevenly, so check plants weekly—immature squash tastes best when 3–6 inches long, with tender skin.
Store-harvested varieties can last months, but fresh-picked Korean squash shines in stir-fries, soups, or even candied as a dessert. The vines themselves stay productive until frost, giving you two harvests in one plant.
For experienced growers, succession planting in warm climates extends the season—just stagger seeds every 2 weeks after the last frost. In cooler zones, opt for black plastic mulch to speed soil warming.
And here’s a pro tip: Prune side vines to encourage fruit development, but leave 3–4 main runners for maximum yield. Whether you’re a space-challenged urban gardener or a backyard enthusiast, this squash delivers unmatched productivity with minimal fuss.
📚 In This Guide
- What you need
- Instructions
- Tips and common mistakes
- Wrapping up and next steps
What you need
- ● Korean squash seeds: 3–5 seeds per plant (or 10–15 seeds for multiple plants). Choose Cucurbita moschata varieties like Gyeol-po or Dae-po.
- ● Containers or garden beds: For containers: 5–10 gallon pots (at least 12 inches deep) with drainage holes.
- ● For in-ground planting: Well-draining soil in a sunny spot (6+ hours of sunlight daily).
- ● Potting mix: High-quality organic mix (or garden soil amended with compost).
- ● Compost or fertilizer: Balanced organic fertilizer (10-10-10) or compost tea for nutrient boost.
- ● Watering can or hose: With a gentle spray nozzle for seedlings.
- ○ Trellis or stakes (optional but helpful): 4–6 ft tall for vining varieties to save space.
- ○ Mulch (optional): Straw or shredded leaves to retain moisture and suppress weeds.
- ● Warm soil temperature (at least 60°F/15°C) for planting (use a soil thermometer if unsure).
- ● Patience! Korean squash takes 90–120 days to mature.
- ● Consistent watering (1–2 inches per week) and no overhead watering to prevent disease.
Step-by-step instructions for growing Korean squash plants
Here’s how to cultivate vigorous Korean squash vines that thrive in full sun and deliver sweet, productive harvests within three months.
Prepare the Planting Site for Optimal Growth
Korean squash thrives in well-draining soil with 6-8 hours of direct sunlight daily, so choose a location that receives full sun exposure. Before planting, amend the soil with 2-3 inches of compost to enrich it with organic matter and improve drainage. Work the compost into the top 12 inches of soil to create a loose, fertile bed where roots can spread easily.
Korean squash vines spread aggressively, so allocate at least 3 feet of space per plant or use raised beds to contain their growth. If your soil is heavy clay, mix in 1 part perlite or coarse sand to prevent waterlogging, which can lead to root rot. Test the soil pH—Korean squash prefers a slightly acidic to neutral range of 6.0-7.0. If your soil is too alkaline, add sulfur or peat moss to adjust it before planting.
Plant Seeds or Transplants at the Right Time
Start seeds indoors 4-6 weeks before the last frost date in your region, or direct-sow them outdoors 2-3 weeks after the last frost when soil temperatures reach 60°F or warmer. Plant seeds 1 inch deep in small pots filled with seed-starting mix, pressing them gently into the soil. Keep the mix moist but not soggy, and place the pots in a warm, sunny location or under grow lights to encourage germination.
If you’re transplanting seedlings, harden them off for 7-10 days before moving them outdoors. Choose a cloudy day to transplant, and place each seedling 2-3 feet apart in the prepared garden bed. Bury the stem slightly deeper than it was in the pot to encourage stronger root development. Water the soil thoroughly after planting to settle the roots and eliminate air pockets.
Provide Consistent Watering and Mulching
Korean squash requires 1-2 inches of water per week, delivered consistently to maintain even moisture. Water deeply at the base of the plant, avoiding the leaves to prevent fungal diseases like powdery mildew. Use a drip irrigation system or soaker hose for the most efficient watering, as squash plants are sensitive to sudden changes in soil moisture. Water in the early morning to allow foliage to dry quickly, reducing the risk of disease.
Apply a 2-3 inch layer of organic mulch, such as straw or shredded leaves, around the base of the plant to retain moisture, suppress weeds, and regulate soil temperature. Keep the mulch 2 inches away from the stem to prevent rot. As the vines spread, extend the mulch to cover newly exposed soil, ensuring the plants remain hydrated and protected throughout the growing season.
Fertilize and Monitor for Pests
Feed Korean squash plants with a balanced, organic fertilizer (10-10-10 or similar) 4-6 weeks after transplanting, applying it according to package instructions. Avoid over-fertilizing, as excess nitrogen can lead to lush foliage at the expense of fruit production. Instead, focus on slow-release organic fertilizers or compost tea to provide steady nutrients without burning the roots. Side-dress the plants with additional compost midway through the growing season to support continued growth.
Keep an eye out for common squash pests, such as cucumber beetles, squash bugs, and aphids. Handpick larger pests like squash bugs and drop them into soapy water. For aphids, spray the undersides of leaves with a neem oil solution or introduce ladybugs as natural predators. Rotate crops annually to prevent soil-borne diseases and reduce pest pressure in future seasons.
Harvest and Maintain for Continuous Production
Korean squash reaches maturity in 90 days, producing 3-5 pound fruits with sweet, dense flesh. Harvest when the squash reaches full size but before the skin hardens—this ensures the best flavor and texture. Use a sharp knife or pruners to cut the stem, leaving 1 inch of stem attached to the fruit. Handle squash gently to avoid bruising, which can lead to rot.
After harvesting, continue to care for the plant by removing any yellowed or diseased leaves and watering consistently. If the vines remain healthy, they may produce additional fruits throughout the season. Once the first frost threatens, harvest any remaining squash and store it in a cool, dry place for up to 3 months. Save seeds from your best squash for next year’s planting by allowing a few fruits to fully mature on the vine before harvesting.
Tips & tricks for perfect Korean squash plant growth
Growing Korean squash successfully hinges on understanding its unique needs—here’s how to optimize every step for maximum yield and sweetness.
Sunlight and Soil Preparation: The 6-8 hours of direct sunlight specified in Step 1 is non-negotiable for Korean squash. If your garden receives less than 6 hours, consider using reflective mulch or growing in containers near a sunny wall. For soil preparation, don’t just top-dress with compost—thoroughly incorporate those 2-3 inches into the top 12 inches of soil to ensure roots access nutrients throughout their growth. A soil test before planting is worth the investment; Korean squash particularly struggles in alkaline soils above pH 7.0.
Seed Starting and Transplanting Strategy: When starting seeds indoors 4-6 weeks before last frost, maintain consistent bottom heat around 70°F to accelerate germination. For direct sowing, wait until soil temperatures consistently reach 60°F—colder soil can stunt root development. The 7-10 day hardening off period is critical; gradually expose seedlings to outdoor conditions by moving them to shaded areas for increasing durations each day. This prevents transplant shock that could set your plants back weeks.
Watering and Mulching Technique: The 1-2 inches of water per week guideline assumes average rainfall—track your local precipitation and adjust accordingly. For container-grown plants, this translates to about 1 gallon of water per plant weekly. When applying the 2-3 inch mulch layer, create a small well around each plant stem to direct water precisely where roots need it most. This simple modification can prevent fungal diseases by keeping foliage dry while maintaining soil moisture.
Fertilization Timing and Pest Prevention: The 4-6 week timing for initial fertilization aligns perfectly with when plants establish their root systems. After that, I recommend switching to a liquid fish emulsion every 3-4 weeks instead of relying solely on compost—this provides a quick nutrient boost without risking over-fertilization. For pest control, I’ve found that introducing ladybugs at the first sign of aphids provides immediate relief and establishes a natural predator-prey balance that continues throughout the season.
Pro Tips for Korean Squash Plant
- Growing Korean squash successfully hinges on understanding its unique needs—here’s how to optimize every step for maximum yield and sweetness.
- Sunlight and Soil Preparation: The 6-8 hours of direct sunlight specified in Step 1 is non-negotiable for Korean squash.
- Seed Starting and Transplanting Strategy: When starting seeds indoors 4-6 weeks before last frost, maintain consistent bottom heat around 70°F to accelerate germination.
Frequently asked questions
Got questions about growing Korean squash plants? You’re not alone—this fast-growing, sun-loving vine has its quirks! Below, we tackle the most common queries to help you cultivate a bountiful harvest with confidence.
How long does it take for Korean squash to produce fruit?
Korean squash (like Cucurbita pepo varieties) typically matures in 70–90 days from planting, depending on climate and care. Start seeds indoors 2–3 weeks before the last frost, or direct-sow after soil reaches 60°F (15°C). With warm weather, you can expect first harvests in 3–4 months!
Can I grow Korean squash in containers? If so, what size pot do I need?
Korean squash thrives in 5-gallon or larger containers with drainage holes. Choose a pot at least 18–24 inches wide to accommodate sprawling vines. Use a lightweight potting mix and trellis the plant to save space. Just ensure it gets 6+ hours of sun daily—containers dry out faster than garden beds!
What pests or diseases should I watch for with Korean squash?
Common threats include:
- Squash bugs: Check undersides of leaves for eggs; handpick adults or use neem oil.
- Powdery mildew: Improve airflow, avoid overhead watering, and spray with baking soda solution (1 tsp per quart of water).
- Cucumber beetles: Use row covers early in the season to prevent damage.
Can I substitute Korean squash for zucchini in recipes?
Yes! Korean squash (especially ‘Korean Summer’ or ‘Chun Doo’) is a direct swap for zucchini in most dishes—it’s milder and slightly sweeter. Use it raw in salads, spiralized for noodles, or roasted like zucchini. For stuffed squash, opt for smaller, firmer varieties (under 8 inches long) for better texture.
How do I overwinter Korean squash plants or save seeds?
Korean squash is an annual, so it won’t survive winter outdoors. To save seeds:
- Let a few squash fully mature on the vine (turn orange/yellow).
- Scoop out seeds, clean, and dry in a cool, dark place for 1–2 weeks.
- Store in a paper envelope in the fridge for up to 3 years.
Pro Tip for Beginners
If your Korean squash flowers but no fruit develops, it’s likely due to poor pollination. Gently shake vines near flowers or hand-pollinate with a soft brush. Warm, still weather can also hinder pollinators—plant near bee-friendly flowers to attract helpers!
Wrapping up and next steps
Growing a Korean squash plant is a rewarding journey that brings vibrant, flavorful harvests to your table in just 90 days! 🌱 With the right soil, sunlight, and care, you’ll enjoy sweet, versatile squash perfect for soups, stir-fries, or roasting.
Whether you’re a beginner or seasoned gardener, this sun-loving vine is a fantastic addition to any garden—so roll up your sleeves and get planting!
Ready to take the next step? Start by choosing your seeds or prepping your garden bed—your future harvest is waiting! 🌿