Propagation
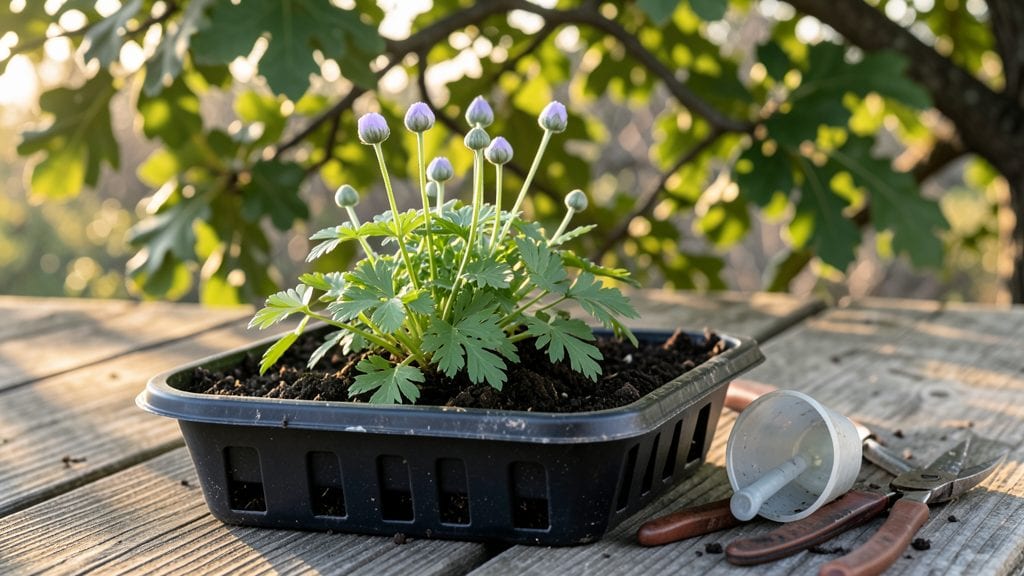
Planting nigella seeds unlocks those dreamy, lacy blooms that dance in the breeze all season long. ✨ I’ve grown love-in-a-mist for years, and the secret to their fast, reliable germination starts with the right timing and soil prep—no fancy tricks, just smart technique.
The seeds pop up within 7-14 days if you follow a few simple rules, and once they’re up, they reward you with bold purple, white, or pink flowers that last from spring to frost.
You’ll need well-draining soil (they hate soggy roots), a sunny spot with at least 6 hours of light daily, and a light hand with watering—these seeds despise being drowned.
Scatter them ¼ inch deep in early spring or late summer for two bloom cycles, and space them 6-12 inches apart to give their feathery foliage room to sprawl. The key? Patience and consistency—they’re slow starters but worth every wait.
By midsummer, you’ll have a cloud of delicate blooms that attract pollinators and add effortless texture to borders or containers. Nigella thrives in poor soil, so it’s perfect for filling gaps or brightening neglected corners. Just avoid overcrowding, and you’ll get long-lasting color with almost no fuss.
Works in zones 3-10, whether sown directly in beds or tucked into pots for balconies. Here’s how to get those first sprouts popping—no black thumb required.
📚 In This Guide
- What you need
- Instructions
- Tips and common mistakes
- Wrapping up and next steps
What you need
- ● Nigella seeds – Choose Nigella damascena (common love-in-a-mist) or other varieties like Nigella sativa (black cumin). Aim for 1–2 tbsp per 10 sq ft for a lush display.
- ● Well-draining potting mix or garden soil – A blend of 50% garden soil and 50% compost works best. For containers, use a lightweight, fast-draining mix (e.g., 60% potting soil + 30% perlite + 10% sand).
- ● Planting area – Full sun to partial shade (at least 4–6 hours of sunlight daily). Nigella thrives in USDA Zones 3–10.
- ● Watering can or hose with a gentle spray nozzle – Nigella seeds hate soggy soil, so avoid overwatering.
- ○ Gloves (optional but recommended) – Nigella seeds can stain hands, and gloves protect against potential skin irritation for some.
- ● Seed-starting trays or biodegradable pots – If sowing indoors 4–6 weeks before last frost, use trays with drainage holes.
- ● Row markers or labels – Nigella grows fast, and labels help track varieties (especially if mixing colors).
- ● Mulch (straw or shredded leaves) – Helps retain moisture and suppress weeds without smothering seedlings.
- ● Organic fertilizer (low-nitrogen, 5-10-5 ratio) – A light application at planting boosts growth (skip heavy fertilizers—nigella prefers lean soil!).
- ● Decorative stakes or cages – If growing tall varieties (like Nigella ‘Miss Jekyll’), stakes prevent flopping in wind.
Step-by-step instructions for planting nigella seeds
Here’s how to grow these effortless, fast-sprouting annuals with minimal fuss.
🌱 Step 1: Choose the Perfect Planting Time and Location
Nigella thrives in cool weather and germinates quickly—plant seeds 2-3 weeks before your last frost date for early blooms. I’ve found they tolerate light frosts, so don’t wait until spring warms up. Choose a sunny spot with 6+ hours of direct sunlight—they’ll reward you with bold, papery blooms all season.
If you’re in a hot climate, opt for fall planting so seeds germinate during cooler months. Nigella hates soggy soil, so avoid low-lying areas where water pools. A well-draining spot with average garden soil is ideal—no need for amendments unless your soil is heavy clay.
💧 Step 2: Scatter Seeds Directly in the Garden
Nigella seeds are self-seeding and don’t transplant well, so sow them directly where they’ll grow. Scatter seeds ¼ inch deep and 6-12 inches apart—they’ll self-thin as they grow. I like to sprinkle them lightly over the soil and barely cover them; they need light to germinate.
Water gently after planting to settle the soil, but don’t soak it. Overwatering at this stage can cause seeds to rot before they sprout. You’ll see tiny green sprouts in 7-14 days—that’s your cue to let nature take over. No need to thin unless seedlings are crowded; nigella handles competition well.
☀️ Step 3: Provide Minimal Care for Fast, Dramatic Blooms
Once seedlings emerge, water only when the top inch of soil feels dry. Nigella is drought-tolerant once established, but consistent moisture during germination ensures strong starts. Avoid wetting the foliage when watering—this prevents fungal issues like powdery mildew.
Fertilizer isn’t necessary unless your soil is poor. A light application of balanced organic fertilizer at planting time is enough. You’ll notice delicate blue, white, or pink flowers in 8-10 weeks, followed by unique seed pods that add texture to dried arrangements.
✂️ Step 4: Deadhead and Collect Seeds for Next Year
To encourage more blooms, snip spent flowers just above the first set of leaves after they fade. This redirects energy to new growth. Nigella’s seed pods are striking—leave some on the plant to dry and collect for next season’s planting. The seeds are easy to harvest once pods turn brown and brittle.
In late fall, cut back foliage to the ground. Nigella often self-seeds prolifically, so you’ll likely find volunteers popping up the following spring. If you want to control spread, deadhead before seeds mature. Either way, these bold annuals reward minimal effort with maximal impact.
Tips & tricks for perfect nigella seeds planting
These game-changing insights will help you achieve fast, dramatic blooms with minimal effort—just like the pros do.
Timing Secret: The 2-3 week window before your last frost is critical for early blooms, but don't stress if you miss it. Nigella seeds can handle light frosts, so even late spring plantings often produce flowers by summer. For hot climates, fall planting is your secret weapon—seeds germinate during cooler months and establish strong roots before summer heat arrives. I've seen fall-planted nigella bloom through winter in mild zones.
Planting Technique: That ¼-inch depth is key—these seeds need light to germinate, so don't bury them too deeply. I use a simple trick: sprinkle seeds lightly over the soil, then gently press them in with a board or your hand. This ensures even coverage while keeping them close enough to surface light. For large areas, mix seeds with sand first to distribute evenly without clumping.
Watering Wisdom: The "only when top inch is dry" rule applies after germination, but during the critical first 14 days, less is more. I've learned the hard way that overwatering at this stage causes seeds to rot before sprouting. Water gently just after planting to settle the soil, then let nature take over. A light misting with a spray bottle works better than a heavy watering can.
Make-Ahead Strategy: You can actually plant nigella seeds up to 2 weeks before your target date and store them in the fridge. Keep them in a sealed container with a damp paper towel to maintain moisture. When ready to plant, let them sit at room temperature for an hour before scattering. This gives you flexibility for unpredictable weather while maintaining fast germination rates.
Pro Tips for Nigella Seeds Planting
- These game-changing insights will help you achieve fast, dramatic blooms with minimal effort—just like the pros do.
- Timing Secret: The 2-3 week window before your last frost is critical for early blooms, but don't stress if you miss ...
- Planting Technique: That ¼-inch depth is key—these seeds need light to germinate, so don't bury them too deeply. I us...
Frequently asked questions
Got questions about growing nigella seeds?
You’re not alone! Here are some of the most common queries—plus quick, practical answers to help you nail that dreamy, lacy bloomscape.
When is the best time to plant nigella seeds?
Nigella seeds are super easy to grow—just scatter them outdoors 2–4 weeks before your last frost (spring) or in early fall for winter blooms. They thrive in cool weather and even self-seed happily! For year-round color, try succession planting every 3–4 weeks.
How long does it take for nigella seeds to germinate?
One of their coolest traits? Fast germination! Nigella seeds typically sprout in 7–14 days when soil temps are 50–70°F (10–21°C). Thin seedlings to 6–12 inches apart once they’re 2–3 inches tall. Pro tip: No need to soak—just plant dry seeds!
Can I grow nigella seeds indoors first?
While possible, nigella seeds don’t transplant well—they prefer to be sown directly in the ground. If you’re in a short growing season, start them indoors 4–6 weeks early in biodegradable pots, then move them outside gently (with soil intact). For best results, direct-sow is easiest!
Why aren’t my nigella seeds sprouting?
No sprouts? Check these fixes:
- Depth: Plant seeds ¼ inch deep—too deep = slower germination.
- Moisture: Keep soil evenly moist (not soggy) until sprouts appear.
- Light: They need full sun (6+ hours/day)—shady spots slow growth.
- Age: Older seeds may need a stratification trick: chill them in the fridge for 1–2 weeks before planting.
What’s the best way to use nigella seeds after harvest?
Beyond their stunning blooms, nigella seeds (aka love-in-a-mist) are edible and aromatic! Use them:
- As a garnish on salads, soups, or baked goods (tastes like onion + pepper).
- In homemade pickles or spice blends (like za’atar).
- As a natural dye (steep seeds in hot water for a golden hue).
Wrapping up and next steps
Growing nigella seeds is a rewarding journey that brings bold, vibrant blooms to your garden with minimal effort—thanks to their fast germination and easy care! Whether you’re a seasoned gardener or just starting, these delicate annuals offer year-round color and a touch of whimsy.
Now that you’re equipped with the right tips and tricks, why not take the next step?
- Start small: Try planting a few seeds in containers or a sunny patch of your yard to see how they thrive.
- Experiment with varieties: Mix and match colors or heights for a stunning, one-of-a-kind display.
- Share the joy: Gift nigella seed packets to fellow plant lovers—it’s a great way to spread the beauty!
Your garden (and future blooms) will thank you! 🌸✨