How To
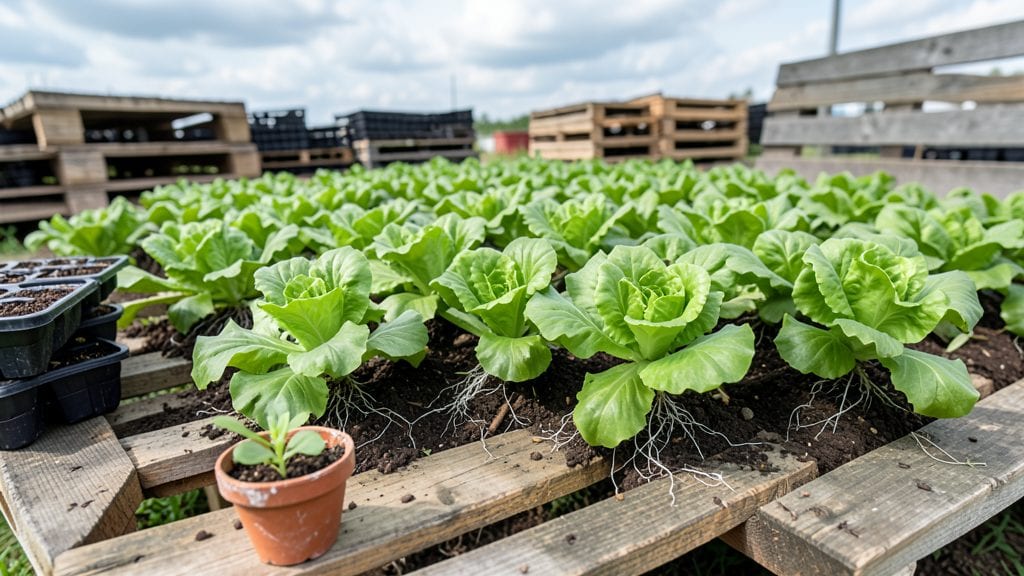
Turn those humble pallets for planting into a vertical garden, and watch my concrete backyard bloom into a lush, herb-filled oasis—no digging required. 🌱 wasted ground area, just lush greenery where there was none before.
You’ll need just a few supplies: untreated pallets (check for the "HT" stamp for heat-treated wood), basic gardening tools, and some potting mix. The best part?
This project costs next to nothing compared to store-bought planters, and you can customize the design to match your yard’s style—rustic, modern, or even painted to blend in.
By the time you’re done, you’ll have a thriving vertical garden that produces food, purifies air, and adds charm to your outdoor space. My pallet planters hold everything from cherry tomatoes to trailing nasturtiums, and the drainage holes I drilled keep roots happy without the mess of traditional beds.
Works in any climate, from sun-drenched patios to shady corners, and adapts to everything from herbs to flowers. Here’s how to make it happen without breaking the bank or your back.
📚 In This Guide
- What you need
- Instructions
- Tips and common mistakes
- Wrapping up and next steps
What you need
- ● Wooden pallets: 2–4 (depending on desired height/width). Choose heat-treated or chemically untreated pallets (marked "HT" or "MB" for safety). Avoid pallets with nails or chemicals.
- ● Drill & bits: 1 (¼"–½" bit for drainage holes).
- ● Screws or nails: 1 lb box (deck screws or galvanized nails for durability).
- ● Landscape fabric: 1 roll (to prevent soil spillage).
- ● Potting soil: 1–2 cubic feet (lightweight, well-draining mix).
- ● Plants: 8–12 (choose compact varieties like herbs, succulents, or shallow-rooted veggies).
- ● Watering can or hose: 1 (with a gentle spray nozzle).
- ● Sandpaper: 120-grit (to smooth rough edges).
- ● Stain or paint: 1 quart (weather-resistant, non-toxic option).
- ● Hanging planters: 4–6 (for trailing plants like strawberries or ivy).
- ● Drip irrigation kit: 1 (for hands-off watering).
- ● Pallet spacers: 4–6 (to create tiers or gaps between pallets).
- ● Gloves & safety goggles: 1 pair each (for handling tools/soil).
Step-by-step instructions for building a pallet vertical garden
Here's how to turn a simple pallet into a thriving vertical garden—no power tools required.
🪴 Step 1: Select and Prepare Your Pallet
Choose a wooden pallet in good condition with no splinters or chemical stains. Plastic-treated pallets aren't safe for edibles. Lay it flat on a stable surface and inspect for loose boards—remove any that wobble with a screwdriver. Sand rough edges lightly to prevent splinters, especially if kids or pets will be near it.
I like to flip the pallet upside down so the slats face upward. This gives you cleaner planting surfaces and better drainage between the boards. If your pallet has metal bands, bend them outward slightly to create extra planting pockets between the wood.
💧 Step 2: Line and Fill with Growing Medium
Lay down landscape fabric over the pallet to prevent soil from falling through the gaps. Secure it with staples or nails along the edges. Then fill each pocket between the slats with 2-3 gallons of potting mix per section, pressing it down gently but not compacting it too tightly.
Leave about ½ inch below the top of each pocket for watering. I like to mix in a handful of compost with the potting mix to give plants a nutrient boost right from the start. Avoid garden soil—it's too heavy and can compact, suffocating roots.
☀️ Step 3: Choose and Plant Your Plants
Select plants that thrive in shallow root spaces like herbs, lettuce, strawberries, or trailing flowers. I recommend starting with 4-6 plants per pallet to avoid overcrowding. Remove plants from their nursery pots carefully, teasing apart roots if they're root-bound.
Dig small holes in the potting mix—just deep enough to accommodate the roots. Place each plant so the top of the root ball sits ½ inch below the pallet's surface. This ensures stability and prevents water from washing away the soil during watering.
🌱 Step 4: Water and Position for Success
Water thoroughly right after planting, letting the water run through the pallet until it emerges from the bottom. This settles the soil and removes air pockets around roots. I like to water from the bottom up by placing the pallet in a shallow tray of water for 10-15 minutes, then letting it drain completely.
Position your pallet in a spot with 6+ hours of sunlight daily. South-facing walls or balconies work best. If you're growing edibles, keep it away from high-traffic areas to avoid contamination. Watch for wilting leaves—this is your signal to water again, usually every 2-3 days depending on your climate.
✂️ Step 5: Maintain and Harvest
Fertilize every 4-6 weeks with a balanced liquid fertilizer to keep plants thriving. I use a spray bottle for easy application. Remove any weeds that sprout between the boards—they compete with your plants for nutrients and water.
Harvest regularly to encourage new growth. For herbs, pinch off leaves as needed. For strawberries, pick fruit when fully ripe. With proper care, your pallet garden will produce for 3-5 years before needing a refresh of potting mix.
Tips & tricks for perfect pallet vertical gardens
Transforming a simple pallet into a thriving vertical garden is easier than you think—here are my go-to tips to make yours flourish.
Pallet Selection Tip: Always choose heat-treated wooden pallets marked with "HT" stamps—these are safe for edibles and free of harmful chemicals. If you're unsure, avoid pallets with metal bands that might contain toxic coatings. I've found that pallets with wider slats (around 3-4 inches) give you more planting space for larger plants like strawberries.
Drainage Strategy: The 10-15 minute bottom-watering technique in Step 4 is a game-changer! Place your pallet in a shallow tray or over a bucket to catch excess water. This method ensures even moisture distribution without over-saturating the roots. For extra drainage, consider adding a layer of pebbles at the bottom of each pocket before adding the potting mix.
Plant Placement: In Step 3, when positioning your plants, place taller varieties like basil or mint in the back pockets and shorter plants like lettuce or strawberries in the front. This creates a natural tiered effect and prevents shading issues. I also recommend spacing plants slightly wider than their root balls—this gives them room to grow without competing for nutrients.
Long-Term Care: To extend your pallet's lifespan beyond the 3-5 year mark, refresh the potting mix every 2 years by removing the old soil and adding 2-3 inches of fresh mix. This prevents nutrient depletion and keeps your plants healthy. I've had my original pallet garden going strong for 7 years by doing this simple refresh!
Pro Tips for Pallets For Planting
- Transforming a simple pallet into a thriving vertical garden is easier than you think—here are my go-to tips to make yours flourish.
- Pallet Selection Tip: Always choose heat-treated wooden pallets marked with "HT" stamps—these are safe for edibles and free of harmful chemicals.
- Drainage Strategy: The 10-15 minute bottom-watering technique in Step 4 is a game-changer!
Frequently asked questions
Got questions about turning pallets into lush vertical gardens? Here are some of the most common ones—and their answers!
What’s the best type of pallet for planting?
Use heat-treated or _HT_-stamped pallets (free of chemicals like methyl bromide). Avoid _MB_-stamped pallets, as they may contain harmful pesticides. Plastic or composite pallets are also safe but pricier. Always sand rough edges before planting!
How long does it take for plants to grow in pallet gardens?
Growth speed depends on plant type, sunlight, and soil quality. Fast growers like herbs (basil, mint) or lettuce may sprout in 2–4 weeks, while veggies (tomatoes, peppers) or flowers (petunias) take 6–12 weeks for full harvests. Monitor moisture—pallets dry out faster than ground soil!
Can I skip pallets and use other materials?
Try repurposed wooden crates, cinder blocks, or even hanging fabric pockets. For a no-wood option, use stacked pots or a wall-mounted planter box. Just ensure drainage holes and sturdy support—safety first!
How do I keep pests away from my pallet garden?
Prevent pests with copper tape (deters slugs/snails), row covers, or companion planting (e.g., marigolds repel aphids). Avoid overwatering—soggy pallets attract fungus gnats. For stubborn critters, try neem oil spray or introduce beneficial insects like ladybugs.
Will my pallet garden survive winter?
In cold climates, disassemble the pallet and store it indoors or cover it with burlap and straw. For hardy plants (kale, pansies), wrap the pallet in insulated frost cloth and add mulch. Drain excess water to prevent rot—pallets aren’t built for snow loads!
Wrapping up and next steps
Transforming old pallets into a thriving vertical garden is more than just a space-saving hack—it’s a creative way to grow your green thumb without sacrificing square footage!
Whether you’re a city dweller with a tiny balcony or a suburban gardener craving vertical flair, this project proves that big ideas don’t need big space. 🌱
Ready to turn your vision into reality? Start by gathering your materials, follow the step-by-step guide, and let your plants climb, thrive, and bring life to every corner. Happy planting—and here’s to a garden that grows up as much as it grows out!
Next step: Sketch your design, pick your plants, and get ready to shop your supplies—your future vertical oasis is just a few cuts away! ✂️🌿