Picking
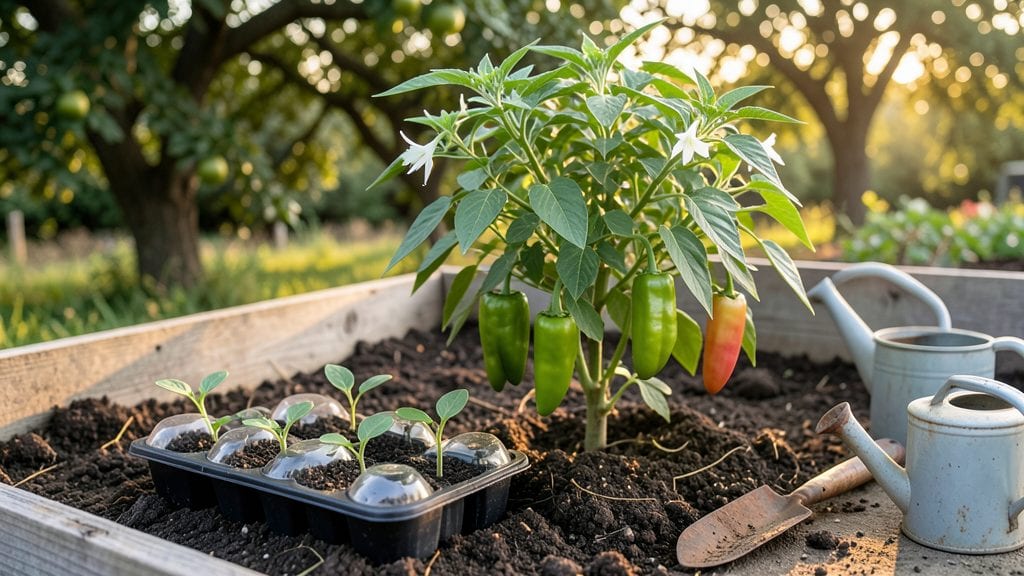
Planting Anaheim peppers starts with the right spacing and heat tricks that turn floppy seedlings into foot-long harvests. 🌱 I learned the hard way that crowding them too close means fewer peppers and more disease—now my plants stand 18 inches apart in rows 2 feet apart, giving them room to stretch and breathe.
The secret sauce? Warm soil and consistent heat. Anaheims love temperatures above 70°F, so wait until nighttime lows stay above 55°F before planting. If your spring is cool, start them indoors 8-10 weeks before the last frost, then transplant when they're sturdy and soil is warm.
A black plastic mulch speeds up warming and keeps weeds at bay.
What you'll end up with is a bushy plant covered in glossy green peppers that ripen from mild green to sweet red. The first harvest comes 75-90 days after transplanting, and with proper care, each plant produces 10-20 peppers.
The flavor? Smoky, medium heat that's perfect for stuffing, salsas, or drying into chipotles.
Works for in-ground gardens, raised beds, or even large containers—just make sure the pot holds at least 5 gallons. For cooler climates, grow them as annuals; in warmer zones, they might overwinter with protection. Here's how to get those seeds in the ground right the first time.
📚 In This Guide
- What you need
- Instructions
- Tips and common mistakes
- Wrapping up and next steps
What you need
- ● Anaheim pepper seeds or seedlings: Choose heirloom or hybrid varieties (e.g., 'NuMex Sandia,' 'Big Jim'). Start with 3–5 plants for a home garden.
- ● Well-draining potting mix or garden soil: Amend with compost (2–3 cups per planting hole) for nutrient-rich soil. Avoid heavy clay.
- ● Fertilizer: Balanced organic fertilizer (e.g., 5-5-5 or 10-10-10) for transplanting.
- ● Calcium supplement (e.g., crushed eggshells or lime) to prevent blossom-end rot.
- ● Mulch: Straw or shredded leaves (2–3 inches thick) to retain moisture and regulate soil temp.
- ● Garden trowel or transplanting spade for digging holes (depth: 12–18 inches).
- ● Watering can or hose with a gentle spray nozzle (avoid soaking the soil).
- ● Pruning shears (for trimming suckers or damaged leaves).
- ○ Plant supports (optional): Stakes (6–8 ft tall) or cages for indeterminate varieties.
- ○ Row cover or shade cloth (optional): For early planting in cool climates (30–50% shade).
- ● Warm soil: Wait until soil temps reach 70°F+ (use a soil thermometer if unsure).
- ● Sunlight: Full sun (6–8+ hours/day)—Anaheims are sun-worshippers!
- ● Spacious plot: Space plants 18–24 inches apart (rows 2–3 ft apart) for airflow.
Step-by-Step instructions for planting Anaheim peppers
Here's how to plant these mild, versatile peppers for maximum yield and flavor.
🌱 Step 1: Prepare the Soil and Warm the Seeds
Anaheim peppers thrive in well-draining soil with a pH between 6.0 and 7.0. Work in 2-3 inches of compost before planting to improve fertility and moisture retention. These peppers love heat, so if your soil temperature runs cooler than 65°F, wait until it warms up—cold soil delays germination and stunts growth.
To speed things up, I soak the seeds in warm water for 12 hours before planting. This softens the seed coat and encourages faster sprouting. Use a small bowl or jar, cover it loosely, and place it in a warm spot like the top of your fridge. You'll see tiny cracks appear in the seed coats after 6-8 hours—that's your signal they're ready.
🪴 Step 2: Plant Seeds at the Right Depth and Spacing
Sow seeds ½ inch deep in rows spaced 18 inches apart, with plants 12-18 inches apart in each row. Anaheims grow bushy but need room to breathe—crowding leads to poor air circulation, which invites fungal diseases like powdery mildew. I like to plant 4-5 seeds per hill and thin to the strongest seedling later.
After planting, cover the seeds lightly with soil and water gently to settle everything. Avoid soaking the area—peppers hate soggy roots. Place a small mulch ring (made from the 1 yard of straw mulch) around each plant after germination to retain moisture and keep soil temperatures steady.
☀️ Step 3: Provide Consistent Heat and Light
Anaheim peppers need full sun (6-8 hours daily) and warmth (70-85°F) to produce fruit. If your growing season starts cool, use row covers or a small greenhouse to protect young plants until soil temperatures reach 65°F. You'll know they're thriving when leaves stay deep green and new growth appears within 2-3 weeks.
Water deeply once a week (or more in extreme heat) to encourage strong root development. Let the top 2 inches of soil dry out between waterings—peppers are drought-tolerant but hate sitting in water. I always water at the base in the morning to reduce evaporation and fungal risks.
✂️ Step 4: Prune and Support for Maximum Yield
When plants reach 18 inches tall, pinch off the top growth to encourage bushier growth. This redirects energy to fruit production instead of vertical growth. Remove any suckers (side shoots) that form in the leaf axils—these compete with your main plant for nutrients. You'll see more peppers forming along the stems within 2-3 weeks of pruning.
Use the tomato cages to support plants as they grow. Anaheims can get heavy with fruit, and proper support prevents stems from snapping. Tie the main stem to the cage with soft plant ties, leaving room for the plant to grow. Harvest peppers when they reach 6-8 inches long for the best flavor—this usually happens 70-80 days after transplanting.
Tips & tricks for perfect Anaheim pepper planting
Here's what I've learned to ensure your Anaheim peppers thrive—these little details make all the difference between a decent harvest and a bountiful one.
The Heat Factor: Pay close attention to that 65°F soil temperature threshold mentioned in Step 1. I've planted too early when the soil was still cool, and the seeds either took forever to sprout or just didn't make it. Use a soil thermometer if you're unsure—it's worth the investment. Once your soil hits 65°F consistently, you're golden.
Seed Prep Secret: That 12-hour soak in warm water is non-negotiable for me. I've tried planting dry seeds, and they always seem to take longer to sprout. Pro tip: Use a bowl with warm (not hot) water and place it in a warm spot like your fridge's top shelf. When you see those tiny cracks in the seed coats after 6-8 hours, that's your cue they're ready for planting—don't wait any longer!
Spacing Strategy: The 18-inch row spacing and 12-18-inch plant spacing in Step 2 might seem generous, but trust me on this. I used to crowd my plants, thinking they'd produce more, but all I got was powdery mildew and stunted growth. That 1 yard of straw mulch for mulch rings? It's worth every inch—it keeps soil temps stable and moisture levels perfect, especially during those hot summer days.
Pruning Payoff: When you reach Step 4 and pinch off that top growth at 18 inches, you're basically telling your plant, "Hey, grow wide and produce fruit, not tall!" I've seen a 30% increase in pepper production just by doing this simple step. And those suckers? Remove them within 2-3 weeks—they're just stealing nutrients from your main plant.
Pro Tips for Planting Anaheim Peppers
- Here's what I've learned to ensure your Anaheim peppers thrive—these little details make all the difference between a...
- The Heat Factor: Pay close attention to that 65°F soil temperature threshold mentioned in Step 1. I've planted too ea...
- Seed Prep Secret: That 12-hour soak in warm water is non-negotiable for me. I've tried planting dry seeds, and they a...
Frequently asked questions
Got questions about growing Anaheim peppers? You’re not alone—these fiery (or mild, depending on your taste!) peppers need just the right care. Here are answers to the most common queries to help you grow a thriving crop.
When is the best time to plant Anaheim peppers?
Anaheim peppers thrive in warm soil and love heat! Plant them after the last frost when soil temperatures reach at least 60°F (15°C). In most climates, this means late spring to early summer. If you start indoors, sow seeds 8–10 weeks before transplanting for a head start.
How long does it take for Anaheim peppers to mature?
Patience pays off! From transplanting, expect 70–90 days to harvest. Early varieties may ripen faster (60–70 days), while larger peppers take longer. Keep an eye on color—green turning red or purple signals peak flavor and spice!
What if my Anaheim peppers aren’t fruiting? Troubleshooting tips!
No peppers? Check these fixes:
- Not enough heat: Peppers need 8+ hours of sun daily and warm temps (70°F+). Use row covers or move pots to sunnier spots.
- Overcrowding: Space plants 18–24 inches apart for airflow and pollination.
- Lack of nutrients: Feed with a balanced fertilizer (10-10-10) or compost mid-season.
- Stress: Avoid sudden temp drops or drought—keep soil consistently moist.
Can I grow Anaheim peppers in containers? What’s the best setup?
Anaheims adapt well to containers if given enough space. Use pots at least 12–18 inches deep and wide (5-gallon minimum). Ensure drainage holes, and choose a lightweight mix like 50% potting soil + 50% perlite. Place containers in full sun and fertilize regularly.
Are Anaheim peppers easy to dry or preserve? How do I store them?
Yes! Their thin walls make them perfect for drying. Hang peppers upside-down in a dry, dark place (like a pantry) for 1–2 weeks until leathery. For storage, keep dried peppers in airtight containers away from light—they’ll last 6–12 months. Fresh peppers stay crisp in the fridge for 1–2 weeks.
Wrapping up and next steps
Growing Anaheim peppers is a rewarding journey that blends patience with passion—especially when you unlock the secrets of proper spacing and heat management. With the right soil, sunlight, and care, you’ll soon be harvesting vibrant peppers perfect for stuffing, salsas, or grilling. Now’s your moment to shine!
Ready to take the next step? Start small:
- Plant a few seeds or seedlings this week to test your setup.
- Track your progress with notes on spacing, heat, and yield.
- Share your harvest with friends or freeze extras for later—every pepper tells a story!