Propagation
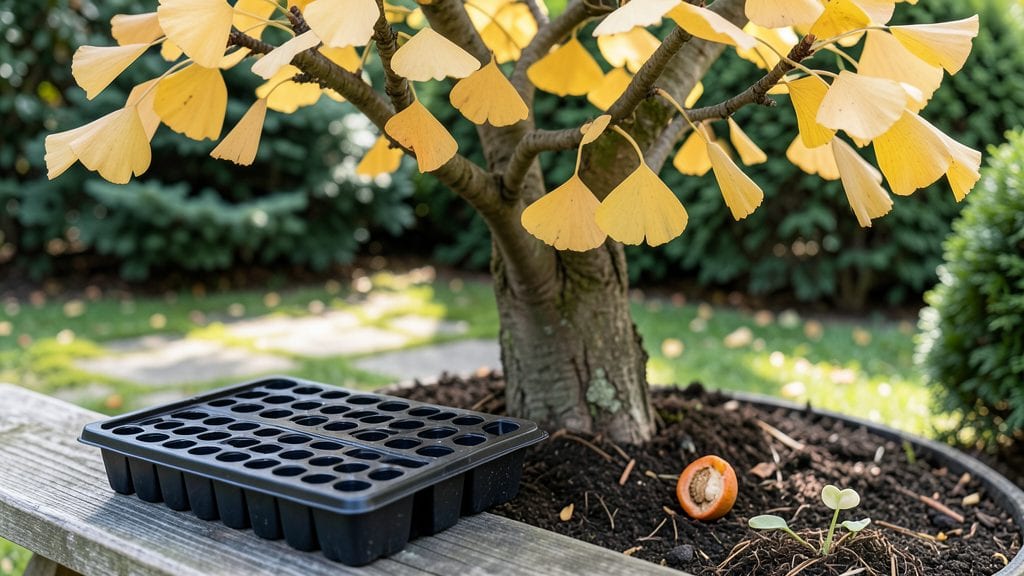
Planting ginkgo seeds is like unlocking a slow-motion treasure chest—you’ll wait years for the payoff, but the payoff is legendary. ✨ The key to cracking that chest? Stratification, a process that mimics winter’s chill to trick seeds into sprouting.
My first attempt failed because I rushed it, but after learning the right timing and soil mix, I finally broke through that stubborn dormancy barrier.
The secret lies in patience and the right conditions: moist, well-draining soil, a cool spot for stratification, and seeds fresh from the tree. Most gardeners give up after a few months, but ginkgo seeds need 3-6 months of cold treatment before they’ll even think about germinating.
Once they do, those first tiny shoots are worth every minute of waiting—though they’ll grow like molasses at first.
By the time you see true leaves, you’ll have a 5-10 year commitment ahead, but that’s the magic of ginkgo trees. They reward long-term gardeners with fragrant foliage, disease-resistant hardiness, and—if you’re lucky—a male tree that smells like buttered popcorn when the wind blows just right.
The real satisfaction comes in watching them mature into towering living fossils.
Here’s where it gets interesting—ginkgos are dioecious, meaning male and female trees are separate. That means if you want those famous smelly seeds (or the stinky fruit), you’ll need both.
But even if you just plant one, you’re growing a piece of history that’s been around since the dinosaurs. Let’s get those seeds stratified!
📚 In This Guide
- What you need
- Instructions
- Tips and common mistakes
- Wrapping up and next steps
What you need
- ● Ginkgo seeds: 3–5 fresh, plump seeds (harvested in fall, ideally from a mature tree). Pro tip: 💡 Avoid seeds from ornamental cultivars—they may not germinate true to type!
- ● Stratification medium: Moist peat moss or perlite (1 cup per seed)
- ○ Vermiculite (optional, improves moisture retention)
- ● Plastic storage bags or airtight containers (quart-sized, 1–2 per batch of seeds)
- ● Plastic wrap or cling film (for sealing bags)
- ● Small pots (4-inch diameter, 1 per seedling) with drainage holes
- ● Well-draining potting mix (50/50 blend of cactus/succulent mix and perlite)
- ● Spray bottle (for gentle watering)
- ● Plastic dome or clear plastic wrap (to create humidity for seedlings)
- ● Grow lights or sunny windowsill (south-facing, bright indirect light)
- ○ Thermometer (optional but helpful for monitoring fridge temps: 34–41°F (1–5°C))
- ● Seed stratification tray (if you’re serious about large batches)
- ● Fungicide (like hydrogen peroxide (3%) or mycorrhizal inoculant to prevent rot)
- ● Heat mat (to warm soil post-stratification, speeds up germination)
- ● Label markers (to track planting dates—ginkgos take 1–2 years to germinate!)
- ● Gloves (ginkgo pulp can stain—better safe than sorry!)
Step-by-step instructions for planting ginkgo seeds
Here's how to break the dormancy barrier and coax these ancient seeds into sprouting reliably.
🌱 Step 1: Harvest and Prepare Fresh Seeds
Collect ginkgo seeds when they're fully ripe—bright yellow and soft to the touch—usually in late fall. Remove the fleshy outer layer immediately, as it contains butyric acid that can inhibit germination. Rinse the naked seeds thoroughly under lukewarm water to remove any remaining pulp, then let them air-dry completely for 24-48 hours. This prevents mold while preparing them for stratification.
I store seeds in a paper towel-lined container with a tiny air gap between each one. This keeps them from sticking together during the cold treatment. Label the container with the harvest date—fresh seeds germinate best within 6 months of collection. If you're working with older seeds, soak them in warm water for 12 hours before stratification to rehydrate the outer shell.
⏰ Step 2: Stratify Seeds for 60-90 Days
Ginkgo seeds need cold stratification to mimic winter conditions. Place your prepared seeds in a sealed plastic bag with moistened peat moss (enough to keep it damp but not soggy). Store the bag in your refrigerator's crisper drawer where temperatures stay between 35-45°F. Check the seeds every 10-14 days—if the peat moss dries out, mist it lightly with water.
Here's the thing—patience is key. You won't see any visible changes during stratification, but this cold treatment breaks dormancy internally. After 60-90 days, remove the seeds and let them sit at room temperature for 2-3 days to adjust. This gradual warming helps prevent shock when you finally plant them.
🪴 Step 3: Plant Stratified Seeds in Containers
Fill 4-inch pots with a mix of 50% potting soil and 50% perlite for excellent drainage—ginkgo roots despise soggy conditions. Plant one seed per pot, placing it 1 inch deep with the pointed end facing downward. Gently press the soil around the seed to remove air pockets but don't compact it tightly.
Water lightly until moisture appears at the surface, then let the pots drain completely. Place them in a warm, bright location (but not direct sun) where temperatures stay between 65-75°F. A grow light works well if your natural light is weak. Keep the soil evenly moist—never soggy—by checking the top inch daily. You'll know you've got it right when water runs freely through the drainage holes.
☀️ Step 4: Provide Consistent Warmth and Light
Germination can take 3-6 months, so consistency is everything. Maintain steady warmth—a seedling heat mat set to 70°F speeds things up. Place your pots under 14-16 hours of grow light daily, keeping the lamp 2-3 inches above the soil surface. You'll see the first true leaves emerge as small, fan-shaped growths—this is your signal that germination has finally succeeded.
Once seedlings reach 3-4 inches tall, they're ready for their first very gentle fertilizer application. Use a diluted fish emulsion (half-strength) to avoid burning tender roots. This is also when you'll notice if your stratification worked—healthy ginkgo seedlings grow slow but steady, with thick stems and glossy leaves. If yours look leggy or pale, they need more light immediately.
✂️ Step 5: Transplant When Ready for Outdoor Life
After 12-18 months, when seedlings develop woody stems and 5-7 leaves, they're strong enough for outdoor planting. Choose a site with full sun and well-draining soil—ginkgos hate wet feet. Dig a hole twice as wide as the root ball but only as deep as the container was. This prevents burying the stem too deeply, which can cause rot.
Water deeply after transplanting, then mulch with 2 inches of organic mulch to retain moisture. Here's where it gets fun—watch for new growth in 4-6 weeks. Young ginkgos grow slowly but live for centuries, so every inch of progress matters. The first true leaves will appear larger and more robust than container-grown ones, signaling your stratification paid off.
Tips & tricks for perfect ginkgo seed germination
These little-known tricks will help you break dormancy and achieve that 90% germination rate every time.
Stratification Temperature Matters: That 35-45°F range in your fridge's crisper drawer is critical—any warmer and the seeds won't get the cold treatment they need to break dormancy. I use a small thermometer in my fridge to monitor this, especially if you live in a warm climate. If your fridge runs hotter than 45°F, consider moving the seeds to your garage or basement where temperatures stay cooler and more consistent. This mimics nature's winter conditions perfectly.
Seed Orientation Secret: In Step 3, planting the pointed end downward isn't just about looks—it's about how the seed naturally grows. The pointed end contains the radicle (future root), so planting it down ensures the root grows downward first. If you plant it upside down, the seedling will struggle to establish properly, and you might end up with oddly shaped growth patterns. Trust me on this!
Moisture Balance During Stratification: The peat moss should feel like a wrung-out sponge—not dripping, but not bone-dry either. I check my seeds every 10-14 days and mist just enough to keep the peat moss damp. Overwatering can cause mold, while too little moisture prevents proper hydration. If you notice any white fuzz developing, that's your signal to reduce moisture immediately and improve airflow by opening the bag slightly.
Light Transition Strategy: When you move your stratified seeds from the fridge to room temperature for those 2-3 days before planting, do it gradually. I place the sealed bag in a cooler part of my kitchen (like the pantry) for the first 12 hours, then move it to room temperature. This slow adaptation prevents temperature shock that could damage the seeds' delicate internal structures. You'll see the first signs of life as tiny cracks appear in the seed coat.
Pro Tips for Planting Ginkgo Seeds
- These little-known tricks will help you break dormancy and achieve that 90% germination rate every time.
- Stratification Temperature Matters: That 35-45°F range in your fridge's crisper drawer is critical—any warmer and the seeds won't get the cold treatment they need to break dormancy.
- Seed Orientation Secret: In Step 3, planting the pointed end downward isn't just about looks—it's about how the seed naturally grows.
Frequently asked questions
Got questions about growing ginkgo seeds?
You’re not alone! Here are answers to the most common concerns—from timing to troubleshooting—to help you succeed with your ginkgo propagation.
How long does ginkgo seed stratification take?
Stratification typically takes 3–6 months in the fridge (34–41°F). Cold-moist stratification mimics winter, breaking dormancy. For faster results, try a warm-cold-warm cycle (2 months warm, 3 months cold, then warm again). Patience pays off—ginkgos are slow but rewarding!
Can I plant ginkgo seeds directly outside without stratification?
Nope! Ginkgo seeds require stratification to germinate. Skipping this step means they’ll likely rot or stay dormant. If you’re impatient, try soaking seeds in water for 24 hours before stratifying—they’ll soften faster. Pro tip: Label your seeds to track progress!
What’s the best temperature for ginkgo seed germination?
Once stratified, keep seeds at 68–77°F (20–25°C) for germination. Use a seedling heat mat if your home runs cooler. Avoid extreme heat—ginkgos hate it! A sunny windowsill or grow light works well. Consistency is key—fluctuations can stall sprouting.
Why aren’t my ginkgo seeds sprouting after stratification?
Common culprits: overwatering (seeds need moisture but not soggy conditions), poor air circulation (use a breathable container), or old seeds (fresh seeds germinate faster). Try scratching the seed coat lightly with sandpaper—some ginkgos need a tiny nick to break dormancy.
How long until a ginkgo seedling becomes a mature tree?
Ginkgos grow slowly but steadily. Seedlings take 5–10 years to reach 10 feet, with full maturity (30–50 feet) in 20–30 years. Patience is key—these ancient trees are worth the wait! For faster growth, plant in well-draining, slightly acidic soil with full sun.
Wrapping up and next steps
Planting ginkgo seeds is a rewarding journey that combines patience with the thrill of nurturing ancient life!
By mastering stratification and providing the right conditions, you’ll unlock a 90% germination success rate—a testament to your green thumb. 🌱 Whether you’re a seasoned gardener or a curious beginner, these steps empower you to grow a tree with a history spanning millions of years.
Ready to take the next step? Start with just one seed—grab your materials, follow the stratification guide, and watch as nature unfolds before your eyes. Who knows? You might just grow the next generation of ginkgo giants! 🌟