
Container Gardens
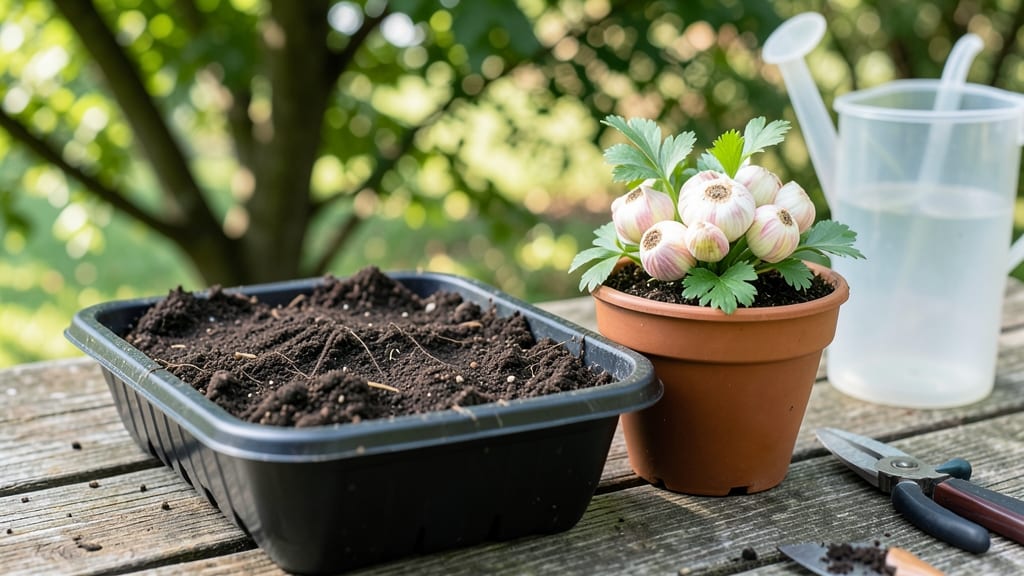
Planting ranunculus tubers transforms a winter dormancy into a spring explosion of papery blooms that look like they’re made of silk. 🌸 I’ve planted these delicate tubers for years, and the secret to their success isn’t complicated—it’s about timing, soil, and a little patience that pays off in vibrant clusters by late spring.
The key starts with well-draining soil mixed with perlite or sand to prevent rot, since soggy tubers turn to mush faster than you’d think. Plant them 3–4 inches deep, about 2–3 inches apart, and keep them in a spot with full sun once the last frost passes.
Most gardeners overlook the spacing, but crowding leads to weak stems and fewer blooms—trust me, you’ll notice the difference.
By early summer, you’ll be rewarded with 3–6 inch stems topped with clusters of blooms that last for weeks. The flowers even make great cut flowers for bouquets, and the plants often rebloom if you deadhead spent blooms.
Just watch for slugs—they adore these tender stems, so a light mulch or row cover helps protect them.
This method works for containers, garden beds, or even hanging baskets, making it perfect for small spaces or urban balconies. The tubers are also perennial in warm climates, so with proper care, you’ll have them popping up year after year. Ready to grow these showstoppers?
📚 In This Guide
- What you need
- Instructions
- Tips and common mistakes
- Wrapping up and next steps
What you need
- ● Ranunculus tubers: 50–100 tubers (depending on desired coverage; larger tubers yield bigger blooms). Choose high-quality, firm tubers (avoid soft or moldy ones).
- ● Well-draining potting mix: 10–15 lbs (for containers) or amend garden soil with 50% perlite/sand to improve drainage. Avoid heavy clay.
- ● Containers or garden bed: For containers: 6–12" deep pots with drainage holes (1 tuber per 2–3 sq. inches of surface area).
- ● For garden beds: Full sun (6+ hours/day) and loose, fertile soil.
- ● Watering can or hose with gentle spray: Tubers hate soggy conditions—opt for fine misting.
- ○ Slow-release fertilizer (optional but recommended): 1 tbsp per sq. ft. of planting area (look for a 10-10-10 or 20-20-20 NPK ratio).
- ● Garden trowel or small shovel: For digging planting holes (tubers should sit 1" deep, eyes-up).
- ○ Gloves (optional): Protect your hands from prickly stems or sharp soil.
- ● Ruler or measuring tape: Space tubers 2–3" apart (closer = denser blooms).
- ● Spray bottle: Lightly mist tubers before planting to encourage root growth.
- ● Timing: Plant tubers 6–8 weeks before your last frost date (they thrive in cool weather, 40–60°F).
- ○ Pre-soaking (optional): Soak tubers in lukewarm water for 1 hour to kickstart sprouting.
- ● Sunlight check: Ensure your planting spot gets full sun (partial shade = leggy stems).
How to plant ranunculus tubers for stunning spring blooms
Transform your garden with paper-like blooms—here’s my foolproof method for planting ranunculus tubers.
🌱 Step 1: Soak the Tubers Overnight
Ranunculus tubers have a tough outer skin that needs softening before planting. Place them in a shallow container and cover with lukewarm water for 12-24 hours. This step ensures faster, more uniform sprouting. You’ll know they’re ready when the outer layer starts to wrinkle slightly.
Drain the water completely before handling. I like to spread them on a paper towel to dry for 30 minutes—this prevents rot later. Tubers that feel damp but not soggy are perfect for planting.
🪴 Step 2: Prepare Containers or Garden Beds
Ranunculus thrives in well-draining soil, so choose containers with drainage holes or a garden spot with loose, sandy soil. Mix 1 part perlite into the first 2 inches of soil to improve drainage. If planting in pots, use a 6-inch diameter container per 3-5 tubers—crowding leads to weak stems.
Work the soil until it’s light and airy, like crumbled cake. Press down gently to create a firm base, but avoid compacting it. The goal is soil that holds moisture but drains freely—ranunculus hates soggy roots.
☀️ Step 3: Plant Tubers at the Right Depth
Place each tuber 1-2 inches deep, with the pointed end facing up. Space them 2-3 inches apart in containers or 4-6 inches apart in garden beds. The key here is depth—planting too shallow causes stems to flop, while burying them too deep delays blooms.
Gently cover with soil and pat lightly to secure. Water just enough to moisten the soil, then let it dry slightly before watering again. You’ll see tiny green sprouts emerge in 4-6 weeks—this is your signal everything’s working.
💧 Step 4: Provide Consistent Moisture and Light
Keep the soil evenly moist but never soggy. Water when the top ½ inch feels dry—this prevents tuber rot. Place containers in a spot with full sun (6+ hours daily), or under grow lights if indoors. Leggy stems mean your plants aren’t getting enough light.
Once sprouts reach 3-4 inches tall, reduce watering slightly. Overwatering now causes blooms to split or rot before they open. You’ll know you’ve got it right when stems are sturdy and leaves are bright green.
⏰ Step 5: Fertilize for Vibrant Blooms
After 4-6 weeks of growth, switch to a balanced liquid fertilizer (10-10-10) every 2-3 weeks. This boosts flower production and keeps stems strong. I dilute it to half-strength—they’re sensitive to salt buildup.
Watch for buds forming in late winter. If your stems grow too tall, stake them gently to prevent flopping. You’ll see the first blooms in 8-12 weeks, depending on your climate—these delicate, layered flowers are worth the wait.
✂️ Step 6: Deadhead and Extend the Season
Pinch off spent blooms to encourage more flowers. Cut stems back by ⅓ after flowering to promote a second flush of blooms. If growing in containers, move them to a cooler spot (50-60°F) in late summer to slow growth and prevent bolting.
After the first frost, dig up tubers, dry them, and store in a cool, dark place until replanting next season. With proper care, your ranunculus will reward you with years of effortless, show-stopping blooms.
Tips & tricks for perfect ranunculus planting
These simple tricks will help you avoid common pitfalls and get those stunning blooms every time.
The Soaking Secret: In Step 1, don't skip the wrinkling test—this tells you the tubers are perfectly hydrated. If they feel mushy after the 12-24 hour soak, drain immediately and pat dry. Over-soaking causes rot before sprouting even begins. I've ruined three batches by ignoring this wrinkle signal!
Drainage is Non-Negotiable: For Step 2, if you're planting in garden beds without perlite, mix in coarse sand instead. The goal is soil that drains like a sponge—not like a swamp. I learned this the hard way when my first batch developed root rot from soggy soil.
Depth Matters More Than You Think: In Step 3, use your finger to check the 1-2 inch depth—this prevents the "floppy stem syndrome" I see all the time. Planting too shallow makes stems bend under their own weight, while too deep delays blooms by weeks. The pointed end up is your visual guide!
Light and Water Balance: After those 4-6 weeks of growth in Step 4, watch for the "3-4 inch rule"—this is when you reduce watering. Leggy stems mean your plants are stretching for light, while drooping leaves mean overwatering. Both are easy to fix if caught early!
Pro Tips for Planting Ranunculus Tubers
- These simple tricks will help you avoid common pitfalls and get those stunning blooms every time.
- The Soaking Secret: In Step 1, don't skip the wrinkling test—this tells you the tubers are perfectly hydrated.
- Drainage is Non-Negotiable: For Step 2, if you're planting in garden beds without perlite, mix in coarse sand instead.
Frequently asked questions
Got questions about planting ranunculus tubers?
You’re not alone—these delicate blooms can feel a little tricky at first! Below, we’ve rounded up the most common queries to help you grow a stunning display with confidence.
When is the best time to plant ranunculus tubers?
Plant your tubers 8–10 weeks before your last expected frost for spring blooms. In warmer climates, you can plant in late fall for winter/spring color. Avoid planting too early—they need cold stratification to wake up! For most gardeners, September–October (fall) or February–March (early spring) works best.
Can I plant ranunculus tubers in winter?
Yes, but with caution! If your winters are mild (above 20°F/-7°C), you can plant in late fall. In colder zones, wait until spring. If planting in winter, cover tubers with mulch or straw to protect them from freezing. Otherwise, store them in a cool, dry place until spring.
What if my ranunculus tubers rot after planting?
Rot usually happens from overwatering or poor drainage. Ensure your soil is well-draining (mix in perlite or sand if needed) and water only when the top inch is dry. If rot appears, remove affected tubers immediately and replant in fresh, dry soil. Never let them sit in soggy soil!
How do I get ranunculus to rebloom?
Ranunculus are perennial in warm climates but often treated as annuals in colder areas. To encourage reblooming, deadhead spent blooms and fertilize lightly with a balanced 10-10-10 formula every 4–6 weeks. In cooler zones, dig up tubers after frost, store them dry, and replant the following season.
What’s a good alternative if ranunculus is hard to find?
If you’re struggling to source tubers, try these easy-to-find, similarly stunning alternatives:
- Anemones – Long-lasting, drought-tolerant blooms in shades of pink, white, and blue.
- Iceland Poppies – Delicate, papery flowers that thrive in cool weather.
- Sweet Peas – Fragrant climbers with a romantic, old-fashioned charm.
- Dahlia Tubers – Bold, colorful blooms (though they need more upkeep).
Wrapping up and next steps
Planting ranunculus tubers is a rewarding way to add vibrant, papery blooms to your garden with minimal effort! Remember to choose healthy tubers, plant them at the right depth, and provide well-draining soil for the best results.
With a little patience, you’ll be greeted by stunning clusters of color that’ll brighten up any container or garden bed.
Ready to transform your space? Grab your tubers, follow these steps, and soon you’ll be sharing your show-stopping blooms with fellow gardeners! 🌸 For even more inspiration, check out our container garden ideas to mix and match your new ranunculus with complementary plants.