Propagation
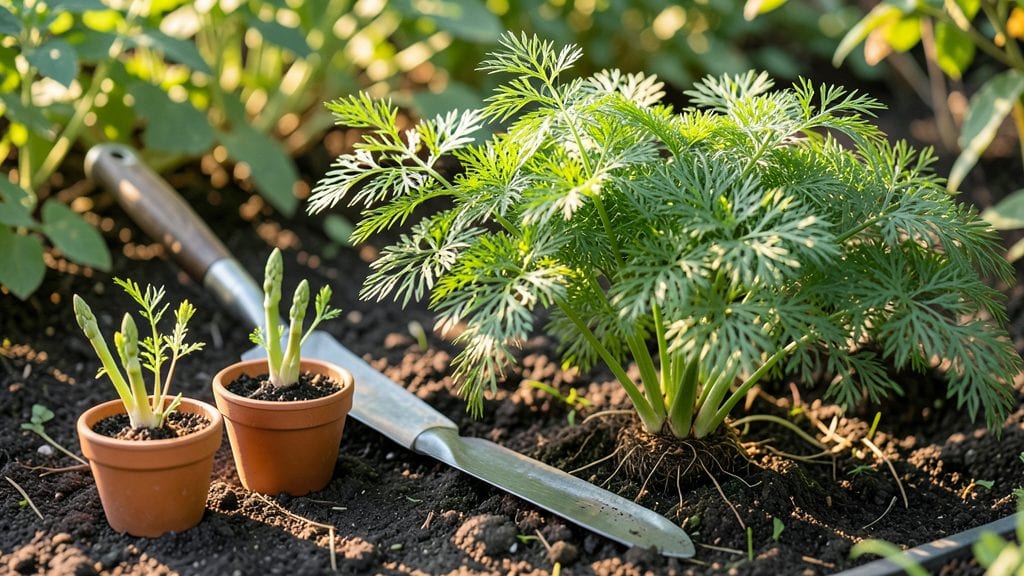
Propagating asparagus plants from tiny crowns means you’ll be harvesting spears for years—starting with just a few inches of root. 🌱 I’ve turned stubborn grocery store crowns into thriving patches by following the right timing and soil tricks.
The key isn’t just digging up roots; it’s giving them the perfect start to break dormancy and grow strong.
You’ll need mature asparagus crowns (or even store-bought ones with roots), a shovel, sharp pruners, and loose, well-draining soil. Plant them in trenches about 6 inches deep, spacing crowns 12–18 inches apart.
The first year is all about building roots—no harvesting—so patience pays off big time. I’ve seen crowns I planted in April already sending up ferns by June.
Once established, you’ll get spears for 15+ years with minimal effort. The harvest starts in year three, and the flavor? Nothing beats homegrown. Just avoid cutting too many spears the first year—let those roots grow. I’ve learned the hard way that rushing leads to weak plants.
This method works in zones 3–10, though colder climates need extra mulch in winter. Whether you’re expanding an existing patch or starting fresh, asparagus propagation is one of the most rewarding gardening investments you’ll make. Let’s get those crowns growing!
📚 In This Guide
- What you need
- Instructions
- Tips and common mistakes
- Wrapping up and next steps
What you need
- ● Asparagus crowns: 1-2 healthy, dormant crowns (preferably 1-year-old or older, with 3-5 buds). Look for plump, firm crowns with no signs of rot or damage.
- ● Garden soil or potting mix: 1 bag (50 lbs) of well-draining, nutrient-rich soil (amend with compost for best results). Avoid heavy clay or soggy mixes.
- ● Garden bed or containers: For in-ground planting: A trench or bed 12–18 inches deep and 12–18 inches wide, with loose, fertile soil.
- ● For container growing: 5-gallon pots or larger (at least 12 inches deep) with drainage holes.
- ● Compost or well-rotted manure: 1–2 gallons to enrich the soil before planting.
- ● Mulch: Straw, wood chips, or shredded leaves (1–2 inches thick) to retain moisture and suppress weeds.
- ● Watering can or hose with a gentle spray nozzle: For consistent moisture without disturbing the crowns.
- ● Garden gloves: To protect your hands while handling soil or crowns.
- ● Soil tester kit: To check pH (ideal range: 6.5–7.5). Adjust with lime or sulfur if needed.
- ● Fertilizer (low-nitrogen, high-phosphorus): Like a 5-10-10 blend, applied sparingly after the first year.
- ● Row cover or frost cloth: For young plants in cooler climates (spring/fall protection).
- ● Plant labels: To track varieties and planting dates.
Step-by-Step instructions for propagating asparagus plants
Here's how to turn small asparagus crowns into thriving perennial harvests.
🌱 Step 1: Select and Prepare Healthy Crowns
Choose 1-year-old asparagus crowns with 3-5 healthy buds—these will develop into strong stems. Inspect each crown for signs of rot or damage; discard any that look mushy or discolored. I always pick crowns from mature plants that have been producing well for at least 3 years, as they've proven their vigor.
Trim any damaged roots or stems with sterilized pruners, cutting back to clean tissue. Soak the crowns in lukewarm water for 30 minutes to encourage root growth and remove any dirt clinging to the roots. This step is critical—it helps prevent disease and gives the roots a head start.
🪴 Step 2: Plant Crowns in Well-Draining Soil
Dig a trench 6-8 inches deep and 12 inches wide, spacing crowns 12 inches apart in rows 18 inches apart. Asparagus needs room to spread, so don’t crowd them. Mix 2 gallons of compost into the bottom of the trench to enrich the soil—this ensures the crowns have nutrients to establish roots quickly.
Place each crown in the trench with the buds 2 inches below the soil surface. The roots should spread out naturally, not bent or crammed. Cover lightly with soil, leaving the buds exposed. Water immediately after planting to settle the soil around the roots and remove any air pockets.
☀️ Step 3: Provide Consistent Moisture and Light
Keep the soil evenly moist but not soggy for the first 4-6 weeks—this encourages root establishment. Water deeply 2-3 times per week, checking that the top 2 inches of soil feel damp but not wet. Asparagus is drought-tolerant once established, but young crowns need steady moisture to grow strong.
Site your trench in full sun—at least 6-8 hours of direct sunlight daily. If your climate is hot, provide afternoon shade during the first growing season to prevent stress. You’ll know the crowns are thriving when new shoots emerge within 3-4 weeks—this is your signal that roots have taken hold.
⏰ Step 4: Manage Growth for First Two Years
During the first year, do not harvest any spears—let the plants focus on building roots. Cut back any fern-like foliage in late fall or early winter to 2 inches above ground level, but leave it in place as mulch. This protects the crowns from freezing temperatures and retains moisture.
In the second year, you can harvest a few spears in early spring, but limit it to no more than 5-10 spears per plant. The goal is still root development. By year three, your asparagus will be fully established and ready for a full harvest—patience pays off with a year-round harvest for decades.
🌿 Step 5: Maintain and Harvest for Long-Term Success
After the third year, harvest spears when they’re 6-8 inches tall and 2 inches above ground level. Cut them at a 45-degree angle to prevent water from pooling on the stump. Stop harvesting when the spears turn woody—this signals the plant to focus on foliage, which nourishes the roots for next year’s crop.
In late fall, cut back the fern-like foliage to 2 inches above ground level and apply 1-2 inches of mulch to insulate the crowns. This protects them through winter and keeps the soil moist. With proper care, your asparagus patch will produce for 15-20 years, making it one of the most rewarding perennial investments.
Tips & tricks for perfect asparagus propagation
These practical tips will help you avoid common pitfalls and maximize your asparagus crowns' potential for decades of harvests.
The Selection Secret: When choosing your 1-year-old crowns in Step 1, look for ones with buds that are firm and plump—not shriveled or dried out. I've learned the hard way that crowns with more than 5 buds can become overcrowded later, so stick to 3-5 healthy buds per crown. Also, avoid crowns with any green growth—they're already too mature and won't establish well.
Soaking Strategy: That 30-minute lukewarm water soak in Step 1 isn't just about cleaning—it's a critical hydration boost. Use water that's warm to the touch (around 80°F) to stimulate root growth without shocking the crowns. I like to add a pinch of sea salt to the water to help prevent bacterial growth during this process. After soaking, gently shake off excess water before planting to avoid waterlogged soil.
Planting Depth Precision: Getting that 2-inch depth right in Step 2 is crucial—too deep and the buds won't emerge, too shallow and they'll be exposed to temperature swings. I use a simple trick: insert a ruler vertically into the trench at planting time. This visual guide ensures consistent depth across all your crowns. Also, resist the urge to pack the soil tightly around the roots—leave some air space for oxygen flow.
First-Year Growth Watch: In Step 4, when you're tempted to harvest those first spears, remember this visual cue: healthy asparagus crowns should produce 10-15 spears in their second year. If you harvest too aggressively in year one, you'll limit next year's production. The fern-like foliage is your plant's way of telling you it's storing energy—don't cut it back until late fall, even if it looks messy.
Pro Tips for Propagating Asparagus Plants
- These practical tips will help you avoid common pitfalls and maximize your asparagus crowns' potential for decades of harvests.
- The Selection Secret: When choosing your 1-year-old crowns in Step 1, look for ones with buds that are firm and plump—not shriveled or dried out.
- Soaking Strategy: That 30-minute lukewarm water soak in Step 1 isn't just about cleaning—it's a critical hydration boost.
Frequently asked questions
Got questions about propagating asparagus?
You’re not alone! Here are answers to the most common concerns—from timing to troubleshooting—so you can grow your own thriving patch with confidence.
How long does it take for asparagus crowns to produce spears after planting?
Patience is key! It typically takes 2–3 years for newly planted asparagus crowns to establish and start producing spears. In the first year, focus on helping roots grow—skip harvesting to avoid stunting growth. By year three, you’ll see a full harvest!
Can I propagate asparagus from seed instead of crowns?
Yes, but it’s far slower—seeds can take 3 years or longer to mature. Crowns (root cuttings) are the best choice for faster, reliable results. If you’re starting from seed, expect a longer wait for spears, but it’s doable for patient gardeners!
Why aren’t my asparagus crowns sprouting after planting?
Common culprits include poor soil drainage, overwatering, or planting too deep. Ensure crowns are partially exposed (1–2 inches above soil) and in well-draining soil. If no growth appears after 4–6 weeks, check for rot or pests—adjust care and try again!
Should I fertilize asparagus crowns before or after planting?
Fertilize after planting—wait until new shoots emerge (spring). Use a balanced, low-nitrogen fertilizer (like 5-10-10) to encourage root growth. Avoid high-nitrogen feeds early, as they promote foliage over roots. Once established, switch to a potassium-rich fertilizer for spear production.
Can I propagate asparagus in containers or only in the ground?
Containers work great for small patches! Use a deep pot (12+ inches) with drainage holes and well-draining soil. Just know: container-grown asparagus may produce fewer spears than in-ground plants. Rotate pots yearly for even growth, and avoid overcrowding crowns.
Wrapping up and next steps
Propagating asparagus from tiny crowns is a rewarding journey that unlocks a year-round harvest of fresh, homegrown spears—no fancy skills required! 🌱 With patience and the right techniques, you’ll transform small crowns into a thriving garden staple.
Whether you’re a seasoned gardener or just starting, this method proves that big rewards grow from small beginnings.
Now that you’re armed with the know-how, take the next step: grab those crowns, prep your soil, and dive in! Watch your garden flourish, and soon, you’ll be savoring the sweet taste of success—one spear at a time. Happy planting! 🌿