Pruning
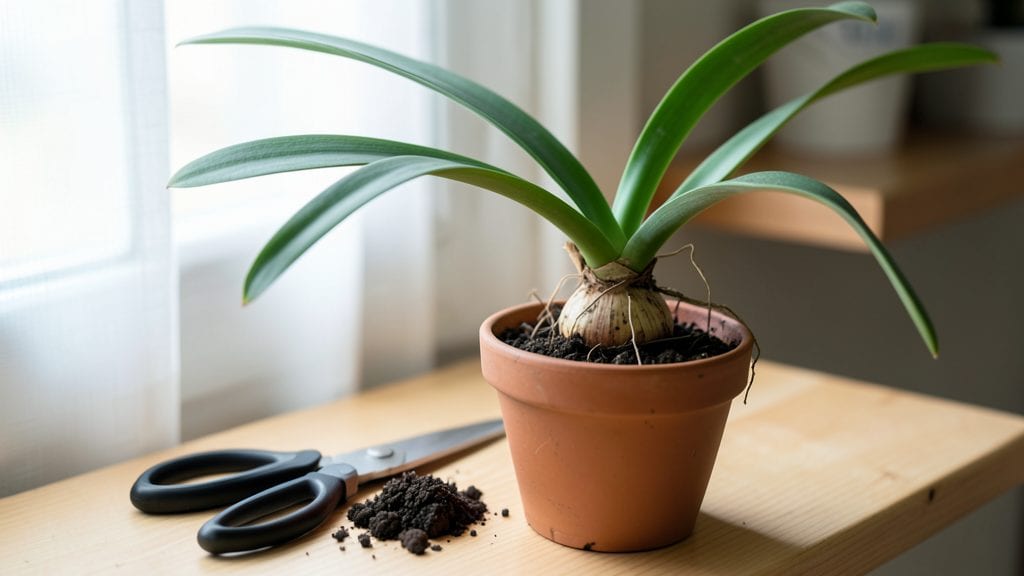
Pruning amaryllis plants isn't just about cutting back—it’s the secret to coaxing those dramatic blooms back year after year. ✨ I’ve watched my own amaryllis go from a sad, leafless stalk to a showstopper in just a few months after learning the right timing and technique.
The key? Three strategic trims that reset the plant’s energy, not just hacking away when the flowers fade.
Most people stop at cutting the dead flower stalk, but the real magic happens with the leaves and bulb. You’ll need sharp scissors or pruners (dull tools crush stems), a clean cutting surface, and a little patience—this isn’t a rush job.
Start by snipping the spent bloom stalk at the base, then trim any yellowed or damaged leaves back to healthy green tissue. The goal? Redirect the plant’s energy toward storing nutrients in the bulb for next season’s blooms.
After pruning, your amaryllis will focus on rebuilding its strength. Within weeks, you’ll see fresh leaves pushing through, and with proper care, that bulb will pack enough energy for another stunning display.
The trick is consistency: don’t over-prune the leaves (they feed the bulb), and always use sterilized tools to avoid disease. Think of it like giving your plant a fresh start—just in time for its next grand performance.
This method works for both indoor amaryllis and those grown in cooler climates with seasonal dormancy. The same principles apply whether you’re reviving a tired plant or maintaining one that blooms like clockwork. Ready to turn those bare stalks into blooming stars again?
📚 In This Guide
- What you need
- Instructions
- Tips and common mistakes
- Wrapping up and next steps
What you need
- ● Clean, sharp pruners or shears – Bypass pruners (not anvil) are ideal to avoid crushing stems. Size: 5-7 inches long for precision.
- ● Rubbing alcohol (70% isopropyl) or hydrogen peroxide (3%) – Quantity: Small bottle (4-8 oz) for sterilizing tools.
- ○ Disposable gloves – Optional but recommended to protect hands from sap and dirt.
- ● Compost bin or paper bag – For disposing of pruned foliage and stems.
- ● Newspaper or cardboard – Quantity: Enough to cover your workspace (e.g., 2-3 sheets) to catch debris.
- ● Garden twine or zip ties – For tying tall stems if they become top-heavy post-pruning.
- ● Plant food or fertilizer – Balanced, water-soluble fertilizer (e.g., 10-10-10) to nourish the plant after trimming. Quantity: Follow package instructions.
- ● Spray bottle with water – To mist leaves and reduce stress on the plant.
- ● Notebook and pen – To track pruning dates and observe changes in growth.
- ● Know your amaryllis’ growth stage – Prune at the right time (early spring, late summer, or after blooming) for best results.
- ● Healthy plant – Avoid pruning if the plant is stressed, diseased, or recovering from transplanting.
- ● Bright, indirect light – Ensure your workspace has good lighting to inspect stems and leaves closely.
- ● Patience and a steady hand – Pruning amaryllis requires gentle precision to avoid damaging the bulb.
Step-by-Step guide to pruning amaryllis plants
Here's how to keep your amaryllis thriving year-round with simple seasonal cuts.
✂️ Step 1: Trim Dead Flowers After Blooming
Once your amaryllis blooms fade completely, cut the flower stalk down to 1 inch above the bulb using clean, sharp pruners. This prevents the plant from wasting energy maintaining dead flowers. I like to do this right after the last petal drops—usually 6-8 weeks after blooming.
Don't rush this step. Wait until the stalk turns brown and crispy before cutting. If you trim too soon, you might accidentally remove new growth that's just starting. The bulb will store energy for next year's bloom after this cut.
🌱 Step 2: Prune Yellow or Damaged Leaves Mid-Season
Check your amaryllis every 2-3 weeks for yellowing or brown leaves. These are signs the leaf is no longer producing energy for the bulb. Use your pruners to snip them off at the base, cutting cleanly through the stem.
Here's the thing—don't remove healthy green leaves just because they're old. Amaryllis leaves stay green until they're truly done for the season. Only trim leaves that are 50% yellow or brown. This keeps your plant focused on storing energy where it counts.
🪴 Step 3: Cut Back Dormant Leaves Before Repotting
When your amaryllis enters dormancy (usually in late summer or early fall), the leaves will turn yellow and wilt. This is your cue to prepare for repotting season. Trim all remaining leaves down to 2-3 inches above the bulb using clean scissors.
This might seem drastic, but it's essential. Removing dead leaves prevents rot and lets you see the bulb's condition clearly. I always do this 2-3 weeks before repotting so new roots have time to form before the growing season begins again.
⏰ Step 4: Lightly Trim New Growth Before Blooming
About 8-10 weeks before your amaryllis typically blooms, you'll see new shoots emerging from the bulb. Once these reach 4-6 inches tall, give them a light trim by cutting back the top 1/3 of the growth. This encourages bushier, stronger stems.
This step is all about balance. You're not removing much—just enough to redirect energy into thicker stems and more blooms. I promise, your plant will thank you with bigger, healthier flowers. Watch for new growth to appear within 2-3 weeks of this trim.
Tips & tricks for perfect amaryllis pruning
These simple tricks will help you keep your amaryllis thriving with minimal effort—and prevent those common pruning mistakes that can stress your plant.
Tool Prep: Always sterilize your pruners with rubbing alcohol before cutting. I learned this the hard way after noticing my amaryllis leaves turning brown unexpectedly—turns out, bacteria from unsterilized tools was causing the issue. A quick wipe between cuts keeps your plant healthy and prevents infections. For extra peace of mind, use clean scissors for each different part of the plant (flowers, leaves, stems).
Visual Timing Cues: In Step 1, don't guess when to trim those dead flowers—wait until the stalk turns completely brown and crispy to the touch. I've seen people cut too soon and accidentally remove new growth that was just starting to form. The stalk should snap easily when dry, not bend like fresh growth. This 6-8 week window after blooming gives you plenty of time to spot when it's ready.
Energy Management: The key to amaryllis care is redirecting energy where it counts. When you see those 50% yellow leaves in Step 2, you're not just cleaning up—you're helping the bulb focus its resources. I've noticed my plants with the most vibrant blooms next year are the ones I pruned aggressively during the growing season. Think of it like giving your plant a spa day—removing the dead weight lets it shine.
Dormancy Prep: That 2-3 inch trim in Step 3 might seem harsh, but it's essential for repotting success. I always do this right after the leaves turn completely yellow and wilt—no exceptions. This gives you a clear view of the bulb's condition and prevents rot from lingering dead leaves. Pro tip: Use this time to inspect the bulb for any soft spots or signs of rot that might need attention before repotting.
Pro Tips for Pruning Amaryllis Plant
- These simple tricks will help you keep your amaryllis thriving with minimal effort—and prevent those common pruning mistakes that can stress your plant.
- Tool Prep: Always sterilize your pruners with rubbing alcohol before cutting.
- Visual Timing Cues: In Step 1, don't guess when to trim those dead flowers—wait until the stalk turns completely brown and crispy to the touch.
Frequently asked questions
Got questions about pruning your amaryllis? You’re not alone—these stunning plants can be tricky! Here are answers to the most common concerns to keep your amaryllis thriving after a trim.
When should I prune my amaryllis after blooming?
Prune the flower stalk (not the leaves!) once the blooms wilt and turn brown. This usually happens 2–4 weeks after flowering. Never cut the leaves—they’re essential for storing energy for next year’s blooms!
What if I missed the window to prune the flower stalk?
Don’t stress! If the stalk is still green or has dried up naturally, you can trim it at the base. Just avoid pruning while the plant is actively growing new leaves or storing energy for dormancy (fall/winter).
Can I prune amaryllis leaves, or is that a mistake?
Yes, but only if they’re yellow or brown (a sign of disease or rot). Healthy leaves should stay intact—they photosynthesize to fuel future blooms. Cut just above a leaf node (where new growth can sprout) using clean, sharp shears.
How do I know if my amaryllis needs pruning for health, not just blooms?
Prune for health if you spot:
- Mushy or blackened leaves (root rot—trim affected areas immediately).
- Brown tips (underwatering; prune dead parts only).
- Pests (like spider mites)—trim infested leaves and isolate the plant.
What’s the difference between pruning amaryllis and other houseplants?
Amaryllis pruning is stalk-focused (deadhead after blooms) and leaf-preserving (unless diseased). Unlike succulents or ferns, you never trim for shape—just for bloom cycles and health. Think of it as "reset mode" for their natural dormancy rhythm!
Wrapping up and next steps
Pruning your amaryllis isn’t just about keeping it tidy—it’s your secret weapon for longer, healthier blooms and a plant that thrives year after year! 🌱 By mastering the three seasonal trims (post-bloom, dormant, and regrowth), you’ll encourage stronger stems, vibrant flowers, and even earlier blooming cycles.
With the right tools and a little patience, your amaryllis will reward you with show-stopping displays for seasons to come.
Ready to put your new skills to the test? Start with your next blooming cycle—grab your shears, follow the steps, and watch your amaryllis transform! And if you’re feeling ambitious, experiment with repotting or fertilizing to give your plant an extra boost. Happy pruning! ✂️💐