Pruning
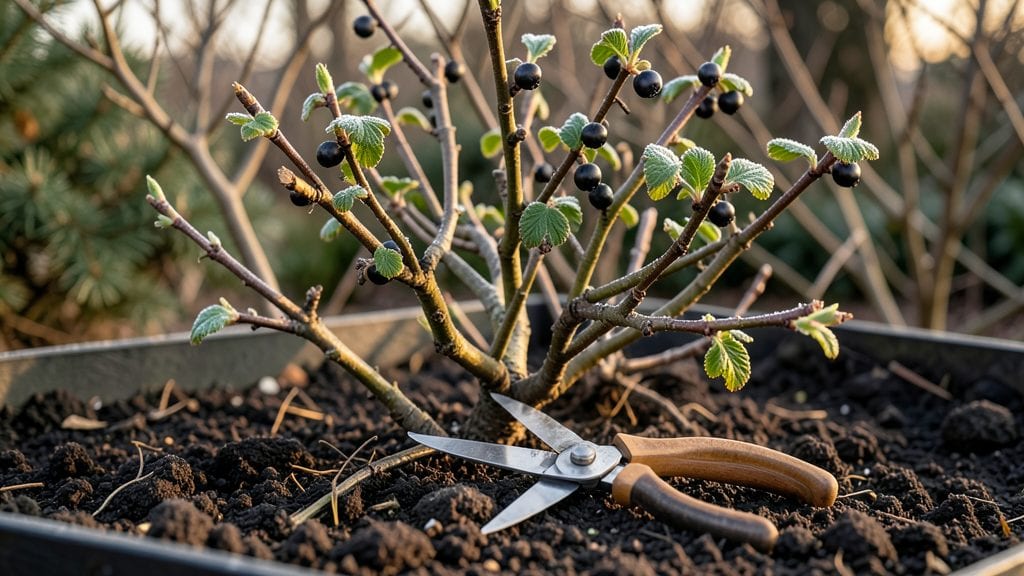
Pruning blackcurrant plants transforms a tangled mess into a productive, fruit-filled shrub. 🌿 I’ve spent years watching my bushes go from unruly to thriving after just two seasonal cuts—spring and winter—each serving a different purpose. The key isn’t aggressive trimming but strategic shaping to boost airflow and fruit production.
You’ll need sharp pruning shears, gloves, and a clear day to work. First, remove dead or diseased wood—it’s the easiest cut to make and prevents future problems. Then focus on thinning out crowded branches to let light reach the center, where most of your berries will form.
This isn’t about drastic changes; it’s about encouraging healthy growth.
After pruning, your blackcurrants will reward you with larger berries and fewer pests. The plants stay compact, making harvests easier, and the fruit develops a richer flavor. By next season, you’ll notice stronger canes and fewer suckers stealing energy from your main branches.
This method works for both young plants and mature bushes, whether you’re rejuvenating an old shrub or maintaining a new one. Once you see the difference, you’ll never skip these two cuts again—your berries will thank you.
📚 In This Guide
- What you need
- Instructions
- Tips and common mistakes
- Wrapping up and next steps
What you need
- ● Pruning shears or secateurs: Choose bypass pruners (sharp, clean blades) for clean cuts. A 5-inch to 7-inch blade works best for blackcurrant branches.
- ● Loppers: For thicker branches (over ½ inch in diameter), opt for bypass loppers with a 10-inch to 14-inch blade.
- ● Garden gloves: Wear cut-resistant gloves (e.g., leather or reinforced fabric) to protect your hands from thorns and sap.
- ● Disinfectant (70% isopropyl alcohol or bleach solution): Clean tools between cuts to prevent disease spread.
- ● Garden twine or rubber bands: For tying up branches if needed (especially after winter pruning).
- ● Garden waste bags or bucket: Collect pruned branches for composting or disposal.
- ○ Sharpie or permanent marker: Label branches if you’re training or identifying specific cuts (optional but helpful!).
- ● Hand pruners with a crimping tool: Helps seal larger cuts to reduce sap loss.
- ● Pruning saw: For stubborn, thick branches that loppers can’t handle.
- ● Knee pads or stool: For comfort if your plants are tall or the ground is uneven.
- ● Plant growth hormone (e.g., rooting powder): If you’re propagating cuttings from healthy branches.
- ● Spray bottle with water: Keeps cuts moist if you’re working in dry conditions.
Step-by-Step guide for pruning blackcurrant plants
Here's how to keep your blackcurrants thriving year-round with just two essential cuts.
✂️ Step 1: Late Winter Dormant Pruning (Before Bud Break)
Start by removing any dead, diseased, or damaged wood first—these are easy to spot as brown, brittle stems. Cut them back to healthy tissue at a 45-degree angle, about ¼ inch above a bud or lateral branch. This prevents water from pooling on the cut and reduces disease risk.
Next, thin out overcrowded branches to improve airflow and sunlight penetration. Aim to leave 4-6 strong, well-spaced stems per plant, removing the weakest ones at the base. Blackcurrants naturally produce new growth from the base, so you're not harming the plant by cutting back aggressively now.
Here's the thing—if you see any suckers (shoots growing from the roots), remove them completely. They divert energy from fruit production. I always check for these in late winter because they're easiest to spot when the plant is dormant.
🌿 Step 2: Summer Light Pruning (After Harvest)
Once the main harvest is done, focus on shaping the plant and removing any water shoots—those are the long, thin, upward-growing stems that appear after fruiting. These shoots don't produce fruit and compete with your main branches, so pinch them out when they're 6-8 inches long to redirect energy to fruit-bearing wood.
Also, look for any branches that are crossing or rubbing against each other. These create wounds that invite disease. Cut one of the branches back to a healthy bud or lateral branch, making sure your cut is clean and slanted. You'll see new growth fill in the gaps naturally over the summer.
Don't skip this step—I've seen blackcurrants go from prolific producers to struggling plants in just one season when summer pruning was neglected. The key is to keep the plant open and airy, which prevents fungal issues like powdery mildew.
⏰ Step 3: Year-Round Maintenance Checks
Make it a habit to do a quick monthly check for any dead or diseased branches throughout the growing season. Remove them immediately to prevent spread. I always carry a small pair of pruning shears in my gardening bag so I can snip off anything that looks suspicious right away.
Watch for new suckers popping up at the base—these are the plant's way of spreading, but they're not helpful for fruit production. Pull them out when you see them, or they'll take over your plant. The goal is to keep energy focused on the main stems.
Finally, don't forget to sterilize your tools between cuts, especially after pruning diseased wood. A quick wipe with rubbing alcohol or a bleach solution prevents cross-contamination. I keep a small bottle of 70% isopropyl alcohol in my tool shed for this exact purpose.
Tips & tricks for pruning blackcurrant plants
Blackcurrant pruning might seem intimidating, but these key tricks will help you keep your plants healthy and productive without the guesswork.
Timing is Everything: Late winter pruning (before bud break) is critical for blackcurrants. The dormant season makes it easier to identify dead wood and suckers. I always prune on a dry, frost-free day when the ground isn't frozen—this prevents stress on the plant. In Step 1, focus on removing only what's necessary; blackcurrants are resilient and will bounce back from even aggressive pruning.
The 45-Degree Angle Matters: When making cuts in Step 1, that 45-degree angle about ¼ inch above a bud isn't just a suggestion—it's essential. This angle prevents water from pooling on the cut, which reduces rot and disease risk. I use a sharp pair of pruning shears to make clean cuts, and I always cut just outside the bud to encourage new growth in the right direction.
Summer Pruning Secrets: During Step 2, those 6-8 inch water shoots might seem harmless, but they're actually stealing energy from your fruit-bearing branches. Pinch them out early—don't wait until they're long and woody. Also, look for branches crossing each other; these create wounds that invite fungal diseases. A quick cut back to a healthy bud keeps your plant open and airy, which is key for preventing powdery mildew.
Tool Care Prevents Problems: Sterilizing your tools between cuts (as mentioned in Step 3) is one of the most important tips I can give. I keep a small bottle of 70% isopropyl alcohol in my gardening bag and wipe my shears after every few cuts, especially when dealing with diseased wood. Clean tools prevent cross-contamination that could spread throughout your entire plant.
Pro Tips for Pruning Blackcurrant Plants
- Blackcurrant pruning might seem intimidating, but these key tricks will help you keep your plants healthy and productive without the guesswork.
- Timing is Everything: Late winter pruning (before bud break) is critical for blackcurrants.
- The 45-Degree Angle Matters: When making cuts in Step 1, that 45-degree angle about ¼ inch above a bud isn't just a suggestion—it's essential.
Frequently asked questions
Got questions about keeping your blackcurrant plants happy with pruning? You’re not alone! Here are some of the most common queries—and straightforward answers—to help you prune like a pro.
When is the best time to prune blackcurrant plants?
Prune blackcurrants twice a year for optimal health: late winter/early spring (before buds swell) and summer (after harvest). Winter pruning removes dead wood and shapes the plant, while summer pruning focuses on thinning out crowded branches to improve airflow and fruit quality.
How do I know which branches to cut?
Look for dead, diseased, or crossing branches—these are your top priorities. Also trim overly long shoots (back to a bud) and weak, spindly growth. Leave 3-5 strong, outward-facing branches per plant to encourage fruiting. Pro tip: Cut at a 45-degree angle just above a bud facing outward.
What if I skip pruning? Will my blackcurrants still produce fruit?
Yes, but expect smaller yields and more disease risks. Unpruned plants get crowded, shaded branches that struggle to ripen fruit or resist pests. Pruning boosts airflow, sunlight penetration, and fruit size—so don’t skip it! Even light pruning (removing just dead wood) helps.
Can I prune blackcurrants in fall?
Pruning in fall or winter (after leaf drop but before buds break) is risky because it can invite fungal diseases (like botrytis) by leaving open wounds. If you must prune late, sterilize tools and avoid heavy cuts. Stick to light maintenance (removing dead wood) and save major pruning for dormant season.
What’s the difference between pruning red and blackcurrants?
Both follow the same basic rules, but redcurrants benefit from more aggressive summer thinning to prevent overcrowding. Blackcurrants, however, fruit on older wood, so avoid cutting back mature branches—focus on young growth instead. Pro tip: Redcurrants often need renewal pruning (replacing old canes) every few years.
Wrapping up and next steps
Pruning your blackcurrant plants isn’t just about shaping them—it’s about boosting fruit production, preventing disease, and keeping them thriving for years. 🌿 With just two key seasonal cuts (winter and summer), you’ll ensure strong growth and a bountiful harvest.
Now that you’re armed with the right techniques and tools, there’s no better time to roll up your sleeves and give your plants the care they deserve.
Ready to take action? Start by scheduling your first pruning session this winter—your future blackcurrant harvest will thank you! For extra confidence, grab a pair of sharp pruners and revisit our step-by-step guide. Happy pruning! ✂️