
Pruning
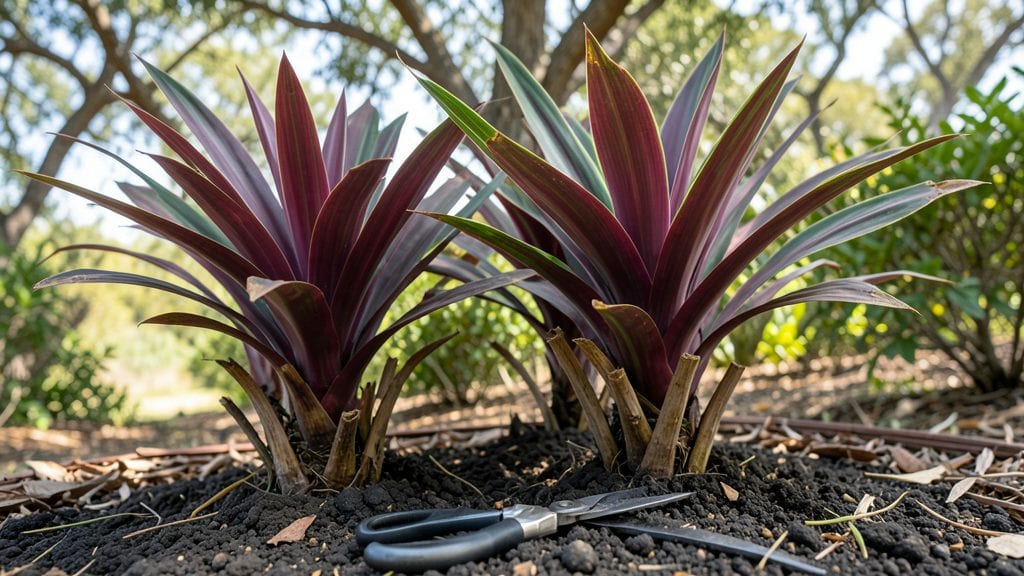
Trimming Cordyline plants keeps them vibrant and full of life year-round, and I’ve learned the hard way that precision cuts make all the difference. ✨ The first time I hacked away at mine in frustration, I ended up with leggy stems and sparse foliage—until I figured out the right technique.
Now my plants stay lush, colorful, and healthy with just a few simple steps.
You’ll need sharp pruning shears, a clean cloth for wiping cuts, and a clear day to assess the plant’s structure. The best time to trim is early spring or after flowering, when the plant is actively growing.
Avoid cutting into old, woody stems—focus on the upper third of the plant to encourage new growth and maintain that striking, layered look.
With each cut, you’ll see fresh green shoots emerge within weeks, restoring that velvety texture and bold color. The key is to never remove more than a third of the plant at once, and always cut just above a leaf node.
This promotes bushier growth and keeps your Cordyline looking like a showstopper, not a sad, overpruned shadow of itself.
Even in winter, a light trim to remove dead or damaged leaves keeps the plant tidy and ready for spring’s burst of growth. Whether you’re shaping for a formal look or letting it grow wild, these precision cuts ensure your Cordyline stays thriving—no matter the season.
📚 In This Guide
- What you need
- Instructions
- Tips and common mistakes
- Wrapping up and next steps
What you need
- ● Sharp pruning shears – Bypass-style (for clean cuts) or anvil-style (for thicker stems). Size: 6-8 inches (15-20 cm) for precision.
- ● Hand pruners or loppers – For thicker stems (½ inch / 1.25 cm or larger). Quantity: 1 pair.
- ● Disinfectant (70% isopropyl alcohol or bleach solution) – Mix: 1 part bleach to 9 parts water. Purpose: Sterilize tools between cuts to prevent disease.
- ○ Garden gloves – Cut-resistant (optional but recommended for protection). Material: Nitrile or leather.
- ○ Rake or leaf blower – To clear fallen debris after trimming. Optional: A small broom for tight spaces.
- ● Compost bin or bag – For collecting trimmings (unless repurposing for mulch).
- ● Horticultural oil or pruning sealant – To protect large cuts (especially in colder climates).
- ● Plant food or fertilizer – Balanced 10-10-10 or slow-release granules to reward your Cordyline after trimming.
- ● Ladder or step stool – For tall or hard-to-reach plants. Safety tip: Use a stable, non-slip surface!
- ● Spray bottle with water – To mist leaves and reduce dust while trimming.
Step-by-step instructions for trimming Cordyline plants
Here's how to keep your cordylines vibrant and healthy with clean, strategic cuts.
🪴 Step 1: Gather Your Tools and Assess the Plant
Start by sharpening your pruning shears or bypass pruners—dull blades tear stems and stress the plant. I always wear gloves too, since cordylines can have small thorns depending on the variety. Examine the plant from all sides, looking for dead or yellowing fronds, overcrowded growth, or stems that have lost their lower leaves.
Run your hand along the stems to check for soft or mushy spots—these indicate rot and should be removed immediately. Healthy stems feel firm and slightly woody. If you're trimming after a cold snap, focus on any fronds that look crispy or browned at the edges, as these won't recover.
✂️ Step 2: Remove Dead or Damaged Fronds First
Use your pruners to cut dead fronds at their base, making a clean slice just above where the frond meets the stem. Avoid tearing—the cleaner the cut, the faster the plant seals itself. I like to work from the bottom up, removing the oldest growth first. This opens up the plant's center, allowing better airflow and sunlight to reach the inner stems.
For fronds that are still green but completely browned or dried out, trim them back to where you see fresh green growth. If a frond is only partially damaged, you can leave it unless it's affecting the plant's overall shape. Watch for pests like scale or spider mites while you're working—if you spot them, treat the plant before continuing.
🌿 Step 3: Thin Out Overcrowded Growth
Now focus on the plant's structure. Cordylines grow in a clumping habit, and over time, the center can become dense and shaded. Select the thinnest, least attractive stems—these are usually the oldest—and cut them off at the base. This encourages new growth from the center, keeping your plant full and vibrant. I aim to remove about 20-30% of the oldest stems in one session.
If you're working with a mature cordyline, you might also trim back some of the taller fronds to maintain a balanced shape. Cut just above a leaf node (the bump where a leaf or branch grows out) to encourage branching. Avoid cutting into the main trunk unless you're doing a major rejuvenation trim—this can stress the plant.
☀️ Step 4: Shape and Maintain Year-Round Color
For a polished look, step back and assess the plant's overall shape. Cordylines respond well to light shaping, so you can trim fronds unevenly to create texture or soften a too-formal appearance. Cut back any fronds that are growing at odd angles or spoiling the plant's symmetry. Always make cuts at a slight angle to prevent water from pooling on the stem.
If your cordyline has lost its lower leaves, don't panic—this is normal as the plant matures. Instead, focus on keeping the upper fronds healthy and vibrant. After trimming, give the plant a light application of balanced fertilizer to support new growth. Water deeply afterward to help the plant recover from the pruning stress.
⏰ Step 5: Clean Up and Monitor Recovery
Remove all trimmed fronds from the area to prevent disease or pests from lingering. I like to compost them if they're healthy, or dispose of them if they show signs of disease. Wipe down your pruners with rubbing alcohol to sterilize them before storing. Keep an eye on the plant in the days following the trim—it should show new growth within 4-6 weeks.
If you notice yellowing leaves or wilting after trimming, it might be a sign of over-pruning or stress. In this case, reduce watering slightly and avoid fertilizing until the plant shows signs of recovery. The key is to trim just enough to encourage new growth without shocking the plant—your cordyline will thank you with bold, year-round color.
Tips & tricks for perfect Cordyline trimming
Here's what I learned after years of perfecting my cordyline pruning technique—these tricks keep your plants thriving.
Tool Prep Matters: Before you even touch the plant, take 5 minutes to sharpen your pruners. I use a fine-grit whetstone to create a razor-sharp edge—this makes clean cuts that heal faster. Dull blades crush stems instead of cutting cleanly, which stresses the plant and invites infection. I also wipe down my tools with rubbing alcohol between cuts to prevent spreading any potential diseases.
The 20-30% Rule: In Step 3, when thinning out overcrowded growth, remember this guideline: never remove more than 30% of the oldest stems in one session. I've learned this the hard way—when I got overzealous and trimmed too much, my cordylines took months to recover. Focus on the thinnest, least attractive stems first, as these are usually the oldest and least productive. This approach maintains the plant's structure while encouraging new growth from the center.
Leaf Node Location: For that perfect balanced shape in Step 4, always cut just above a leaf node when trimming taller fronds. These nodes are the little bumps where new leaves or branches grow out. If you cut below a node, you'll end up with a bare stem. I like to run my finger along the stem to feel for these nodes—they're usually about 1-2 inches apart on mature cordylines. This simple technique encourages branching and keeps your plant full and vibrant.
Recovery Timeline: After trimming, give your plant the 4-6 weeks it needs to show new growth. I've seen people rush to trim again too soon, which can set back recovery. During this time, reduce watering slightly and avoid fertilizing until you see fresh green growth emerging. Think of it as a healing period—your cordyline is working hard to regenerate, and patience pays off with bold, year-round color.
Pro Tips for Trimming Cordyline Plants
- Here's what I learned after years of perfecting my cordyline pruning technique—these tricks keep your plants thriving.
- Tool Prep Matters: Before you even touch the plant, take 5 minutes to sharpen your pruners.
- The 20-30% Rule: In Step 3, when thinning out overcrowded growth, remember this guideline: never remove more than 30% of the oldest stems in one session.
Frequently asked questions
Got questions about trimming your Cordyline plants? You’re not alone! Here are some of the most common concerns—and their straightforward answers—to keep your plants thriving with minimal stress.
When is the best time to trim Cordyline plants?
Trim your Cordyline anytime the foliage looks overgrown or leggy, but aim for spring or early summer for the best regrowth. Avoid heavy trimming in late fall or winter, as the plant may struggle to recover before dormancy. Light maintenance (like removing dead leaves) can happen year-round!
How much can I cut back without harming the plant?
You can safely trim up to ⅓ of the plant’s height in one session, but avoid cutting into the woody base. For dramatic shaping, do it gradually over a few months. If you’re unsure, err on the side of caution—Cordylines bounce back better with patience than aggression!
What should I do with the cuttings after trimming?
Use the trimmings for propagation! Dip the cuttings in rooting hormone (optional) and plant them in well-draining soil. Keep them lightly moist and in bright, indirect light. Within a few weeks, you’ll have new Cordyline babies—free plants for you (or to share with friends)!
Why is my Cordyline turning brown after trimming?
Brown tips or leaves after trimming usually mean over-pruning or stress. If you cut too aggressively, the plant may focus energy on recovery instead of new growth. Reduce watering slightly, ensure good drainage, and avoid fertilizing until fresh growth appears. Most plants rebound within 4–6 weeks!
Can I shape my Cordyline into a topiary or formal hedge?
Cordylines
respond well to shaping, especially the C. fruticosa varieties. Use sharp shears for clean cuts and trim regularly (every 4–6 weeks) to maintain your design. For hedges, space plants 3–4 feet apart and prune new growth consistently. Just avoid cutting into old wood—focus on fresh, flexible stems!
Wrapping up and next steps
Trimming your Cordyline plants doesn’t have to be intimidating—with the right tools, timing, and technique, you can keep them vibrant and thriving year-round! 🌿 Whether you’re shaping for aesthetics, encouraging new growth, or maintaining health, precision cuts make all the difference.
Now that you’re armed with the know-how, grab those pruners and get ready to transform your space into a lush, colorful oasis.
Ready to take the next step? Experiment with different styles—like fan-shaped or tiered trims—and watch your Cordylines shine! 🌟 For extra flair, share your progress or ask questions in gardening communities to stay inspired.