Pruning
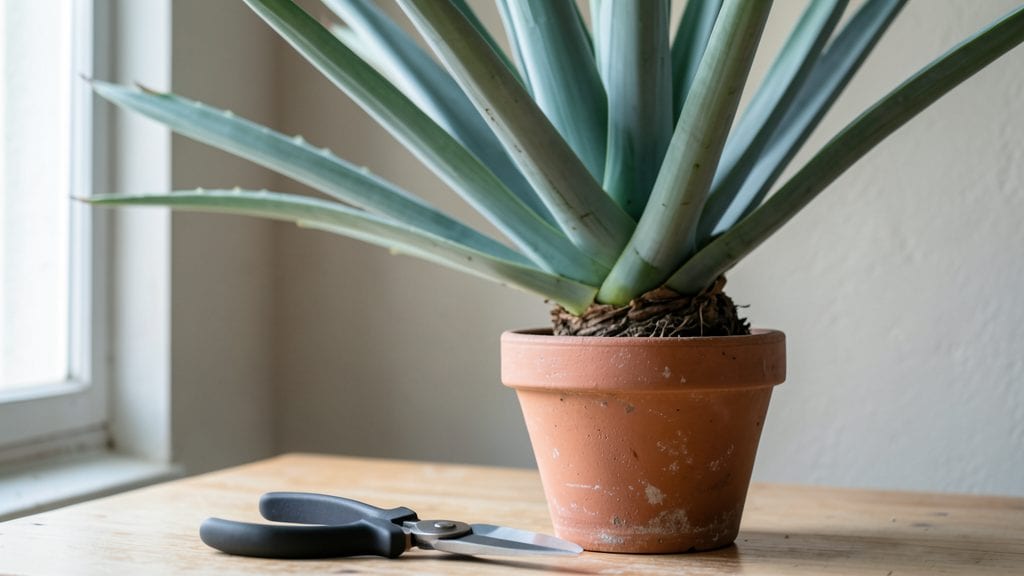
Yucca plant trimming transforms a scraggly, overgrown mess into a showstopping architectural specimen—if you do it right. I’ve trimmed yuccas for years, and the difference between a sad, leggy plant and a bold, upright stunner comes down to three strategic cuts made at the right time.
The best part? You can trim year-round, not just in spring or fall, as long as you follow the rules.
Here’s the secret: yuccas don’t need frequent pruning, but when you do cut, you’re not just cleaning up—you’re encouraging new growth from the base. Grab a sharp bypass pruner and a disinfectant (rubbing alcohol works), and focus on removing dead, damaged, or overcrowded stems.
The goal is to leave a clean cut just above a healthy node, where new shoots will emerge within 4-6 weeks.
After trimming, your yucca will reward you with thicker foliage, a fuller shape, and even pups (baby plants) at the base—perfect for propagating. The key is patience: avoid over-trimming, and never cut more than one-third of the plant at once.
With the right cuts, your yucca will stay vibrant and vigorous for years, turning heads in your landscape.
This method works for all yucca varieties, from the tall Yucca elephantipes to the compact Yucca rostrata. Whether you’re shaping a mature plant or reviving an neglected one, the same principles apply. Ready to give your yucca the makeover it deserves?
📚 In This Guide
- What you need
- Instructions
- Tips and common mistakes
- Wrapping up and next steps
What you need
- ● Pruning shears or bypass pruners – Choose sharp, sterilized ones with a 5- to 8-inch blade for clean cuts.
- ● Garden gloves – Opt for thick, cut-resistant gloves (e.g., nitrile-coated) to protect from sharp leaves.
- ● Disinfectant (70% isopropyl alcohol or bleach solution) – 1 part bleach to 9 parts water to sterilize tools before and after trimming.
- ● Rubbing alcohol or hydrogen peroxide (3%) – For cleaning wounds on the plant if cuts are made.
- ● Newspaper or cardboard – To lay down under the plant and catch debris.
- ● Trash bag or compost bin – For removing pruned material (yucca leaves can be composted).
- ● Hand pruners or loppers – For thicker stems (if your yucca has woody growth).
- ● Gardening kneeler or stool – For comfort if trimming a tall or large yucca.
- ● Plant food or fertilizer – A balanced 10-10-10 or low-nitrogen option to revive the plant post-pruning.
- ● Spray bottle with water – To mist cuts and reduce stress on the plant.
- ● Permanent marker – To mark growth points if you’re planning a structured trimming schedule.
Instructions for yucca plant trimming: year-round growth with 3 strategic cuts
Here's the precise method I use to keep yuccas thriving through every season without sacrificing their striking structure.
Assess Growth and Identify Cut Points in Early Spring
Start by examining your yucca in early spring when new growth begins. Look for brown, dead leaves at the base or any stems that have outgrown their space—these are your first targets. I focus on removing only 20-30% of the plant's foliage in one session to avoid shocking it. Use sharp, clean pruning shears or a knife to make cuts at a 45-degree angle, about ½ inch above a leaf node where new growth can emerge.
This angle prevents water from pooling on the cut, which could rot the stem. If you're unsure where to cut, imagine drawing an invisible line between the base of the plant and the sky—your cuts should follow that upward trajectory. Avoid cutting into healthy green tissue; your goal is to remove only what's damaged or spent.
Remove Dead or Damaged Stems Mid-Summer for Airflow
As summer progresses, yuccas often develop dry, crispy stems or leaves that trap moisture and invite pests. In mid-summer, inspect the plant for any stems that are completely brown and brittle or have hollow centers. These are ready for removal. Use your pruning tools to cut these stems at the base, right where they meet the main trunk.
This step improves airflow, reducing the risk of fungal diseases like root rot. I like to schedule this cut on a dry, sunny morning when the plant is actively photosynthesizing. After trimming, give the plant a light watering to help it recover—just enough to moisten the soil 1-2 inches deep, no deeper. Overwatering now can undo all the good you’ve done.
Prune for Shape and Encourage New Growth in Late Fall
In late fall, yuccas often grow leggy or develop uneven shapes from uneven sunlight exposure. This is the time to refine the plant’s form by trimming back any overly long or misplaced stems. Use your pruning shears to cut just above a leaf node, ensuring the cut is clean and doesn’t tear the plant tissue. For very large stems, you can make two cuts: the first to remove the bulk, and the second to clean up the stub.
This late-season trim stimulates new growth in spring by redirecting the plant’s energy. After pruning, reduce watering significantly—yuccas are drought-tolerant and need far less moisture in cooler months. Let the soil dry out completely between waterings, and avoid fertilizing until you see fresh growth in early spring. The goal here is to let the plant rest and store energy for next year.
Sanitize Tools and Monitor Recovery Year-Round
After each trimming session, sanitize your pruning tools with 70% isopropyl alcohol to prevent the spread of disease. This is non-negotiable—yuccas are tough, but even they can succumb to bacterial or fungal infections if tools aren’t clean. Wipe down the blades thoroughly before and after use, and store them in a dry place when not in use.
Monitor your yucca closely after trimming. Healthy new growth should appear within 4-6 weeks, depending on the season. If you notice yellowing leaves or wilting, it’s a sign of over-pruning or stress. In this case, reduce watering further and avoid any additional cuts until the plant shows signs of recovery. Patience here pays off—yuccas reward careful trimming with denser, more vibrant foliage year after year.
Tips & tricks for perfect yucca plant trimming
These strategic insights will help you maintain your yucca's health while preserving its architectural beauty throughout the year.
Seasonal Timing Matters: The three-season pruning schedule in the instructions is designed to align with your yucca's natural growth cycles. Early spring cuts (Step 1) capitalize on the plant's natural recovery period when temperatures are moderate and new growth begins. Mid-summer trimming (Step 2) removes spent foliage before pests become more active, while late fall pruning (Step 3) allows the plant to redirect energy toward root development during its winter dormancy. This seasonal approach prevents stress by never removing more than 30% of foliage in any single session.
Cutting Technique Precision: The 45-degree angle and ½-inch clearance above leaf nodes specified in Step 1 and Step 3 are critical for two reasons. First, this angle creates a natural water runoff path that prevents the cut surface from becoming a moisture trap—essential for preventing rot in yucca's fibrous stems. Second, cutting above a leaf node preserves the plant's growth hormones that would otherwise be severed. For large stems in Step 3, the two-cut method prevents tearing while maintaining clean edges. Always use a sharp tool to avoid crushing the stem tissue.
Post-Trimming Care Strategy: The watering instructions after each trimming session (1-2 inches deep in Step 2 and complete drying in Step 3) reflect yucca's desert origins. After removing dead material in summer, a light watering helps the plant recover without promoting fungal growth. In fall, withholding water mimics the plant's natural dormancy period. Remember that yuccas store water in their thick stems—overwatering at any time is the most common mistake gardeners make. Always let the soil dry completely between waterings after trimming.
Tool Sanitation Protocol: The emphasis on 70% isopropyl alcohol in Step 4 goes beyond basic hygiene—it's a disease prevention measure specific to yucca's susceptibility to bacterial leaf spot and fungal infections. Alcohol doesn't just clean; it kills bacterial spores that might linger on tools between cuts. For extra protection, especially in humid climates, consider using a dedicated pair of pruners for your yucca that you never use on other plants. This simple precaution can extend your plant's life by years.
Pro Tips for Yucca Plant Trimming
- These strategic insights will help you maintain your yucca's health while preserving its architectural beauty throughout the year.
- Seasonal Timing Matters: The three-season pruning schedule in the instructions is designed to align with your yucca's natural growth cycles.
- Cutting Technique Precision: The 45-degree angle and ½-inch clearance above leaf nodes specified in Step 1 and Step 3 are critical for two reasons.
Frequently asked questions
Got questions about keeping your yucca plant looking its best? Here are some of the most common concerns—and their answers—to help you trim with confidence!
When is the best time to trim a yucca plant?
Trim your yucca plant in early spring (just as new growth begins) or late winter to encourage healthy regrowth. Avoid heavy pruning in fall or winter, as the plant may struggle to recover before dormancy. Light trimming to remove dead leaves or brown tips can be done year-round, though!
How do I trim a yucca plant without killing it?
Use clean, sharp pruners to make cuts at a 45-degree angle about ½ inch above a leaf node or joint. Avoid cutting into the main trunk unless necessary—focus on removing only dead, damaged, or overgrown foliage. Disinfect tools with rubbing alcohol between cuts to prevent disease.
Can I propagate my yucca plant from trimmings?
After trimming, let cuttings dry for 1–2 days to callus over. Plant them in well-draining soil and keep them in bright, indirect light while they root. Yucca cuttings often take 4–6 weeks to establish roots—be patient! This is a great way to grow new plants for free.
Why does my yucca plant have brown tips after trimming?
Brown tips usually mean underwatering, overwatering, or fluoride buildup in tap water. Flush the soil with distilled or rainwater to remove excess salts. Reduce watering slightly and ensure the pot has drainage holes. If the issue persists, trim only the brown tips (they won’t regrow) and focus on adjusting care.
Do I need to fertilize after trimming my yucca?
Yes! After pruning, feed your yucca with a balanced, water-soluble fertilizer (like 10-10-10) diluted to half strength. Apply it every 4–6 weeks in spring and summer to support new growth. Skip fertilizer in fall and winter, as the plant enters a slower growth phase.
Wrapping up and next steps
Trimming your yucca plant isn’t just about keeping it tidy—it’s a game-changer for its health and growth! 🌱 With the right tools and three strategic cuts (spring, summer, and fall), you’ll encourage lush foliage, prevent overcrowding, and even boost blooms.
Remember, confidence comes with practice, so don’t hesitate to give it a try—your yucca will thank you!
Ready to take the next step? Grab your pruners, mark your calendar, and schedule your first trim this season. Your yucca’s future starts with a single snip!