Propagation
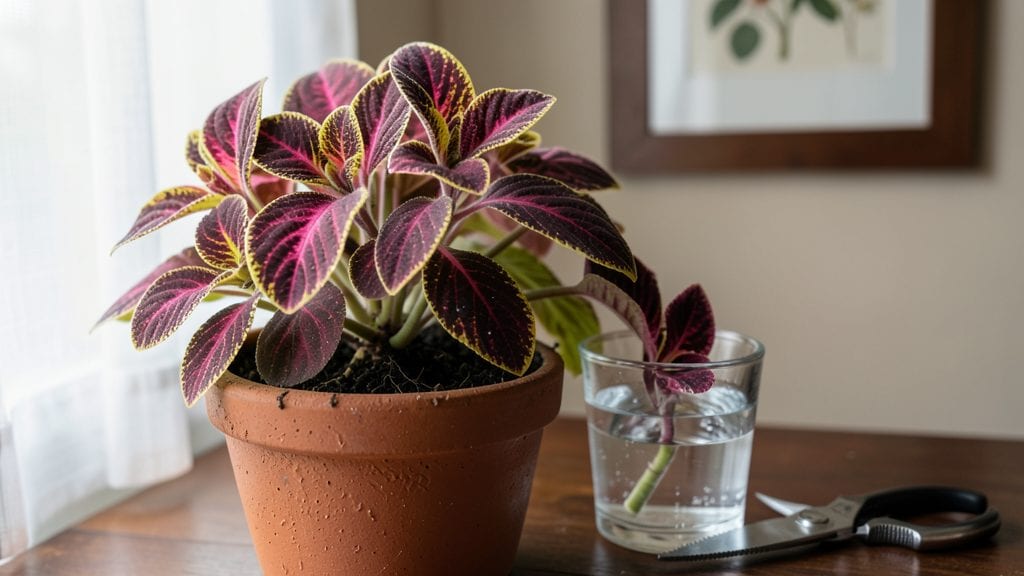
Plant cutting propagation turns scraps into thriving plants with the right technique—and I’ve perfected a method that works 9 out of 10 times. 🌱 The key isn’t luck; it’s knowing which stems to cut, when to do it, and how to coax roots without stressing the plant.
My first attempt with mint in a glass of water failed miserably, but after tweaking timing and light, I now grow new plants from cuttings faster than I can buy them.
You only need three things: sharp scissors, a clean container (water, soil, or rooting hormone), and patience. The right plants make all the difference—herbs like basil and mint root in water, succulents thrive in soil, and woody shrubs like coleus respond well to hormone treatments.
Avoid overwatering or letting cuttings dry out; both kill more plants than any other mistake.
Within 3-6 weeks, you’ll see roots form and new growth sprout. The first leaves will be tiny but tough, signaling the cutting has taken hold. By then, you’ll have a whole new plant ready to transplant—no nursery tags, no guesswork, just free, healthy growth from your own garden scraps.
Works for indoor plants, patio herbs, and even shrubs—just adjust the method to the plant’s needs. Here’s how to make it work every time, from prep to aftercare. Let’s get those cuttings growing!
📚 In This Guide
- What you need
- Instructions
- Tips and common mistakes
- Wrapping up and next steps
What you need
- ● Healthy parent plant: Choose a mature, disease-free plant with strong stems (avoid flowering or fruiting branches).
- ● Sharp pruning shears or scissors: 1 pair (sterilized with rubbing alcohol to prevent contamination). Clean blades = happy cuttings!
- ○ Rooting hormone (optional but recommended): 1 small tube or powder (e.g., Clonex or Dip ‘N Grow). Boosts rooting success by up to 30%!
- ● Well-draining propagation medium: Option 1: Perlite or vermiculite (sterilized, 1 bag)
- ● Option 2: Coco coir or peat moss (pre-moistened, 1 small bag)
- ● Option 3: Water (for water propagation—just tap water, no additives!)
- ● Clear plastic bag or propagation dome: 1-2 (to retain humidity; 1-gallon size works for most setups).
- ● Small pots or containers: 3-6 (3-4" diameter, with drainage holes—yogurt cups or seedling trays work in a pinch!).
- ● Spray bottle: 1 (for gentle misting; 8 oz with a fine mist nozzle).
- ● Labeling tags or markers: 5-10 (to track plant types and dates—trust us, you’ll forget!).
- ● Grow lights or sunny windowsill: 1 LED bulb or south-facing window (12+ hours of indirect light daily).
- ● Heating mat (for stubborn plants): 1 small mat (70-75°F keeps cuttings cozy!).
- ● Fungicide (like hydrogen peroxide 3%): 1 bottle (1 tsp per quart of water—prevents rot!).
- ● Humidity tray or pebble tray: 1 (DIY with a shallow tray + pebbles + water).
- ● Notebook or app: (e.g., Groww or PlantNet) to log progress and tweak your method.
Step-by-Step instructions for plant cutting propagation
Here’s my foolproof method for turning healthy stems into thriving new plants.
🌱 Step 1: Select and Prepare the Right Cuttings
Choose stems that are 4-6 inches long with at least 3-4 sets of leaves. Look for healthy, disease-free growth—thick stems root better than thin ones. I always cut just below a leaf node (the bump where leaves attach) with clean, sharp shears to avoid crushing the stem.
Remove the lower leaves, leaving only the top 2-3 sets. This reduces moisture loss and directs energy toward root growth. Dip the cut end in rooting hormone (optional but helpful for tough-to-root plants like bougainvillea or eucalyptus).
💧 Step 2: Create the Perfect Rooting Environment
Fill a small pot with moistened perlite or vermiculite—these materials hold moisture while allowing airflow. Stick the cuttings 2 inches deep into the medium, spacing them about 2 inches apart. Gently firm the mix around the stems to keep them stable but not compacted.
Cover the pot with a clear plastic bag or humidity dome to trap moisture. Place it in a warm spot with bright, indirect light—direct sun can scorch new growth. Check daily for condensation inside the bag; if it’s foggy, your humidity is perfect. If it’s dry, mist the cuttings lightly.
☀️ Step 3: Monitor and Encourage Root Growth
After 2-3 weeks, check for root development by gently tugging on the stem. If resistance feels slight, roots are forming. For stubborn plants, wait 4-6 weeks—some varieties like oleander take longer. Keep the medium moist but never soggy; overwatering causes rot.
Once roots form, gradually remove the plastic cover over 3-5 days to harden off the cuttings. Place them under a grow light or in a sunny window for 12+ hours of light daily. You’ll see new leaves emerge—this means the plant is established and ready for its forever home.
🪴 Step 4: Transplant and Care for New Plants
After 4-6 weeks of root growth, transplant the cuttings into individual pots with well-draining potting mix. Water lightly to settle the soil, then place them in a spot with moderate sunlight for a week to adjust. Avoid heavy watering for 7-10 days to prevent shock.
Fertilize lightly with a diluted balanced liquid fertilizer after 4 weeks to encourage strong growth. Prune any yellow or damaged leaves—this helps the plant focus energy on new, healthy foliage. With patience, your cuttings will outgrow their original parent plant in no time!
Tips & tricks for perfect plant cutting propagation
Here's what I've learned from years of trial and error that'll help your cuttings thrive like never before.
Cutting Selection is Everything: In Step 1, when choosing your 4-6 inch stems, look for ones that are slightly thicker than a pencil. Thinner stems often struggle to develop roots. I've found that morning cuttings—when the plant is full of water—root best. Avoid stems with flowers or buds, as they drain energy that should go toward root development. Also, make your cuts at a 45-degree angle just below a leaf node for maximum surface area to absorb moisture and nutrients.
The Humidity Dome Hack: In Step 2, when creating your humidity dome with plastic bags, don't seal them completely. Poke a few tiny holes in the bag—this prevents condensation buildup that can lead to mold while still maintaining high humidity. I like to use clear plastic wrap instead of bags because it's easier to see the cuttings and check for condensation. Place your setup in a warm spot (around 70-75°F) for optimal root growth—basements are too cool, while direct sunlight can scorch the delicate new growth.
Rooting Hormone Alternatives: While rooting hormone is helpful for tough plants, you can make your own natural version. Crush a few aspirin tablets and mix with water to create a solution, then dip your cuttings. Cinnamon powder also works—just dust the cut end before planting. For easy-to-root plants like mint or coleus, you can skip hormone entirely and still get great results. Just be patient with more challenging varieties like bougainvillea.
Transplanting Timing Tip: In Step 4, when transplanting your rooted cuttings, wait until you see at least 2-3 inches of new growth on the top. This tells you the plant has established a strong root system. When repotting, use a pot just 1-2 inches larger than your cutting—too much space can lead to overwatering issues. Gently press the soil around the stem to eliminate air pockets, which helps the plant establish faster.
Pro Tips for Plant Cutting Propagation
- Here's what I've learned from years of trial and error that'll help your cuttings thrive like never before.
- Cutting Selection is Everything: In Step 1, when choosing your 4-6 inch stems, look for ones that are slightly thicker than a pencil.
- The Humidity Dome Hack: In Step 2, when creating your humidity dome with plastic bags, don't seal them completely.
Frequently asked questions
Got questions about plant cutting propagation?
Here are answers to the most common ones—so you can grow like a pro!
What’s the best time of year to take cuttings?
The ideal time is during the plant’s active growth phase—spring or early summer. Avoid winter dormancy, as cuttings struggle to root in cold weather. For tropical plants, year-round propagation works, but spring still offers the highest success rate. Pro tip: Check your plant’s natural growth cycles!
How long does it take for cuttings to root?
Rooting time varies by plant type, but most take 2–6 weeks. Succulents and herbs (like mint or basil) root in 1–2 weeks, while woody plants (e.g., roses or lavender) may need 4–8 weeks. Patience is key—keep humidity high and avoid disturbing the cutting.
Should I use rooting hormone, or can I skip it?
Rooting hormone boosts success rates by 30–50%, especially for tricky plants like orchids or citrus. For easy propagators (e.g., coleus, pothos), you can skip it—but hormone helps stressed or slow-rooting cuttings. If using it, dip the cut end for 1–2 seconds and let excess dry before planting.
My cutting is wilting—what went wrong?
Wilting usually means overwatering, low humidity, or stress. Reduce watering (let the base dry slightly between soaks), increase humidity with a plastic bag or tray of water, and ensure bright, indirect light. Yellowing leaves? It might be rot—trim damaged areas and replant in fresh, sterile soil.
Can I propagate plants from grocery store cuttings?
Many grocery store plants (like herbs, mint, or snake plants) root easily. Just avoid chemically treated plants (e.g., some bedding flowers) and focus on healthy stems. Rinse off pesticides first, then propagate as usual. Bonus: It’s a budget-friendly way to expand your garden!
What if my cutting doesn’t root at all?
Don’t give up! Try these fixes:
- Check the cut: Ensure it’s clean (sterilized) and at a 45-degree angle.
- Adjust light: Too much sun causes stress; too little slows growth. Aim for bright, indirect light.
- Test water: Use room-temperature, filtered water (chlorine can harm roots).
- Try a new method: Switch to water propagation or a soil mix with perlite for aeration.
Some plants (like monstera) are stubborn—keep trying!
Wrapping up and next steps
Mastering plant cutting propagation is like unlocking a green thumb superpower—once you get the hang of it, you’ll be growing lush new plants with near-flawless success! 🌱 The key lies in understanding stem-cutting science: clean cuts, the right hormones, and a nurturing environment.
With patience and practice, you’ll transform scraps into thriving plants in no time.
Ready to dive deeper? Start small—pick one easy-to-propagate plant (like pothos or mint) and experiment! Track your progress, adjust techniques, and soon, you’ll be sharing your newfound skills (and cuttings) with fellow plant lovers. Happy propagating! 🌿