Picking
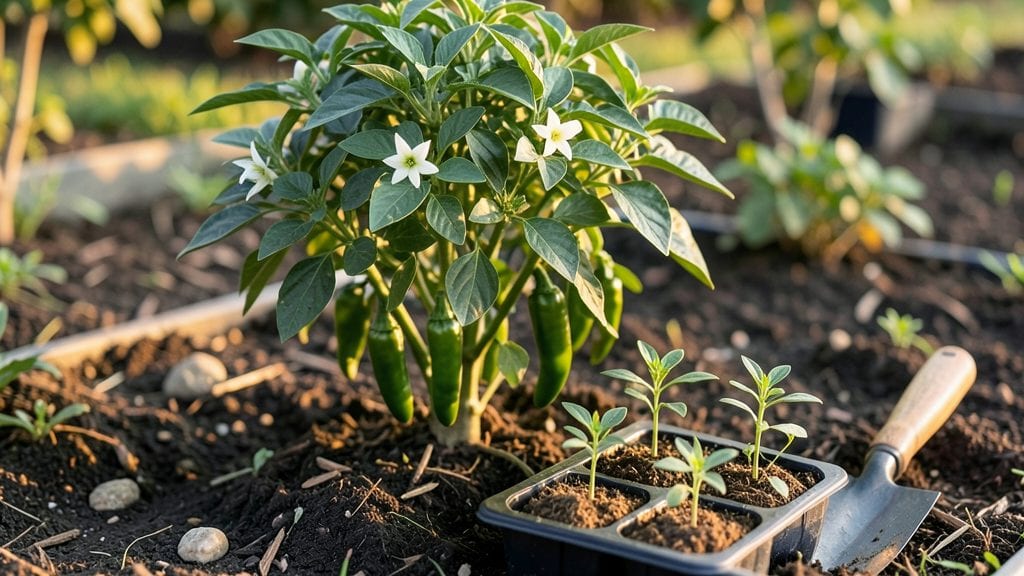
Planting Tabasco peppers starts with a simple secret: they thrive where other peppers fail—hotter climates, poorer soil, and even neglect. I’ve grown them in zone 8’s brutal summers and seen them produce bright red pods when my bell peppers gave up.
The key isn’t fancy techniques; it’s matching their heat-loving nature with the right timing and support.
You’ll need a sunny spot with 6+ hours of direct light daily—they’ll tolerate heat better than most—but avoid soggy soil. Tabascos hate wet feet, so raised beds or well-draining containers work best.
Start seeds indoors 8-10 weeks before last frost or buy transplants after all danger of frost has passed. The trick? Harden them off slowly to prevent transplant shock, which is where most beginners lose their first batch.
Once planted, these peppers reward minimal care with maximum heat. Stake them early—they grow 3-4 feet tall and need support for those heavy pods. Pinch off early flowers if your plants look leggy, and focus on watering at the roots, not overhead.
In 90 days, you’ll harvest pods that pack 50,000 Scoville units—enough to spice up sauces, pickles, or even homemade hot sauce.
They’re tougher than they look, but watch for aphids and fungal spots. A quick spray of neem oil or a row cover keeps pests at bay. The best part?
These peppers keep producing all season if you deadhead spent blooms. Ready to grow your own fire? Let’s get those seeds in the ground.
📚 In This Guide
- What you need
- Instructions
- Tips and common mistakes
- Wrapping up and next steps
What you need
- ● Tabasco pepper seeds: 10–20 seeds (choose a variety like Tabasco Red or Tabasco Yellow for authenticity).
- ● Seed-starting mix: 1–2 gallons of sterile, well-draining potting soil (avoid garden soil—it’s too dense!).
- ● Seed trays or small pots: 2–4 biodegradable pots (3–4 inches deep) or a seed tray with cell inserts.
- ● Grow lights or sunny windowsill: A full-spectrum LED grow light (12–16 hours/day) or a south-facing window (if natural light is strong).
- ● Fertilizer: Balanced water-soluble fertilizer (e.g., 10-10-10) or organic options like fish emulsion.
- ● Transplant containers: 5–7 gallon pots or raised beds (if planting outdoors).
- ● Mulch: Straw or shredded leaves (2–3 inches) to retain moisture and suppress weeds.
- ● Spray bottle: For gentle watering during germination.
- ● Trowel or small shovel: For transplanting seedlings.
- ● Pruning shears: To trim excess foliage and encourage bushier growth.
- ○ Gloves (optional): Protect your hands from spicy peppers (even the stems can irritate!).
- ○ pH testing kit (optional): Ideal soil pH for Tabasco peppers: 6.0–7.0.
- ● Warmth: Tabasco peppers hate cold. Start seeds indoors 8–10 weeks before the last frost (or wait until after all frost risk has passed if direct-sowing).
- ● Sunlight: At least 6–8 hours of direct sunlight daily (indoors or outdoors).
- ● Patience: Germination takes 10–20 days—stay consistent with moisture!
- ● Space: Plants need 18–24 inches apart for airflow (crowding = disease risk).
Step-by-Step instructions for planting Tabasco peppers
Here's how to grow fiery Tabasco peppers from seed to harvest with minimal fuss.
Start Seeds Indoors 8-10 Weeks Before Last Frost
Use the 4-cell seedling tray and fill each cell with 2 cups of seed-starting mix. Press the mix down gently so it's firm but not compacted. Tabasco seeds germinate best at 75-85°F, so place the tray on a seedling heat mat or in a warm spot like on top of the fridge.
Plant 2 seeds per cell, about ¼ inch deep—deeper planting slows germination. Cover lightly with additional mix and mist the surface until evenly moist. Keep the tray covered with clear plastic wrap to retain warmth and humidity. Check daily for condensation; remove the wrap once sprouts appear, usually in 7-14 days.
Once seedlings emerge, move them to a south-facing window or under grow lights for 14-16 hours of light daily. If using grow lights, position them 2-3 inches above the plants to prevent leggy growth. You'll know they're getting enough light when the stems are thick and leaves are dark green.
Harden Off and Transplant After Frost
About 2 weeks before your last frost date, begin hardening off the seedlings. Place them outside in a sheltered spot for 1-2 hours the first day, gradually increasing exposure over 7-10 days until they can stay out all day. This slows their adjustment to outdoor conditions and prevents shock.
When nighttime temperatures stay above 55°F, transplant the seedlings into the 4-gallon containers using the 1 gallon of potting mix per plant. Fill each container halfway with mix, remove the seedling from its tray, and place it in the center. Add more mix around the roots, leaving 1 inch of space at the top. Water deeply until moisture runs out the drainage holes.
Choose a location with full sun (6+ hours daily) and well-draining soil. If planting in the ground, amend the soil with 1 cup of compost per plant to ensure fertility. Space containers 12 inches apart to allow airflow and reduce disease risk.
Maintain Consistent Water and Fertility
Water the Tabasco peppers deeply 2-3 times per week, ensuring the top 2 inches of soil feel dry before watering again. Overwatering leads to root rot, while underwatering causes peppers to become bitter. Use a watering can with a narrow spout to direct moisture at the base and avoid wetting the leaves.
After transplanting, apply ½ cup of balanced fertilizer (10-10-10) to each plant. Repeat every 4-6 weeks during the growing season to support fruiting. You'll notice new leaves and stronger stems within 2 weeks of fertilizing—this is your sign the plants are thriving.
Pinch off any flowers that appear in the first 4-6 weeks to encourage bushier growth. This redirects energy from fruiting to root and stem development, leading to a more productive plant later. Once the plant is established, let it flower and fruit freely.
Prune and Harvest for Maximum Yield
Prune the plants weekly by removing any yellow or diseased leaves with clean pruning shears. This improves airflow and reduces the risk of fungal infections. Also, trim back any suckers—those small shoots that grow in the leaf axils—to focus the plant’s energy on producing peppers rather than extra foliage.
Harvest Tabasco peppers when they reach 2-3 inches long and turn bright red. Use sterilized scissors to cut the peppers at the stem to avoid damaging the plant. You'll get the hottest flavor if you harvest in the morning when the peppers are fully hydrated. Store harvested peppers in a paper bag in the refrigerator for up to 2 weeks or dry them for long-term storage.
Continue harvesting regularly to encourage more production. A well-maintained Tabasco plant can yield 50-100 peppers per season, giving you plenty of heat for homemade hot sauce or spicy dishes.
Tips & tricks for planting Tabasco peppers
Growing Tabasco peppers successfully comes down to a few key tricks that make all the difference between a struggling plant and a fiery harvest.
Germination Temperature: Those 75-85°F temperatures in Step 1 aren't just suggestions—they're critical. Tabasco seeds need this warmth to germinate consistently. If your home stays cooler, consider using a seedling heat mat or placing the tray on top of your refrigerator (which often stays warm). I've seen germination rates drop by half when seeds sit in cooler conditions, so don't skip this step if you live in a chilly climate.
Lighting Strategy: The 14-16 hours of light in Step 1 is non-negotiable for strong seedlings. If you don't have a south-facing window, invest in grow lights—even a basic LED setup will work. Position them just 2-3 inches above the plants to prevent leggy growth. You'll notice the difference immediately: seedlings under proper light develop thick stems and vibrant green leaves, while those with insufficient light stretch toward any available sunlight and become weak.
Transplanting Timing: Waiting until nighttime temperatures stay above 55°F in Step 2 is crucial for survival. Tabasco peppers are tropical plants that can't tolerate cold snaps. I've learned this the hard way after transplanting too early and watching my plants wilt overnight. Check your local frost dates and plan accordingly—rushing this step often leads to shock and stunted growth.
Watering Technique: The 2-3 times per week watering schedule in Step 3 works best when you water deeply each time. Use your finger to check the top 2 inches of soil—it should feel dry before watering again. I always use a watering can with a narrow spout to direct water at the base of the plant, which prevents fungal issues that wet leaves can cause. This simple adjustment has kept my plants healthier and more productive season after season.
Pro Tips for Planting Tabasco Peppers
- Growing Tabasco peppers successfully comes down to a few key tricks that make all the difference between a struggling plant and a fiery harvest.
- Germination Temperature: Those 75-85°F temperatures in Step 1 aren't just suggestions—they're critical.
- Lighting Strategy: The 14-16 hours of light in Step 1 is non-negotiable for strong seedlings.
Frequently asked questions
Got questions about growing your own fiery Tabasco peppers? You’re not alone! Here are answers to the most common queries—from timing to troubleshooting—so you can plant with confidence and harvest like a pro.
When is the best time to plant Tabasco peppers?
Tabasco peppers thrive in warm soil, so plant them after the last frost when temperatures consistently stay above 60°F (15°C). In most regions, this means mid-to-late spring. If you’re in a cooler climate, start seeds indoors 8–10 weeks before the last frost and transplant seedlings outdoors once they’re sturdy. Pro tip: Use black plastic mulch to warm the soil faster!
How long does it take for Tabasco peppers to mature?
With the right care, Tabasco peppers can go from seed to harvest in just 90–120 days! If you start with transplants, expect fruit in about 70–90 days. Patience is key—don’t rush harvesting; wait until peppers turn a vibrant red (or yellow, if you’re growing a variety like ‘Yellow Tabasco’). Fun fact: The longer they stay on the plant, the hotter they get!
Can I grow Tabasco peppers in containers?
Tabasco peppers adapt well to containers as long as the pot is at least 12–18 inches deep and has drainage holes. Use a high-quality potting mix with added compost, and place the container in a spot that gets 6–8 hours of sunlight daily. Just be mindful of watering—containers dry out faster than garden beds. Bonus: Container growing makes it easy to move plants indoors if frost threatens!
What should I do if my Tabasco plants get pests or diseases?
Common issues include aphids, spider mites, and fungal diseases like powdery mildew. Prevent pests by using neem oil or insecticidal soap, and improve airflow to reduce mildew. For fungal problems, remove affected leaves and avoid overhead watering. Early intervention is key—check plants weekly for signs of trouble. Quick fix: Introduce beneficial insects like ladybugs to keep pests in check!
Can I save seeds from my Tabasco peppers for next year?
Yes! Tabasco peppers are open-pollinated, so you can save seeds for future planting. Let a few peppers fully ripen on the vine, then scoop out the seeds, rinse them, and dry them on a paper towel for 1–2 weeks. Store the seeds in a cool, dry place until next season. Note: If you cross-pollinate with other hot peppers, flavors and heat levels may vary.
Wrapping up and next steps
Growing Tabasco peppers is a rewarding journey—packed with fiery flavor and minimal fuss! With the right soil, sunlight, and a little patience, you’ll enjoy a hot harvest in just 90 days.
Whether you’re a seasoned gardener or a curious beginner, these spicy gems thrive with basic care, making them perfect for containers or garden beds.
Now that you’re armed with tips and tricks, roll up your sleeves and plant those seeds! Start small, experiment with varieties, and soon you’ll be savoring homemade hot sauce, salsas, or pickled peppers straight from your garden. Happy planting—and may your harvest be hot! 🌱🔥