
Pruning
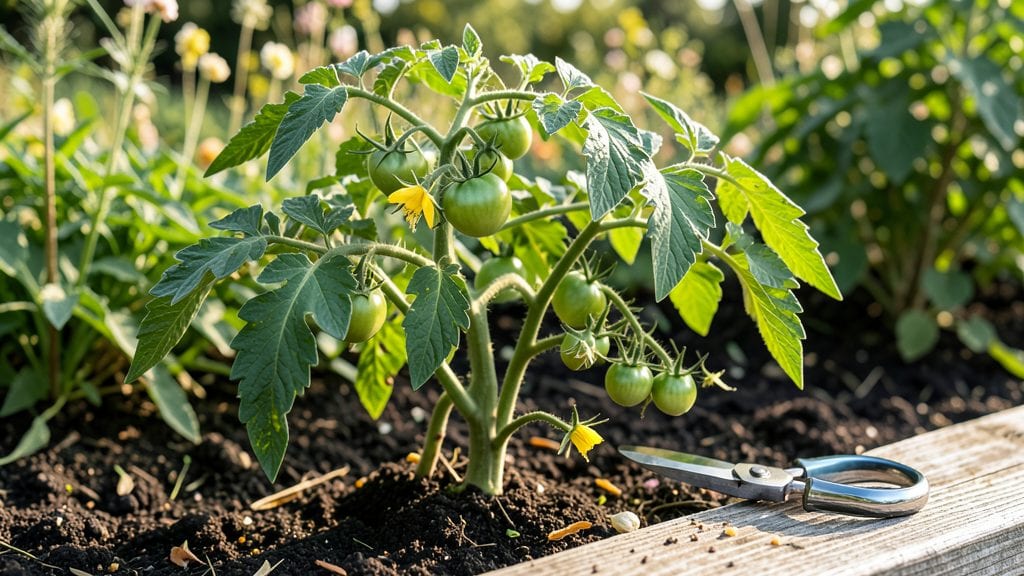
Pruning vegetable plants isn’t just about trimming—it’s the secret to year-round productivity that keeps your garden thriving instead of struggling. 🌱 I spent years watching my tomatoes sprawl into unruly vines and herbs bolt before they matured, until I learned how strategic cuts redirect energy where it matters most.
The right snips mean bigger yields, fewer pests, and plants that keep producing long after most gardens call it quits.
You don’t need fancy tools to start—just clean pruners, sharp scissors, and a clear plan for when to cut. The key is timing: early pruning shapes growth, mid-season trims boost fruit production, and late-season cleanup prepares plants for next year.
I’ll show you exactly which parts to remove from tomatoes, cucumbers, beans, and herbs without sacrificing future harvests. Even a few minutes of pruning every two weeks can double your output.
What you’ll end up with is a garden that looks neater but produces more—tomatoes heavy with fruit instead of tangled vines, herbs with bushy growth instead of leggy stems, and vegetables that stay healthy longer.
The best part? You’ll spend less time fighting pests and diseases because airflow improves dramatically. Let’s turn those overgrown plants into powerhouses.
This works for containers, raised beds, or in-ground gardens—no matter your setup. The same principles apply whether you’re dealing with a single tomato plant or a full plot.
Ready to see the difference a few snips can make? Let’s get started with the tools and first cuts that make all the difference.
📚 In This Guide
- What you need
- Instructions
- Tips and common mistakes
- Wrapping up and next steps
What you need
- ● Sharp pruning shears – Bypass pruners (for clean cuts on stems up to ½ inch thick). Quantity: 1 pair.
- ● Hand pruners – For smaller branches or precision work (great for delicate veggies like tomatoes or peppers). Quantity: 1 pair.
- ● Gloves – Garden or work gloves to protect hands from thorns (e.g., roses) or rough stems. Quantity: 1 pair.
- ○ Disinfectant (optional but recommended) – Rubbing alcohol or 10% bleach solution to sterilize tools between cuts and prevent disease spread.
- ● Sharpie or permanent marker – For labeling pruned branches if you’re experimenting with different trimming techniques.
- ● Loppers – For thicker stems (e.g., squash vines or overgrown kale). Quantity: 1 pair.
- ● Hose or spray bottle – To rinse off sap or dirt after pruning.
- ● Compost bin or bag – For collecting pruned debris (great for nutrient recycling!).
- ● Sun hat & sunscreen – Especially for outdoor pruning sessions on sunny days!
How to prune vegetable plants for bigger harvests
Here's the simple method I use to keep my veggies thriving all season long.
🌱 Step 1: Early Season Pruning to Boost Growth
Start by removing any yellow or damaged leaves from the base of your plants. These leaves compete with your veggies for energy and often harbor pests. Use clean, sharp pruning shears to cut just above a leaf node—this is where new growth will sprout. For plants like tomatoes, pinch off the first few flower clusters when they're still small. This might seem counterintuitive, but it redirects the plant's energy into stronger stems and leaves first.
Focus on the lower third of the plant first. You'll see new, vibrant leaves emerging within a week—that's your signal everything is working. Never remove more than 25% of the plant at once, or you'll shock it. For bush beans and peas, simply snip off any brown or twisted pods before they develop.
✂️ Step 2: Mid-Season Maintenance for Airflow
When plants reach about half their mature height, it's time for your second trim. Thin out crowded stems to improve airflow—this prevents fungal diseases like powdery mildew. For indeterminate tomatoes, prune suckers (the little shoots that grow in the leaf axils) down to the main stem. These suckers drain energy that could go toward fruit production. I like to do this on a dry morning so the cuts heal faster.
For leafy greens like kale and Swiss chard, cut outer leaves at the base to encourage bushier growth. Leave the inner leaves intact—they'll keep producing. Watch for any branches growing inward or crossing over others. These need to go immediately, as they create shaded spots where pests hide. Always sterilize your shears between cuts with rubbing alcohol to prevent spreading disease.
☀️ Step 3: Late Season Pruning for Next Year's Growth
As your plants near the end of their season, focus on cleaning up rather than harvesting. Remove all diseased foliage and any remaining fruit that's past its prime. For perennials like asparagus and rhubarb, cut back the fronds to 2 inches above ground level in late fall. This protects the crown from winter damage and encourages fresh growth in spring. For annuals, cut back stems to 6 inches tall and compost them—don't leave old plant debris in your garden.
This is also the time to trim back any aggressive spreaders like mint or comfrey. Cut them back hard to control their growth and prevent them from taking over. You'll notice how much cleaner your garden looks after this final trim. The less debris you leave, the fewer pests will overwinter in your soil. Mulch the area with 2-3 inches of straw afterward to protect the soil through winter.
Tips & tricks for pruning vegetable plants like a pro
These game-changing strategies will help you maximize your garden's potential while avoiding common pruning pitfalls.
Timing is Everything: In Step 1, when you're removing yellow or damaged leaves, do it on a dry morning when the plants are fully hydrated. This makes cuts heal faster and reduces stress on the plant. I've found that pruning right after watering helps prevent disease entry points. For tomatoes specifically, pinch off those early flower clusters when they're still no bigger than a dime—this might feel counterintuitive, but it pays off with stronger plants that produce more fruit later in the season.
Tool Prep Makes All the Difference: Before you start Step 2's mid-season maintenance, sterilize your pruning shears with rubbing alcohol between cuts—this is non-negotiable for preventing disease spread. I keep a small bottle of 70% isopropyl alcohol in my gardening toolkit. Also, make sure your shears are sharp; dull blades crush stems instead of making clean cuts, which invites infection. For aggressive spreaders like mint, invest in heavy-duty pruners that can handle tough stems without bending.
Visual Cues for Perfect Pruning: In Step 3, when cutting back perennials to 2 inches above ground, look for the crown—the thickened base where new growth emerges. This is your target cutting point. For annuals, aim for 6 inches tall but leave some foliage to protect the soil from erosion. I always check for the classic "V" shape where leaves meet the stem (leaf axils) when pruning tomatoes—this is where suckers grow, and removing them redirects energy to fruit production.
Seasonal Maintenance Beyond the Basics: After your late-season cleanup, consider creating a pruning schedule. Mark your calendar for early spring (just as new growth appears), mid-summer (when plants reach half height), and early fall (for cleanup). I've seen gardens transform when they follow this rhythm—plants stay healthier, produce more consistently, and look stunning year-round. For woody plants like tomatoes, a light pruning every 2-3 weeks during the growing season keeps them manageable and productive.
Pro Tips for Prune Vegetable Plants
- These game-changing strategies will help you maximize your garden's potential while avoiding common pruning pitfalls.
- Timing is Everything: In Step 1, when you're removing yellow or damaged leaves, do it on a dry morning when the plants are fully hydrated.
- Tool Prep Makes All the Difference: Before you start Step 2's mid-season maintenance, sterilize your pruning shears with rubbing alcohol between cuts—this is non-negotiable for preventing disease spread.
Frequently asked questions
When is the best time to prune vegetable plants?
Timing depends on the plant! For leafy greens (like kale or spinach), prune outer leaves in early spring or after harvest to encourage regrowth. For fruit-bearing veggies (tomatoes, peppers, cucumbers), prune in late winter/early spring to shape the plant before flowering. Avoid pruning during heatwaves or frost—stress weakens recovery.
Do I need special tools to prune vegetable plants?
Not necessarily! Start with clean, sharp pruning shears or scissors for larger stems. For delicate plants (like herbs or lettuce), your fingers work fine—just pinch stems just above a leaf node. Disinfect tools with rubbing alcohol between plants to prevent disease spread. A small gardening glove also helps protect against thorns (hello, tomatoes!).
Will pruning reduce my vegetable harvest?
Not if done right! Pruning directly improves yields by redirecting energy to larger, healthier produce. For example, pruning tomato suckers (those little shoots between stems) boosts fruit size and air circulation. However, over-pruning (especially late in the season) can stress plants. Focus on strategic cuts—never remove more than 1/3 of the plant at once.
What should I do with the pruned branches?
Don’t toss them! Use pruned branches for compost (if disease-free), mulch around base plants, or even herb gardens (like basil or mint). For leafy greens, wilted leaves can be added to salads or smoothies. Just avoid using diseased or pest-infested clippings—they can spread problems to your compost pile.
My plant looks sad after pruning—what went wrong?
No worries—it’s often temporary! Wilted leaves or slow regrowth can happen if you pruned too aggressively or during stress (like drought or extreme heat). Give your plant time and proper care: water deeply, add compost, and avoid pruning again for 4–6 weeks. If yellowing persists, check for pests or nutrient deficiencies (like nitrogen).
Can I prune vegetable plants in winter?
Yes, but with caution! Dormant season pruning (late fall/winter) helps shape perennials (like asparagus) or remove dead growth. Avoid heavy pruning in freezing temps—wait until spring for most annuals. For cold-hardy plants (kale, Swiss chard), a light trim in late winter can encourage early spring growth. Always prune on mild days to reduce shock.
Wrapping up and next steps
Pruning your vegetable plants isn’t just about keeping them tidy—it’s the secret weapon for bountiful harvests year-round! 🌱 By mastering the three strategic trims (early-season shaping, mid-season maintenance, and late-season cleanup), you’ll boost airflow, reduce pests, and encourage healthier growth.
Whether you’re a seasoned gardener or just starting, these simple steps will transform your garden into a productive powerhouse.
Ready to level up your harvest? Grab your pruners, pick a plant, and start trimming today—your future meals (and happy plants!) will thank you. 🌿 Next, check out our pruning schedule guide to stay on track all season!